Adding Steps to Workflow Templates
Once you have saved your workflow template, you can add steps and tasks. A step is like a phase of a workflow, and can contain multiple tasks. A task is a specific action to be carried out, such as uploading a document or filling in missing information.
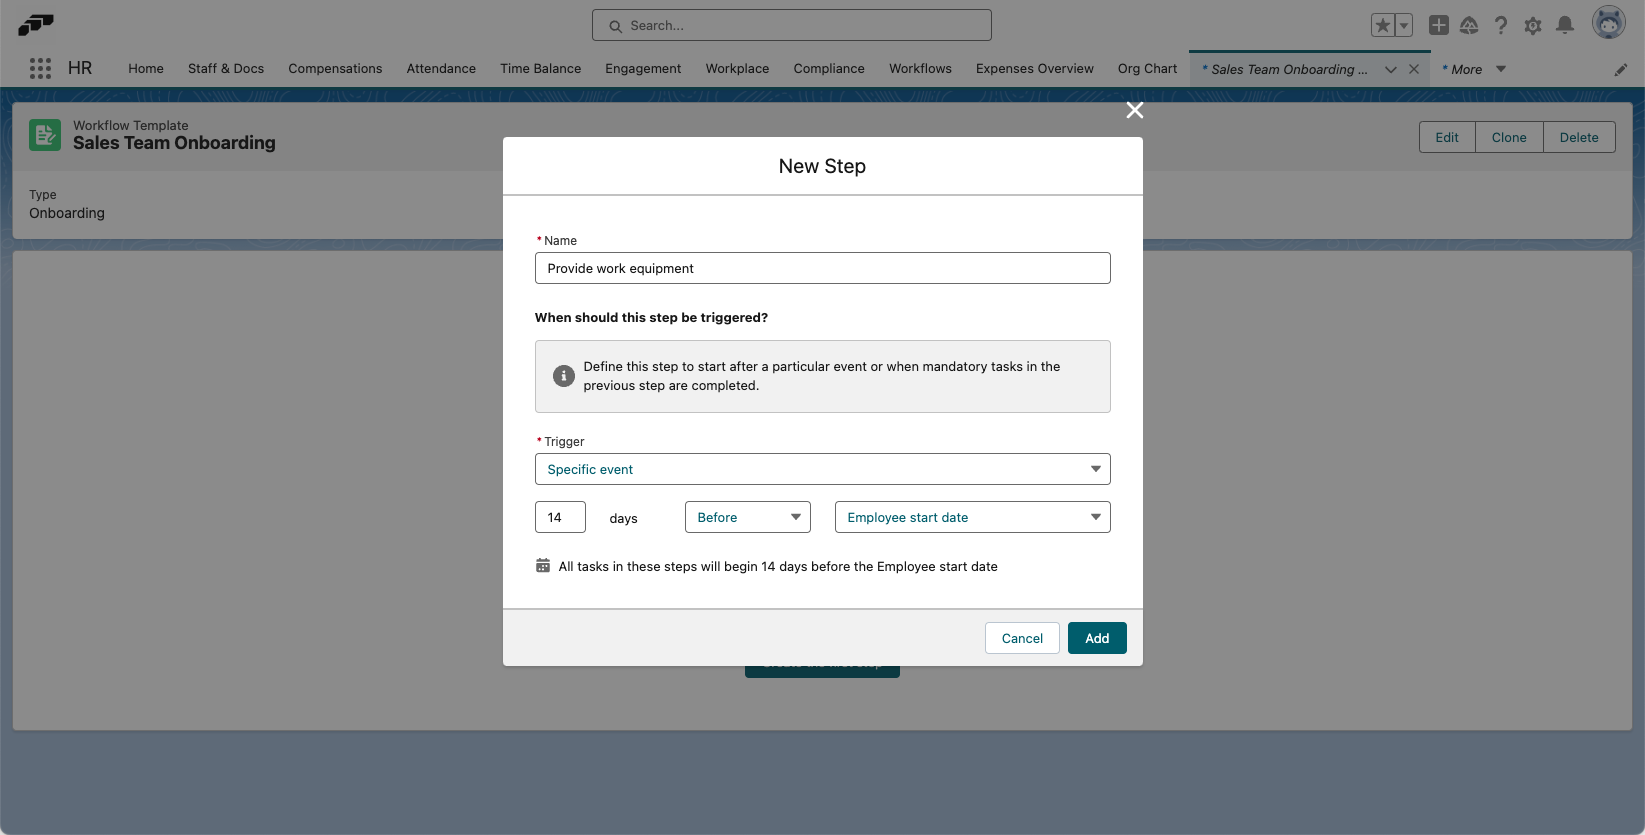
Open your workflow template. Click Create the First Step. Give your step a name and then select a trigger. You can trigger a step after all mandatory tasks in the previous step have been completed.
Alternatively, you can set the step to trigger a certain amount of time before or after a specific event, such as the Workflow Start Date or Employee Start Date. Once you have set the trigger, click Add.
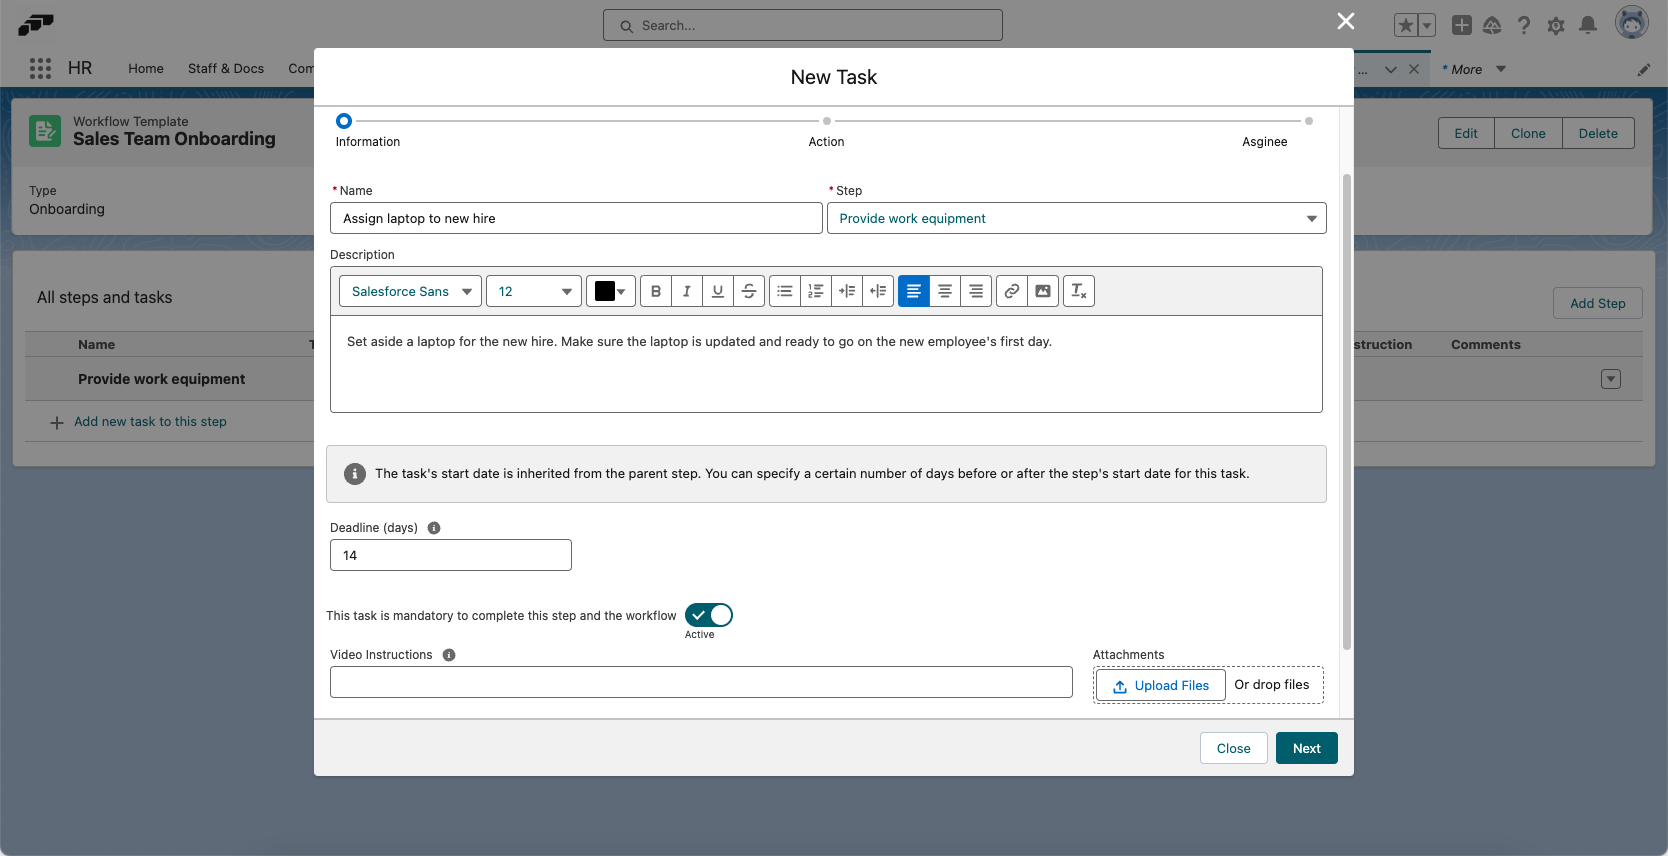
To create a task, click Add New Task To This Step below your newly created step. Give your task a name, select which parent step it should belong to, and write a description if needed. Define a deadline and choose whether the task is mandatory.
You can also add video instructions by entering a video URL or attaching a video file to help the user complete the task.
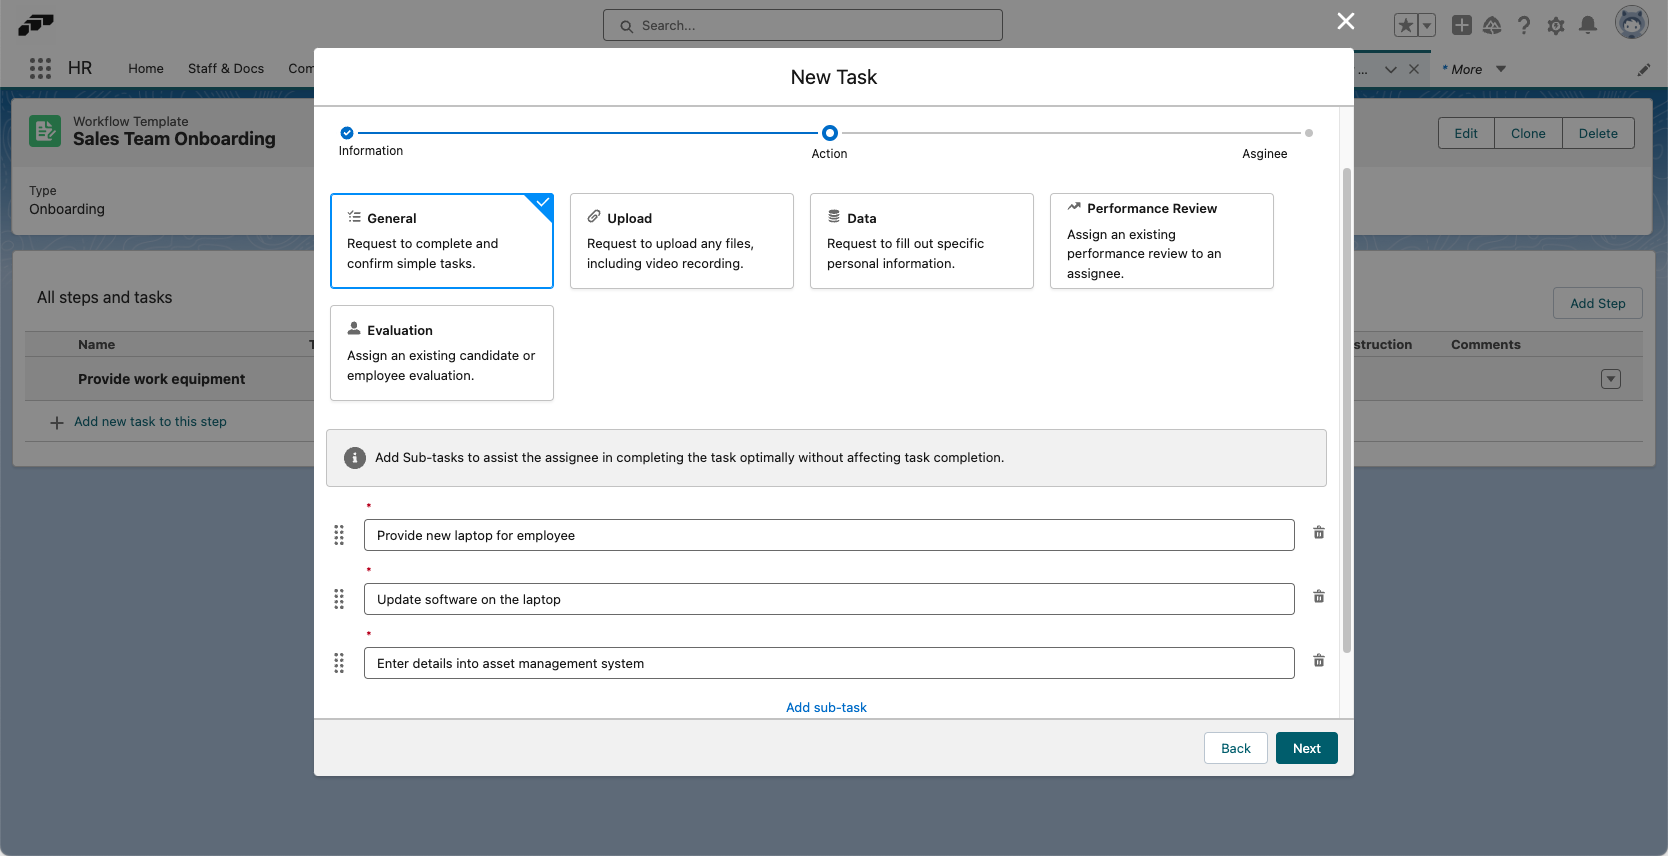
Clicking Next, you can select from various types of tasks, including Upload, Data, Performance Review, or Evaluation.
Each task has a slightly different structure:
- General: A simple task to be completed, e.g. “Write a message to your new team on Slack”. These tasks are completed simply by marking them as done.
- Upload: For when a file or document needs to be uploaded, e.g. “Sign and upload work contract”. You will need to define the document’s Type, Category, and File Format. The task will contain an upload field for the assignee to use.
- Data: For when you require information, e.g. “Enter bank details”. You can define data Fields for this item type. The assignee will see these fields in the task in the Employee Hub.
- Performance Review: Assign a previously created performance review and a reviewer.
- Evaluation: Assign an existing evaluation template to an employee to assess employees or candidates.
- Signature: If you are using the flair eSign integration, you can request e-signatures on documents.
You can also add subtasks to guide the user. While subtasks are not mandatory to complete the step, they will appear in a checklist in the Employee Hub, giving the assignee a step-by-step to-do list to aid them in completing the task.
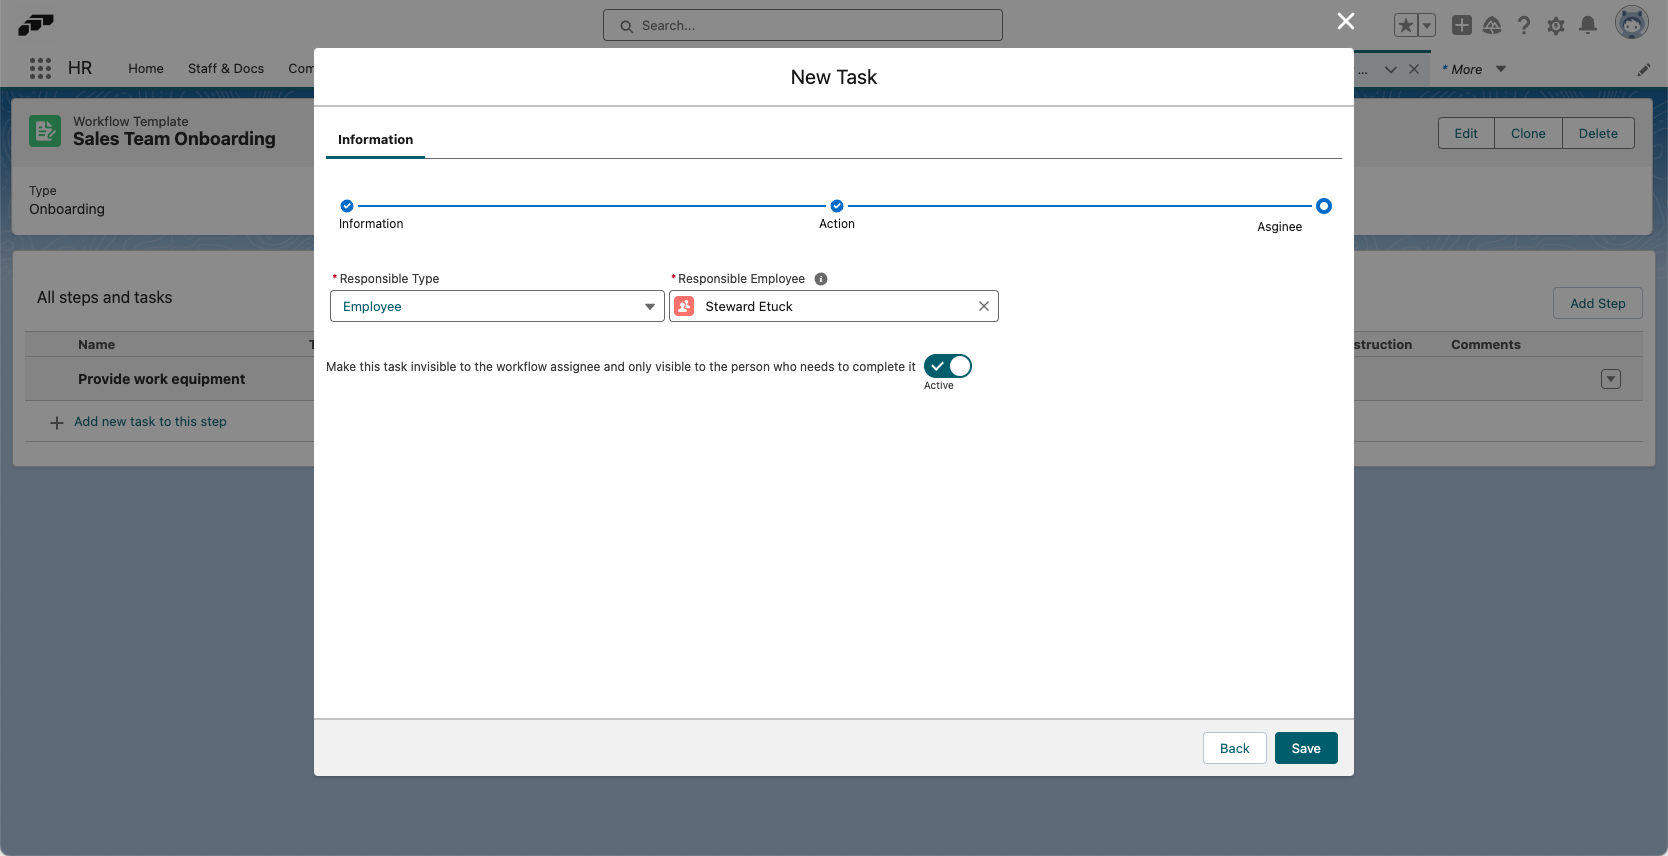
Clicking Next to the final screen will allow you to select which role is responsible for completing the task:
- Manager: The manager of the person this workflow is assigned to.
- Performance Manager: The performance manager of the person this workflow is assigned to.
- Workflow Assignee: The person this workflow is assigned to, which you will define once you have finished creating your workflow template.
- Employee: Choose any employee to assign this task to.
- Team: Choose a team to assign this task to.
You can also adjust the visibility of the task using the toggle.
![]()
If your workflow includes a task that is assigned to a manager, the manager will be able to view and edit tasks assigned to employees.