How To Configure the Employee Hub Data Layout
In this guide, we will look at the different ways to customize the layout of the Personal Data section for employees, as well as the manager’s view of their team’s personal data in the Employee Hub.
Create a New Page Layout
The first step is to open the flair HR app in Salesforce and then open Salesforce Setup by clicking the gear icon in the top-right corner and clicking Setup.
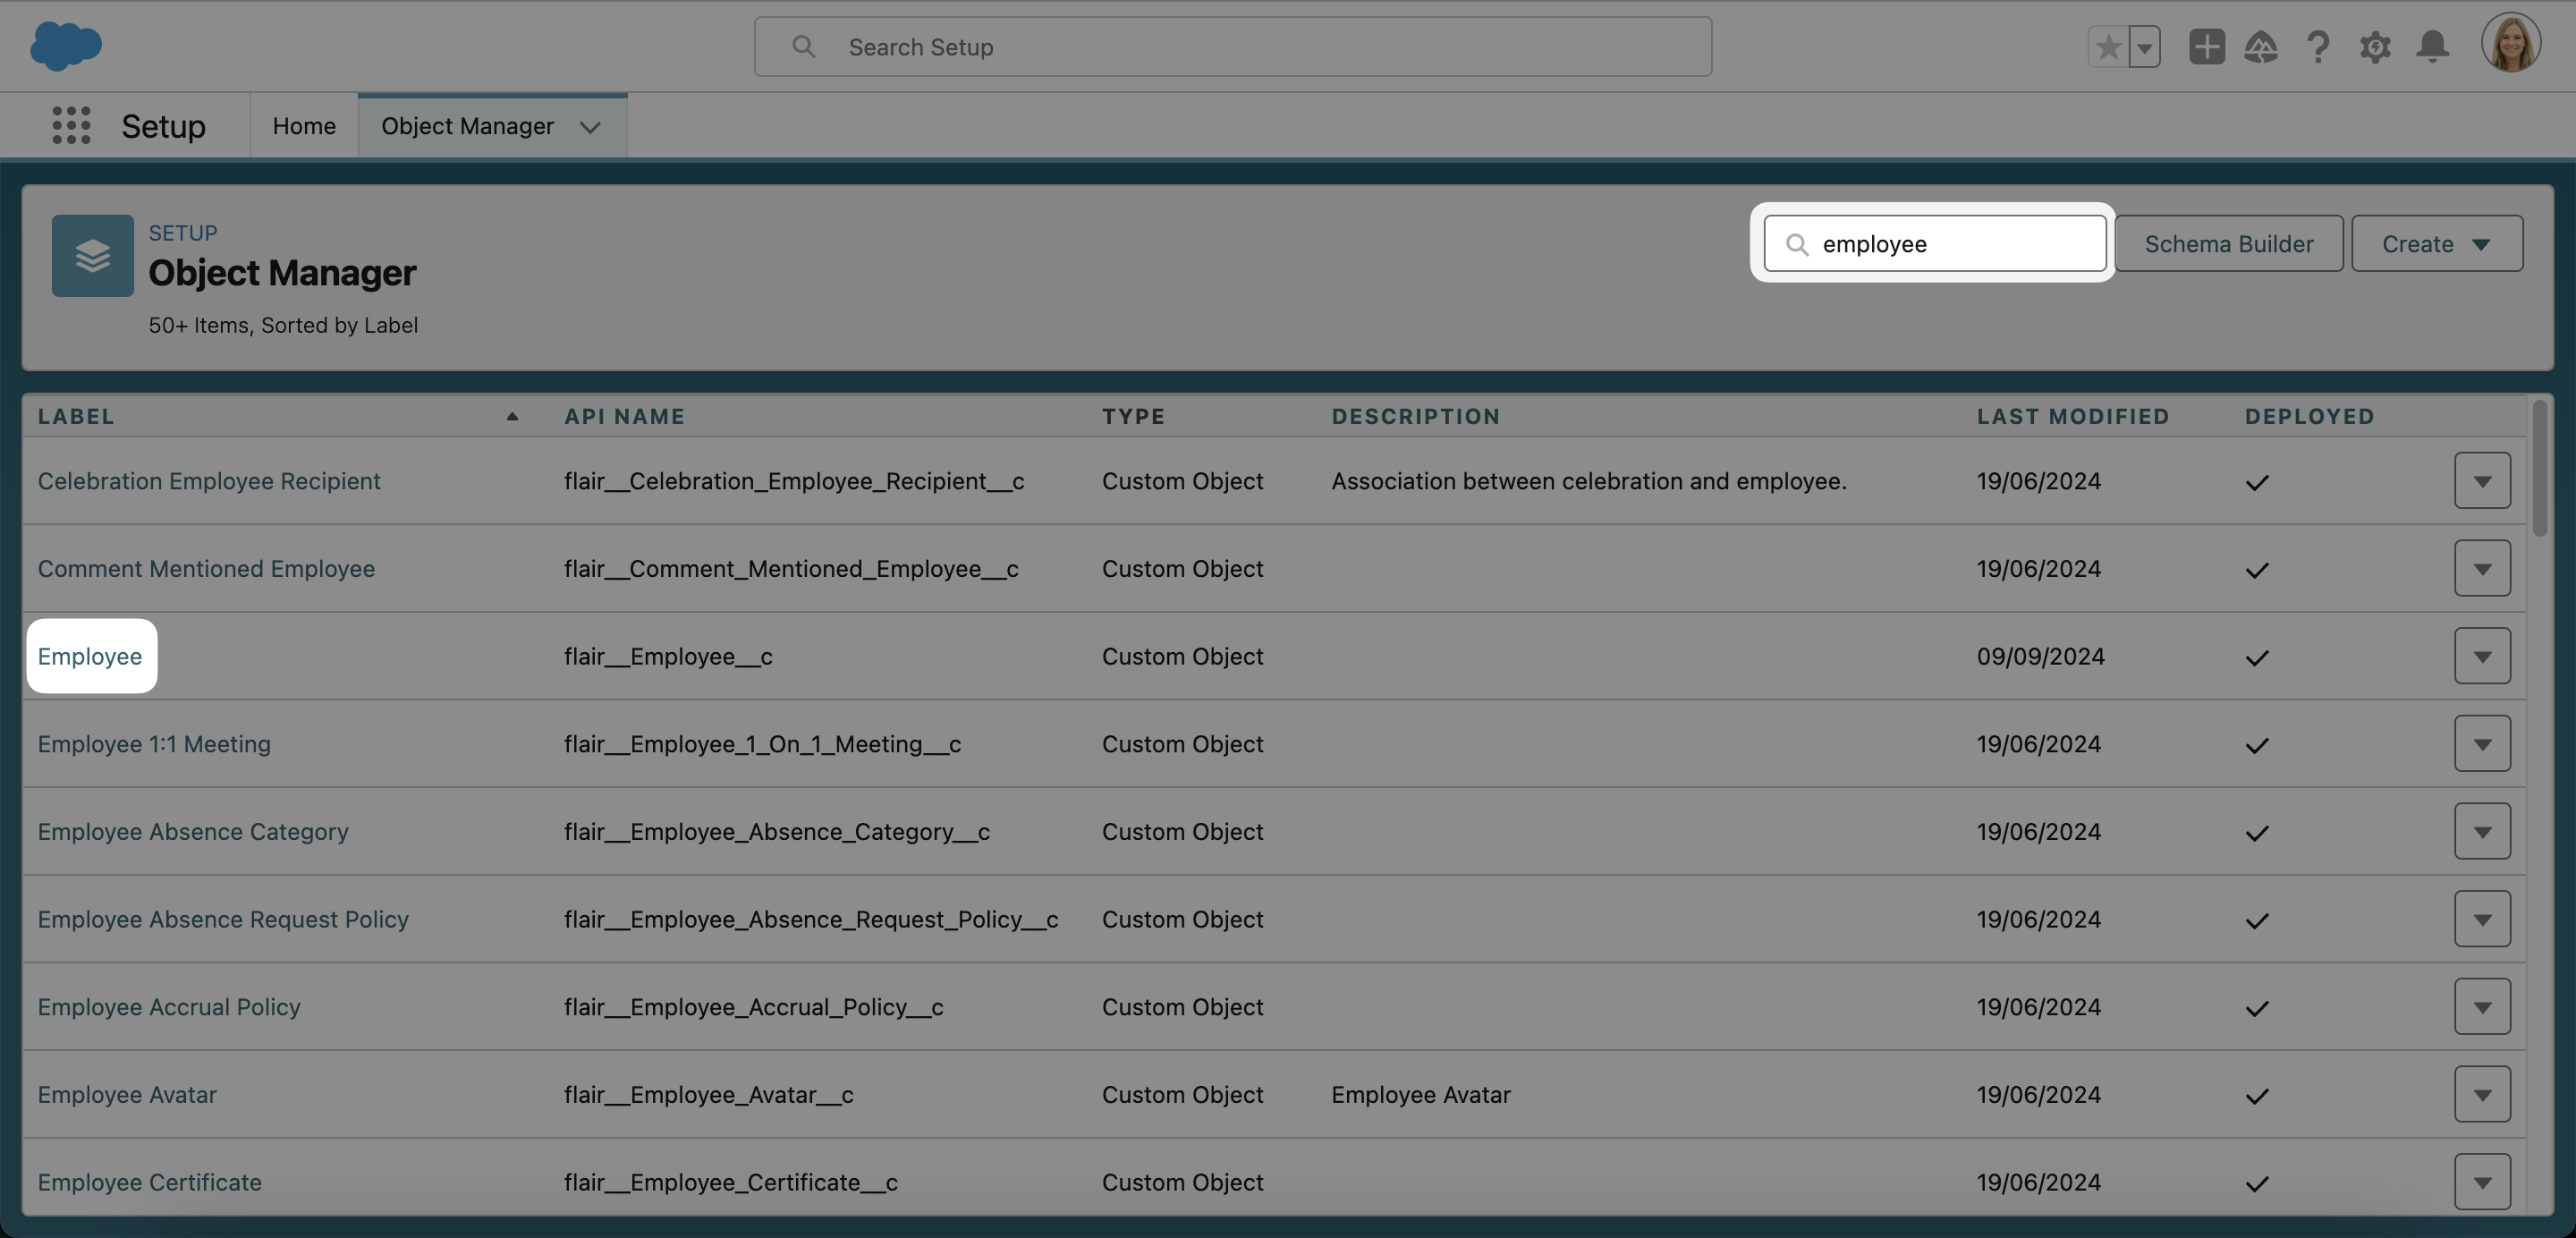
Use the Quick Find bar in the left pane to find Object Manager. Search employee using Quick Find in the top panel, then select the Employee custom object.
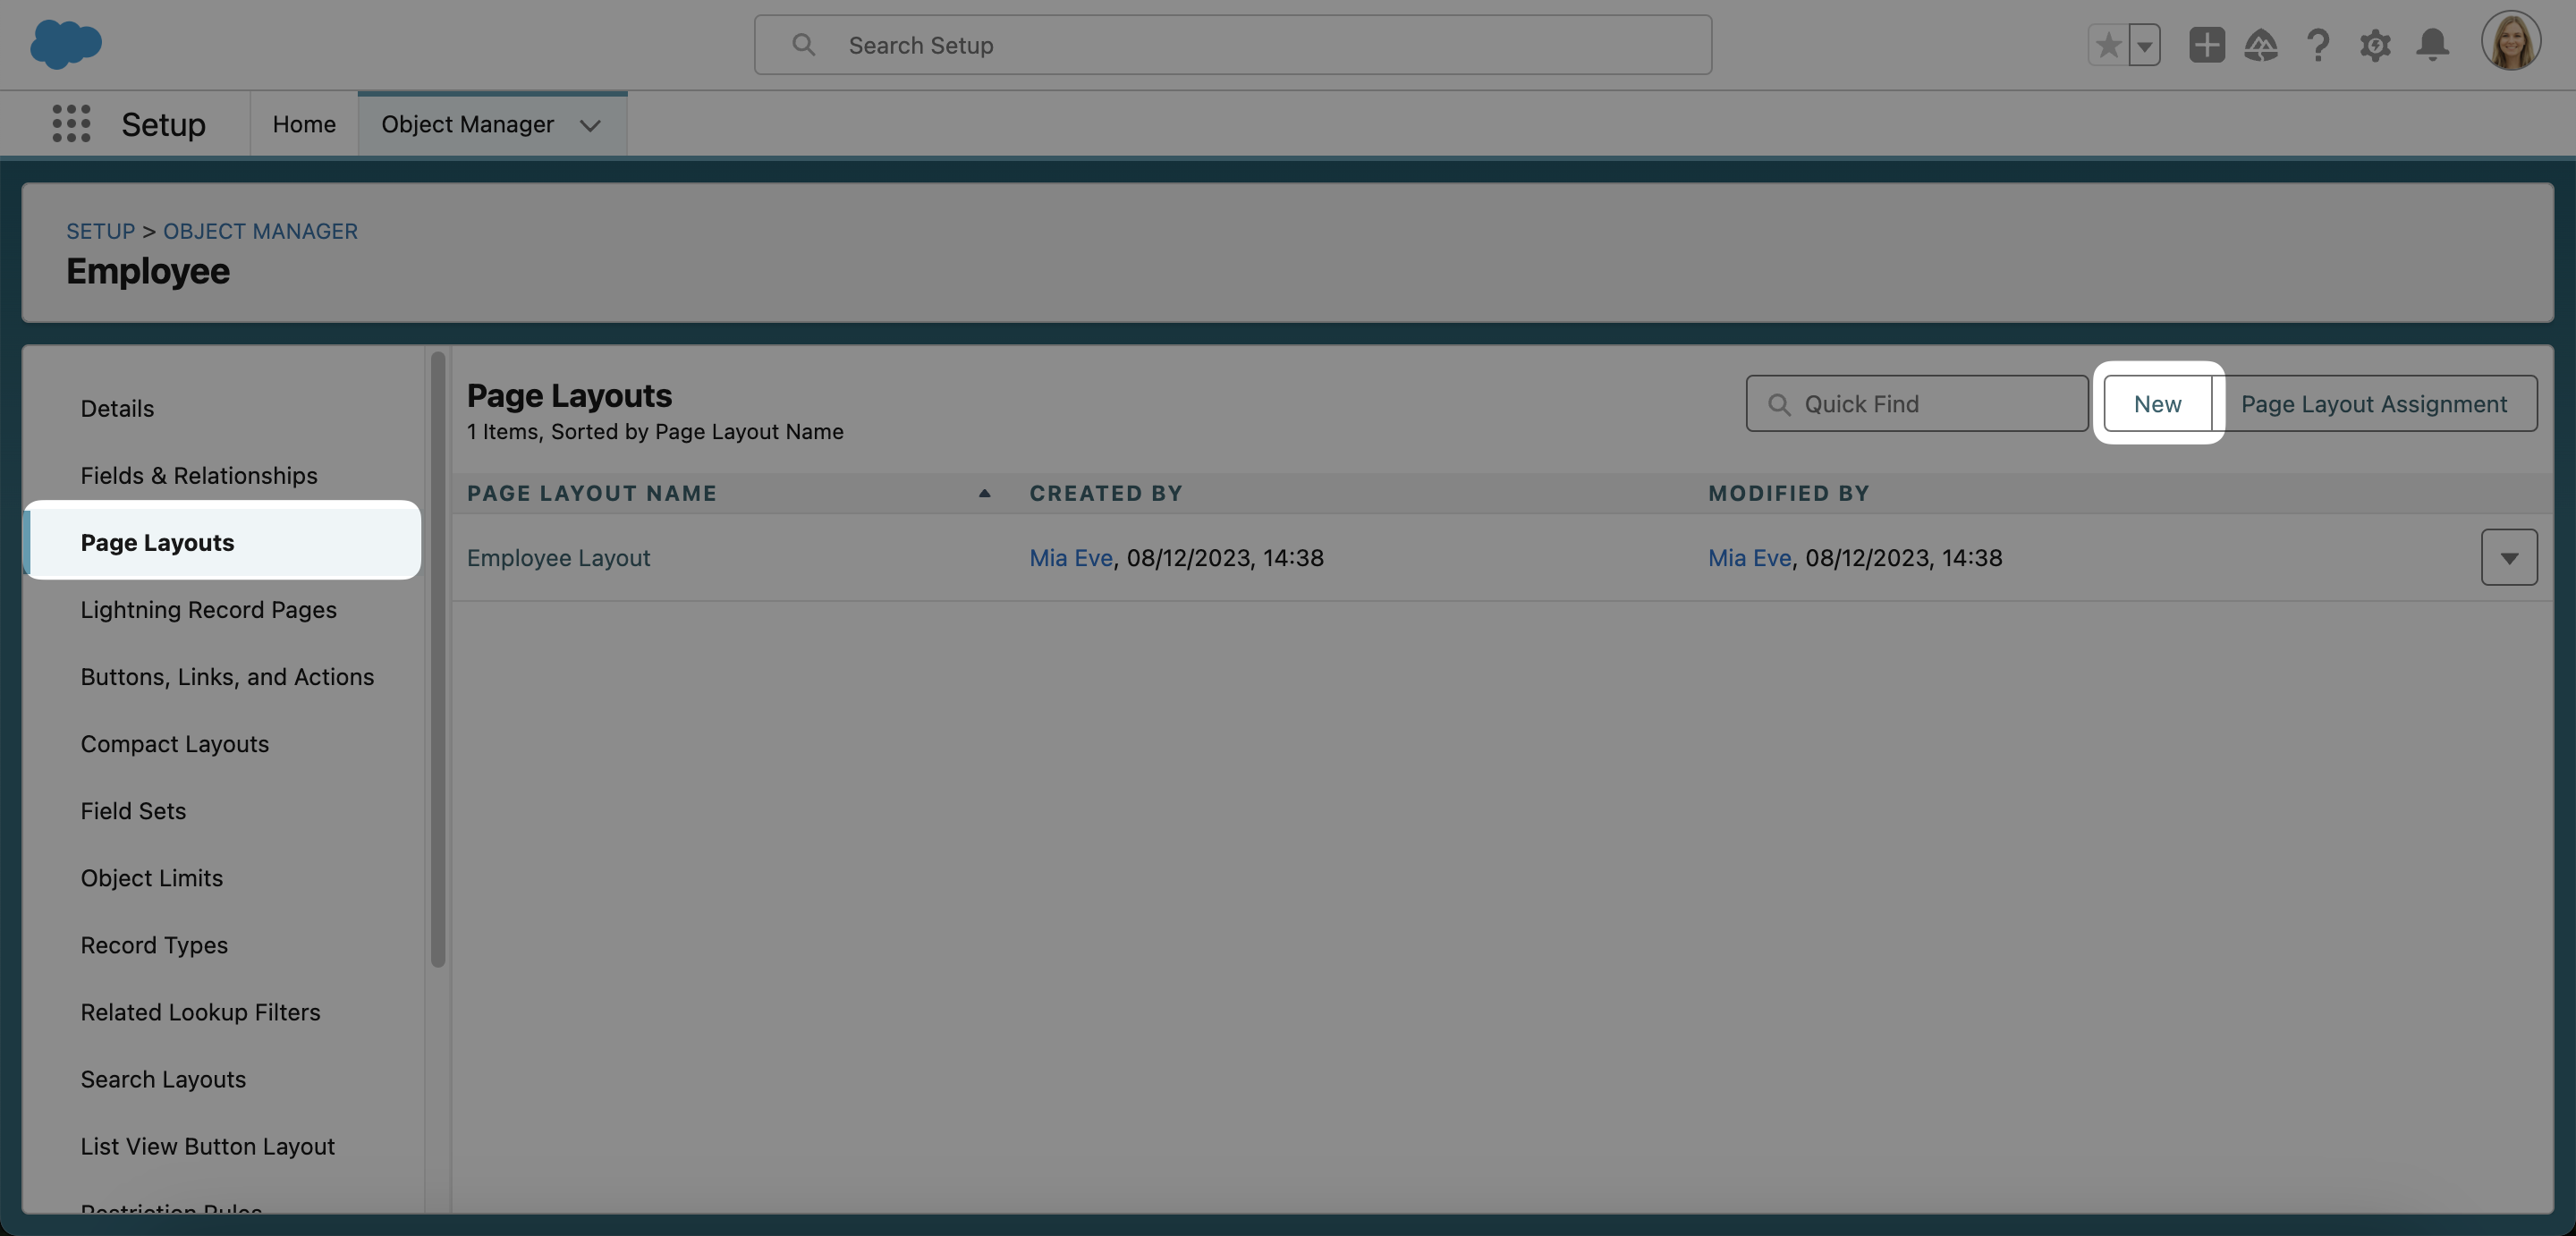
Select Page Layouts in the left menu list. Then click New.
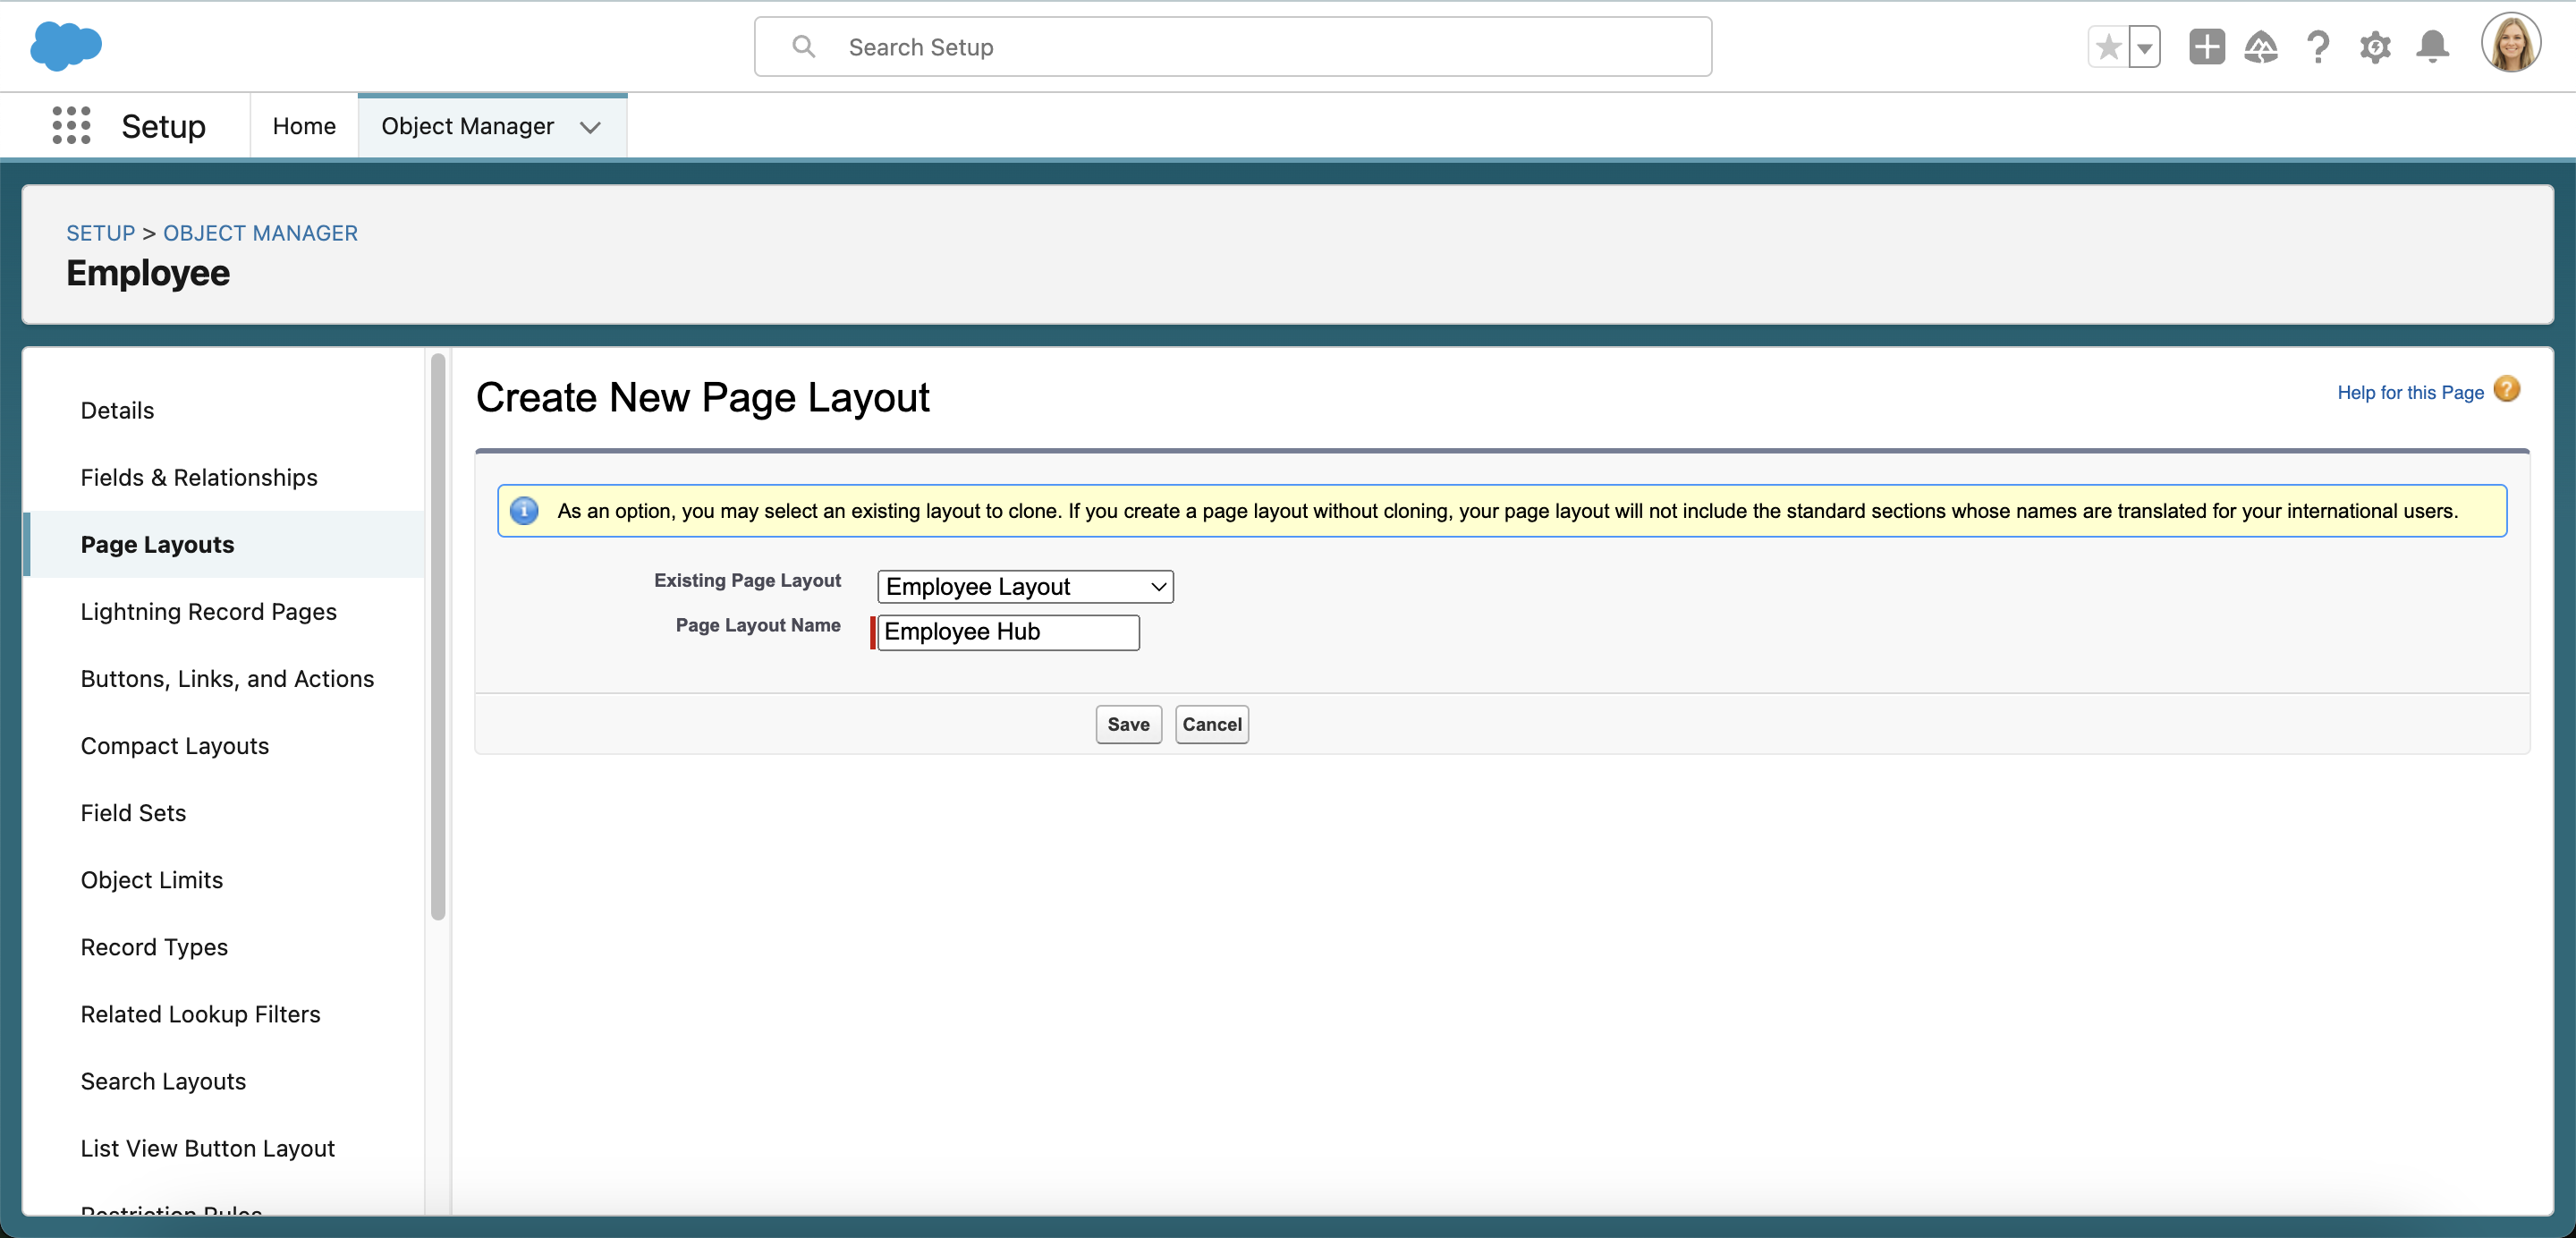
We recommend starting with an existing page layout. To do this, choose Employee Layout in the Existing Page Layout dropdown. This will clone the existing Employee Hub layout so you don’t have to start from scratch.
The Page Layout Name is important. The name you enter determines which view your custom layout will be applied to: Employee view or Manager view.
Employee View
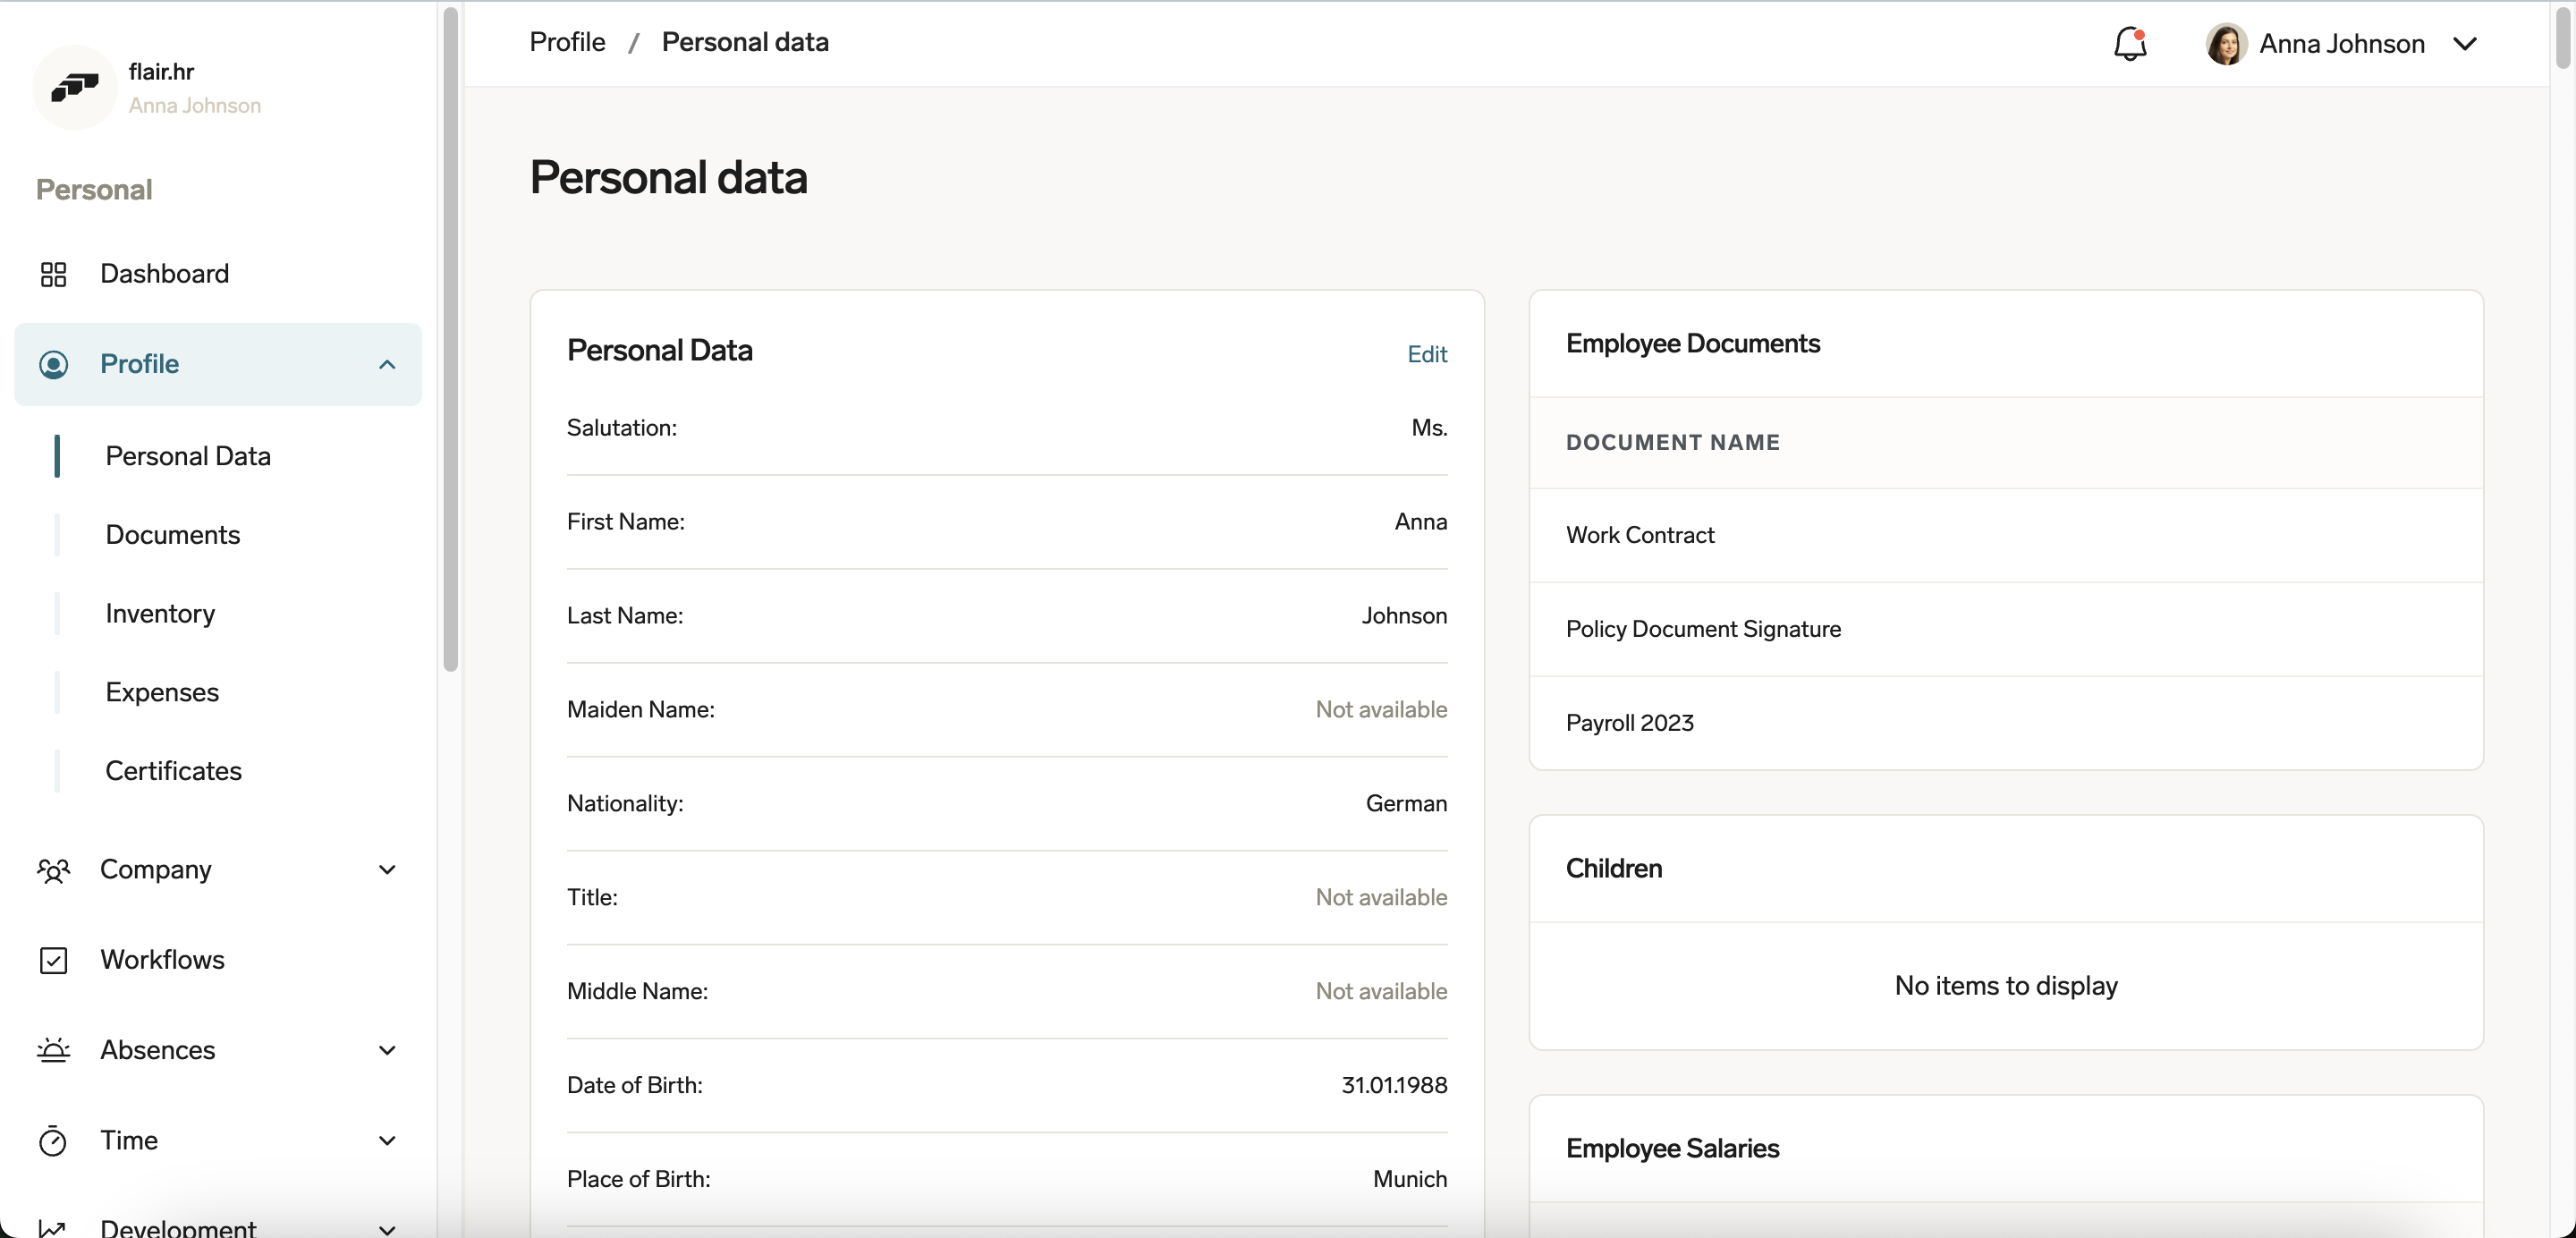
The Personal Data section of the Employee Hub is where employees can view and edit their own details.
To customize the default layout of the Personal Data section of the Employee Hub, enter the Page Layout Name: Employee Hub when creating a new page layout.
Manager View
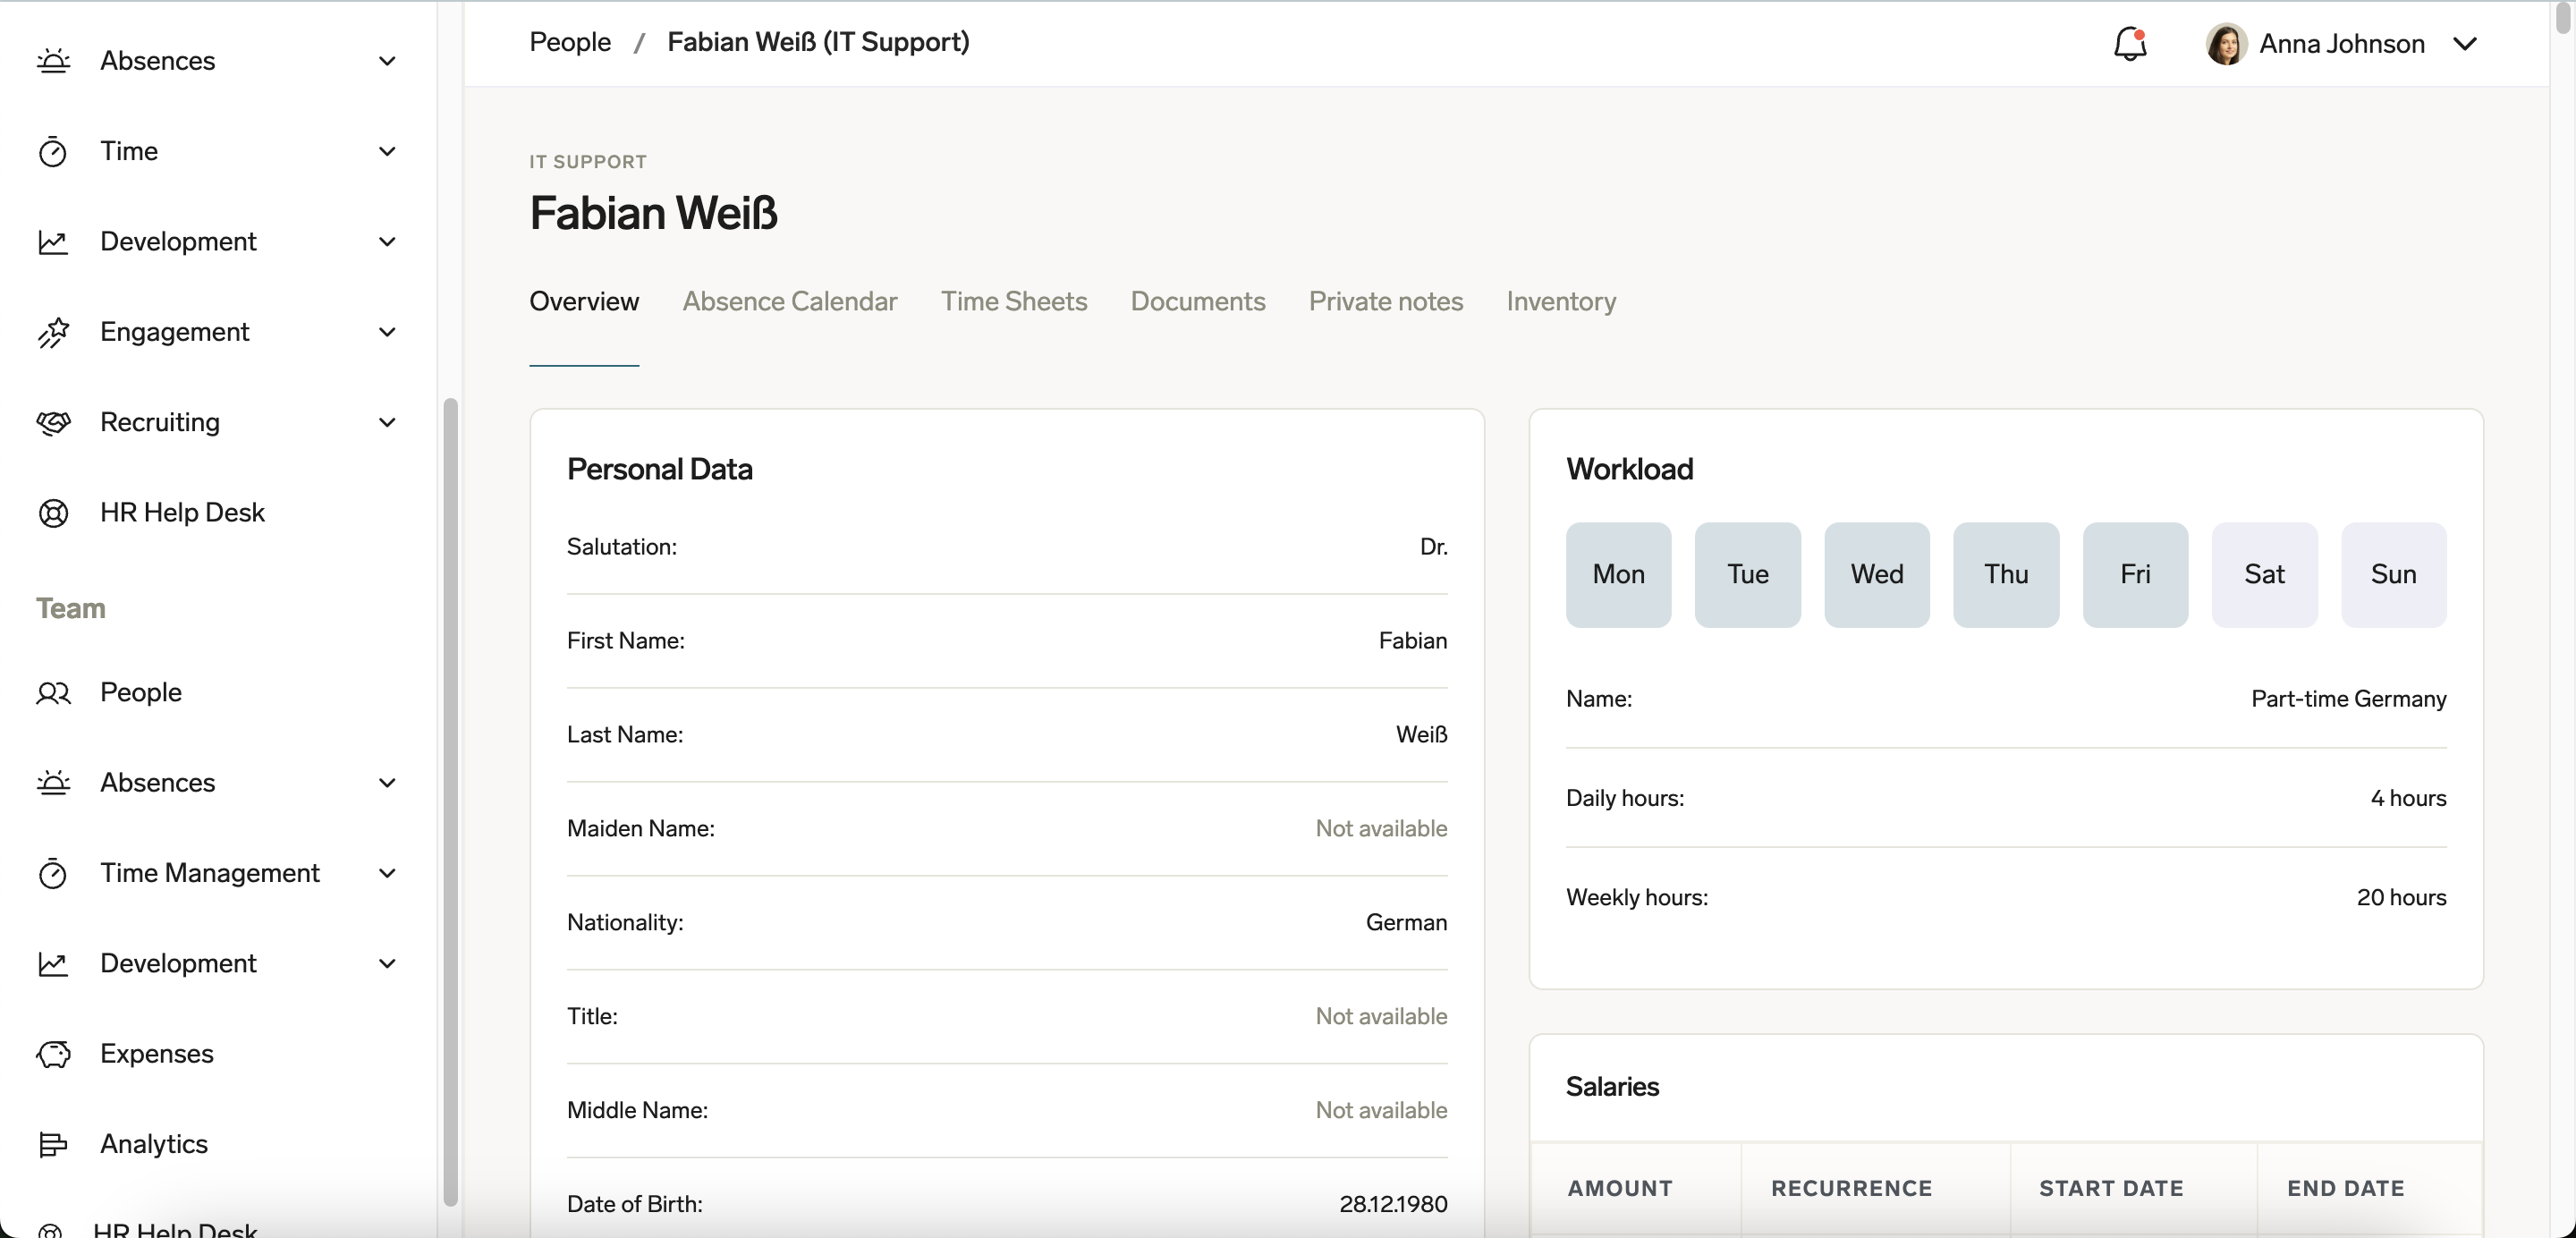
Managers can view their team members’ personal details by selecting employees from the People section of the Employee Hub.
If you want your custom page layout to apply to this manage view, enter the Page Layout Name: Employee Hub Manager when creating a new page layout.
Customizing the Page Layout
Once you have chosen a Page Layout Name and clicked Save, you can start customizing the page layout.
At the top of the screen, you will see a gray panel containing components such as Fields and Buttons that you can add to your page layout. The faded items are already part of your layout; clicking on them will show you their location within your layout.
You can drag and drop Fields from the gray panel to add them to your page layout. You can also drag and drop fields that are already part of your layout to change their position on the page. Double clicking a field will give you the option to make the field read only or required. You can also click the minus symbol next to a field to remove it from your layout.
ℹ️ Please note: Only simple field types, such as text, numbers, checkboxes, and picklists are supported.
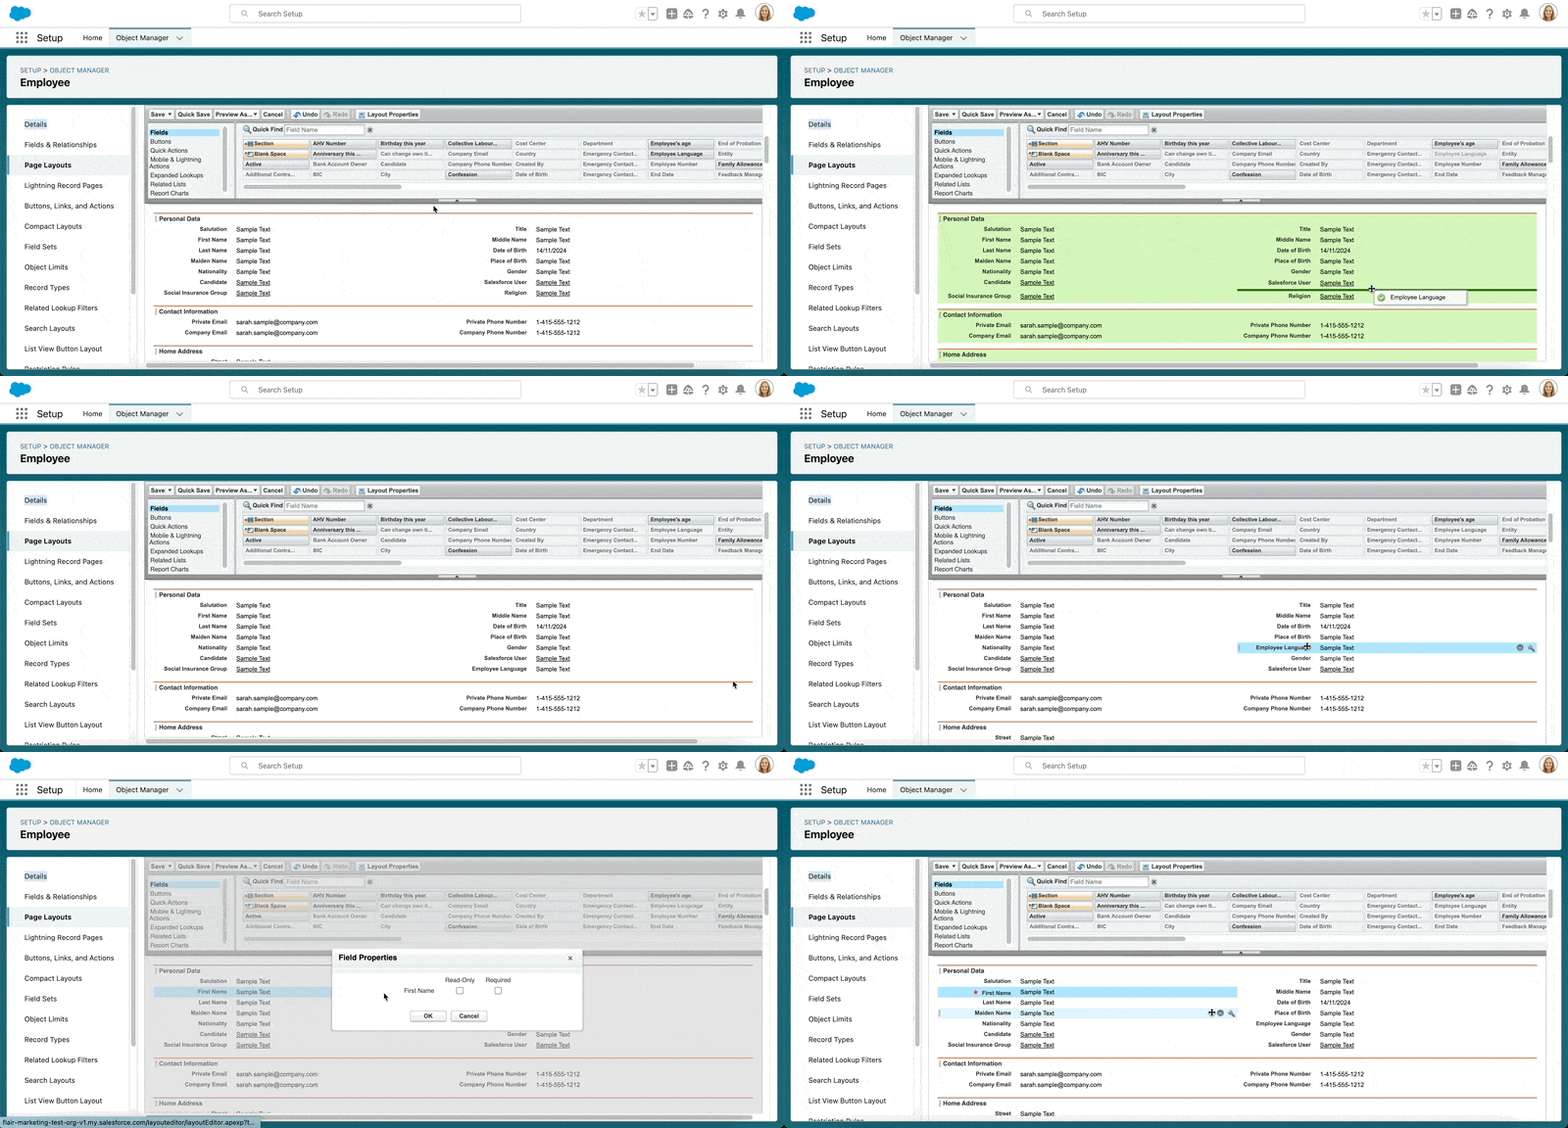
Finally, click Save in the top-left corner of the gray pane. Now your custom layout will be applied to the Employee Hub.
Customize Layouts for Specific Record Types
You can also create custom layouts for specific Record Types that you have created in Salesforce. For example, you might have different Record Types for specific company locations, such as Global, Germany, and Italy.
If you want to display a different view for German employees, you can do this by adding the Record Type Name Germany to your Page Layout Name.
📘 The Page Layout Name must follow this naming convention:
Employee Hub: RecordTypeNameorEmployee Hub Manager: RecordTypeName. You must replace RecordTypeName with the exact name of a Record Type that you have created in Salesforce.
In the above example, the Page Layout Name for German employees would be Employee Hub: Germany. If you wanted to change the manager view in Germany, the correct Page Layout Name would be Employee Hub Manager: Germany.