Set Up a Recruiting Email Address
With flair, you can automatically send an email to candidates after they applied for a job using your email address.
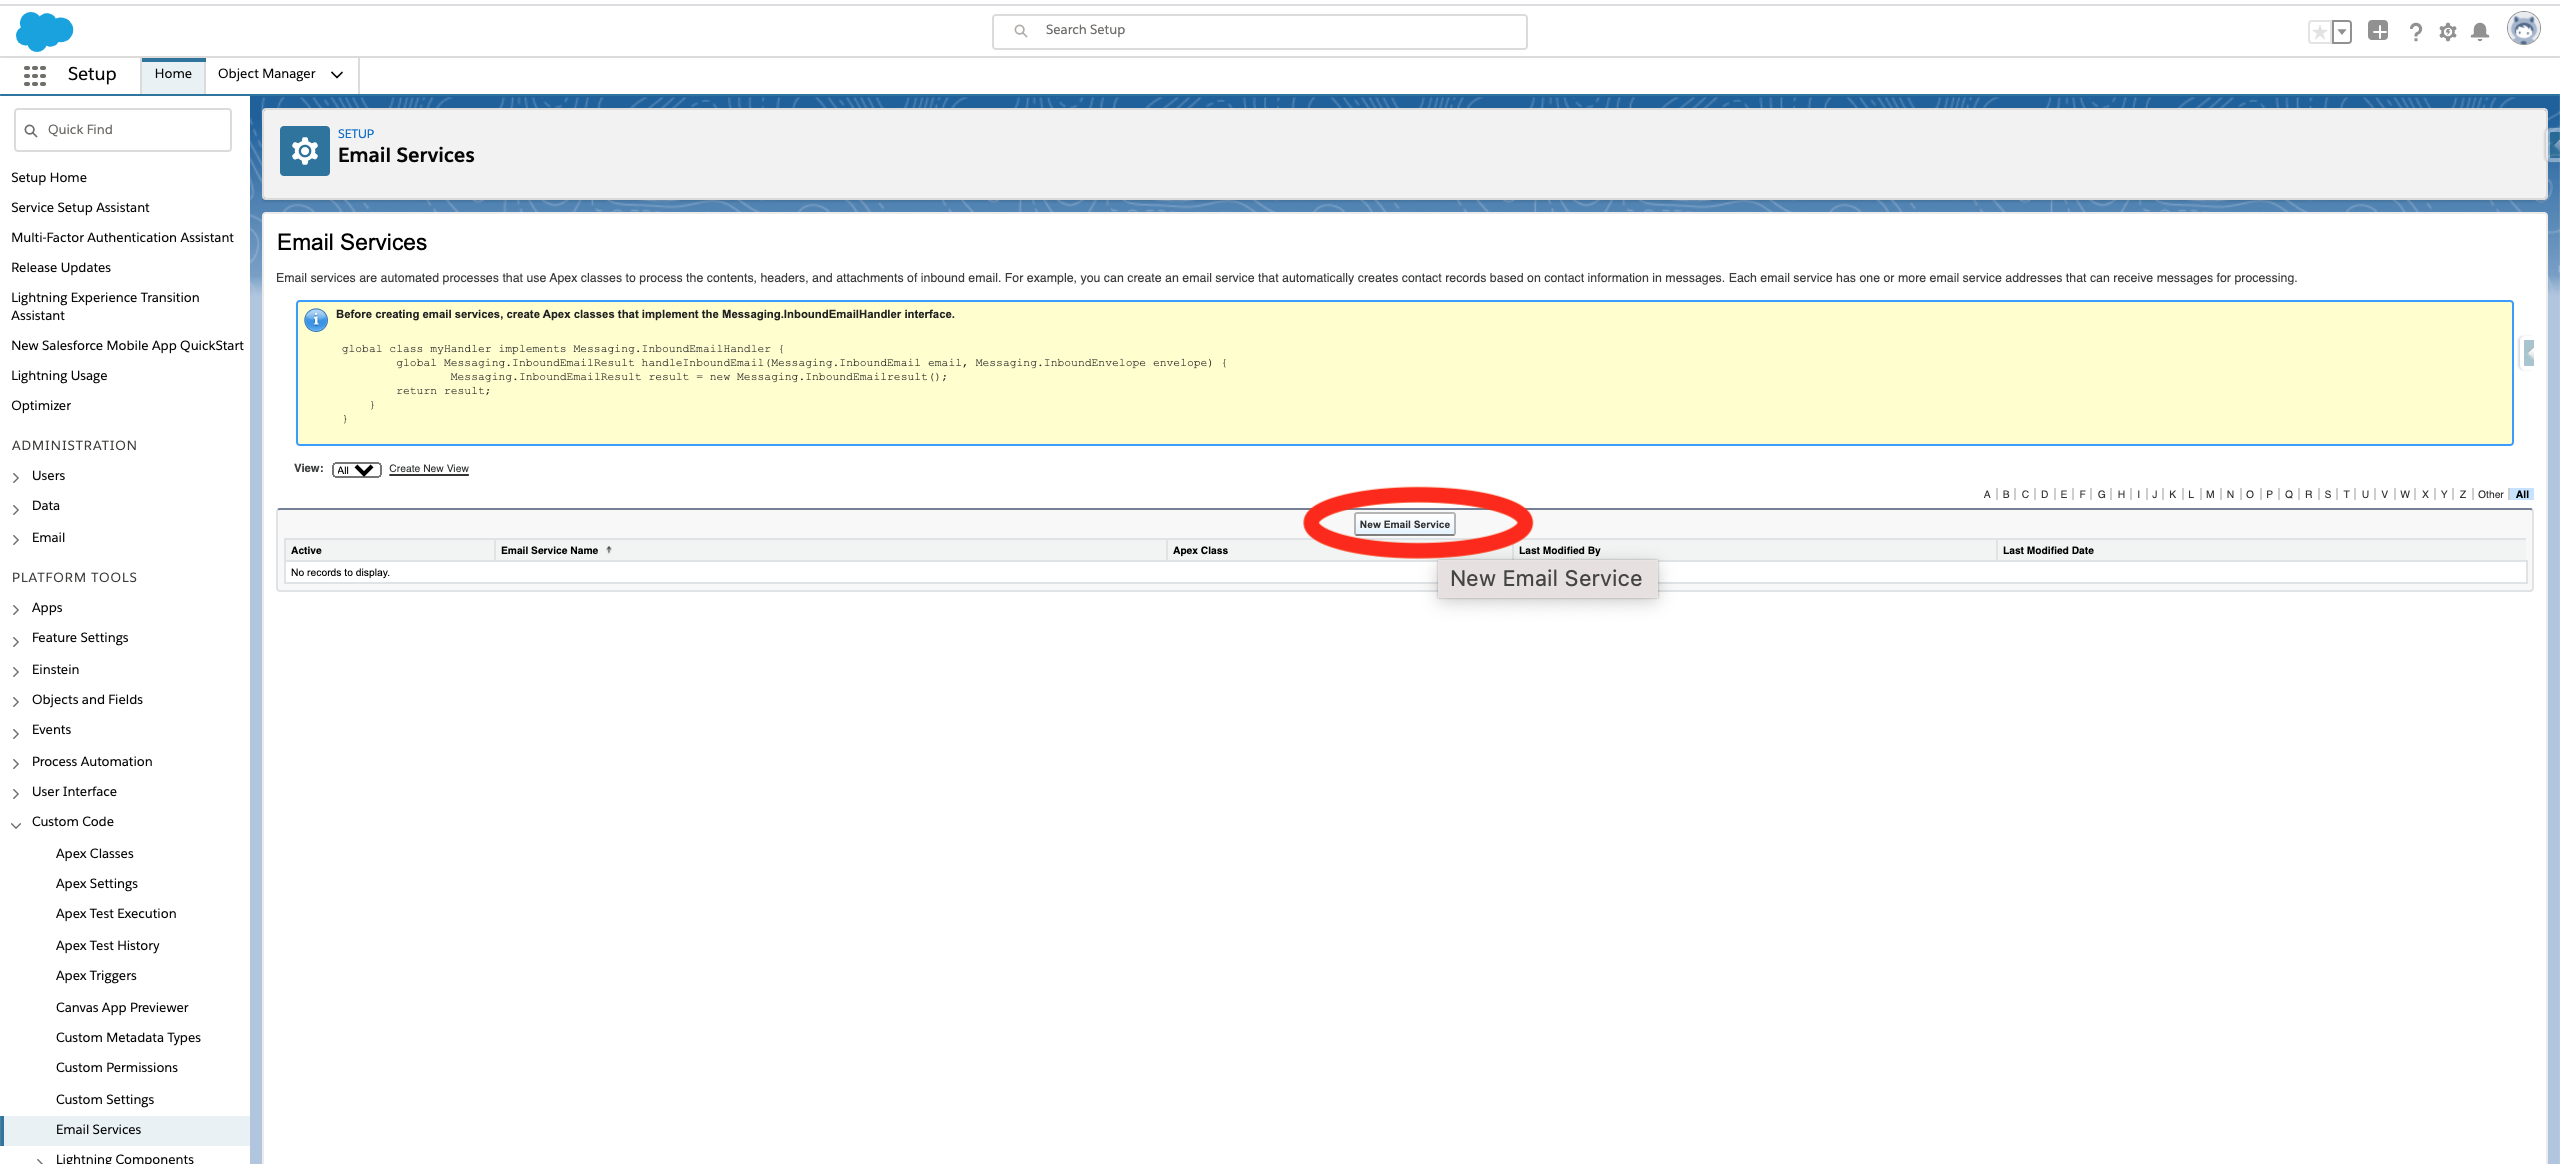
In Salesforce Setup, search for Email Services in the Quick Find box in the left pane.
Click New Email Service.
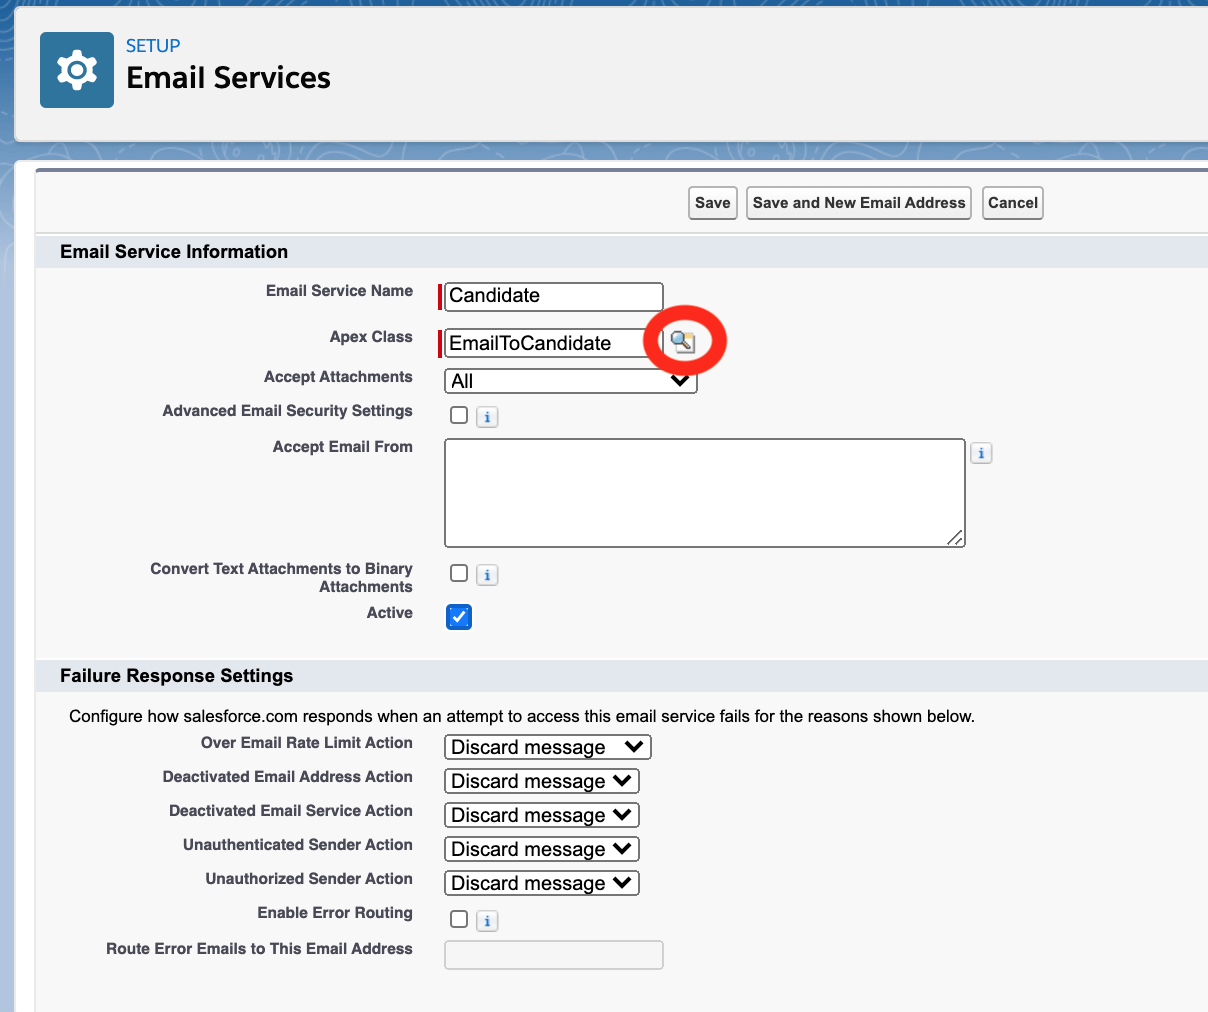
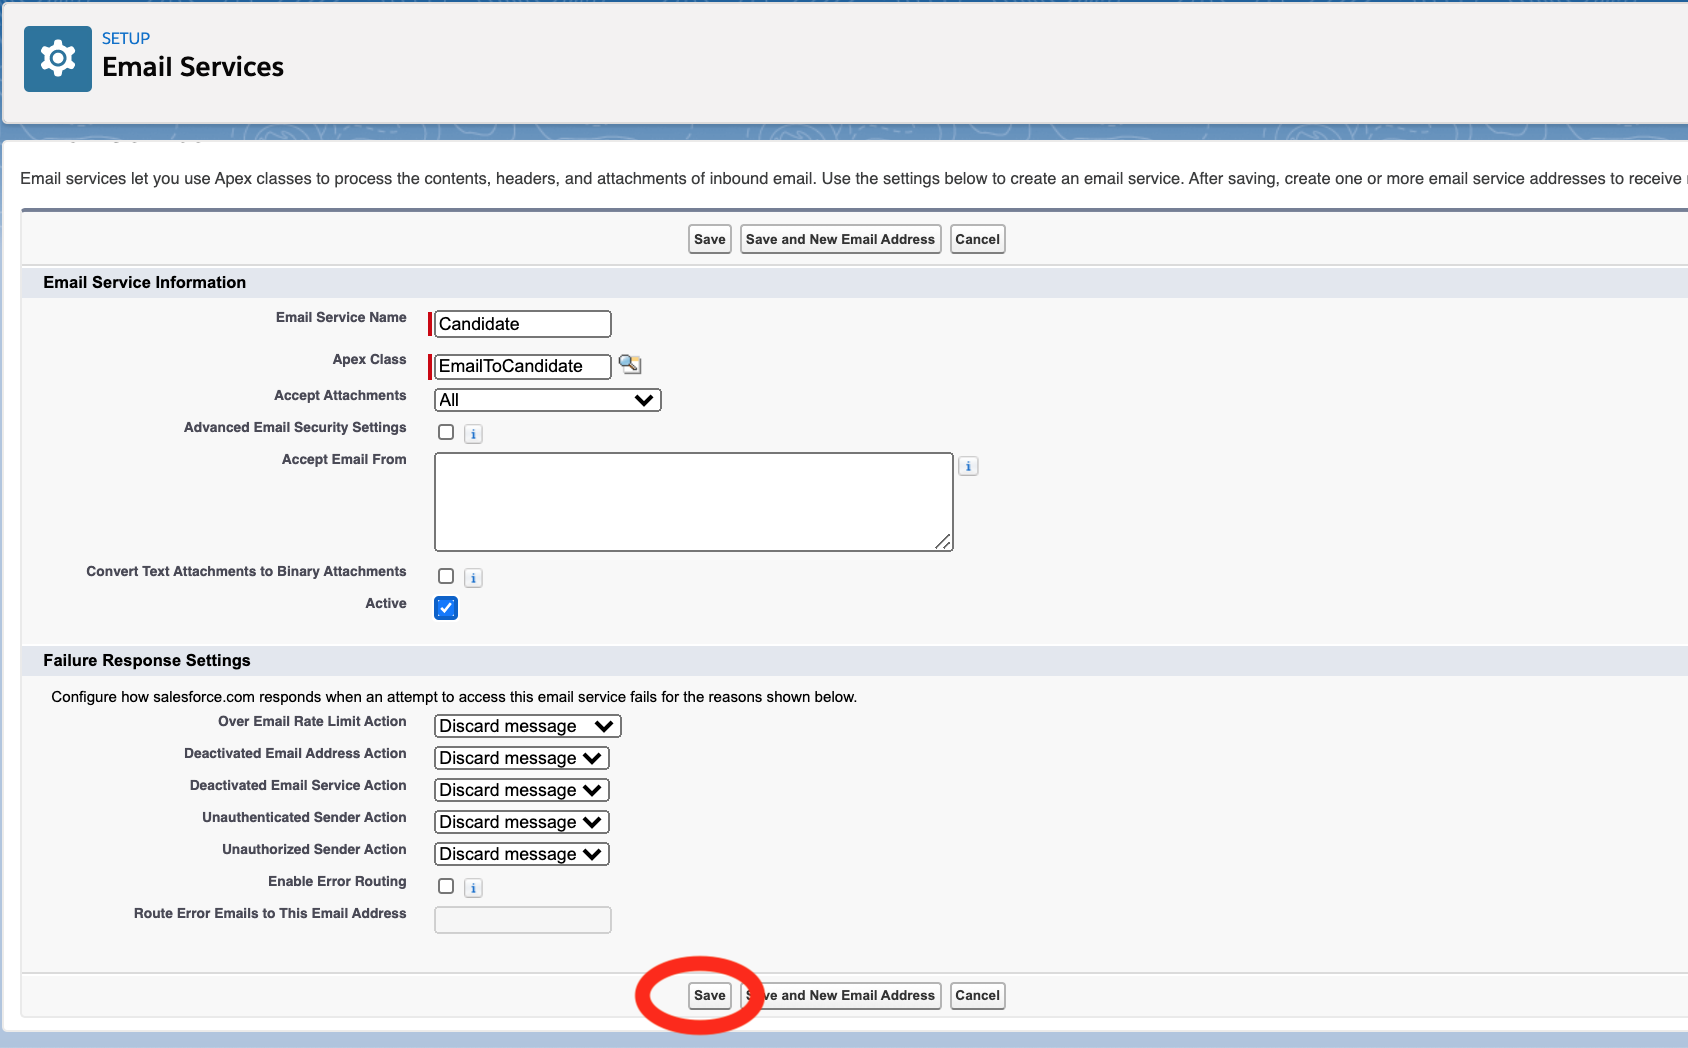
Fill in the fields as follows:
- Email Service Name:
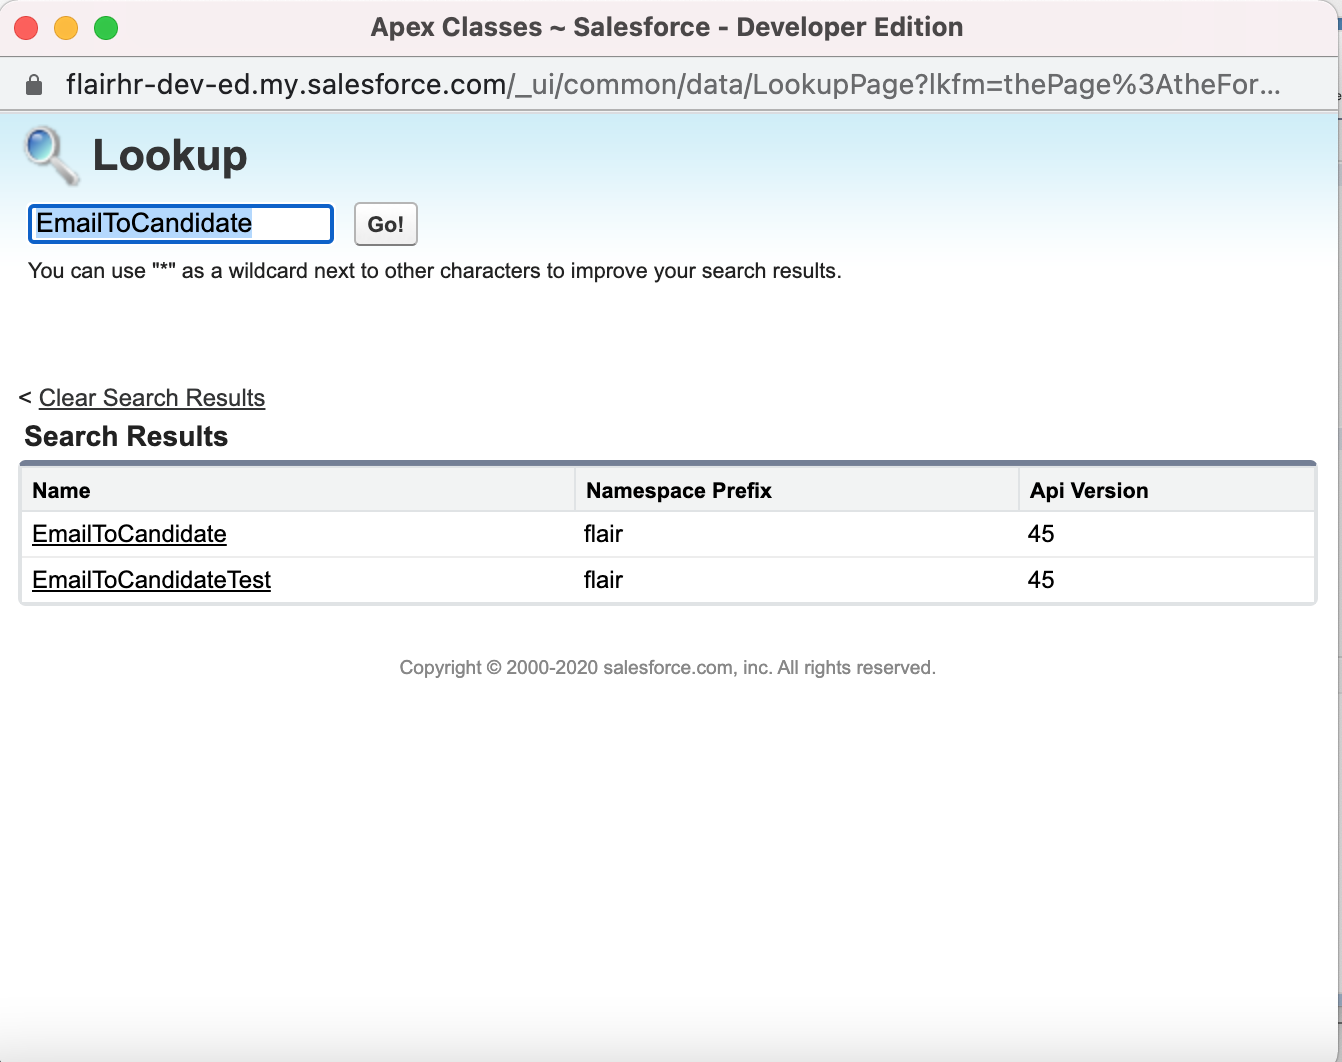
Candidate - Apex Class:
EmailToCandidate
Then check the Active checkbox and click Save.
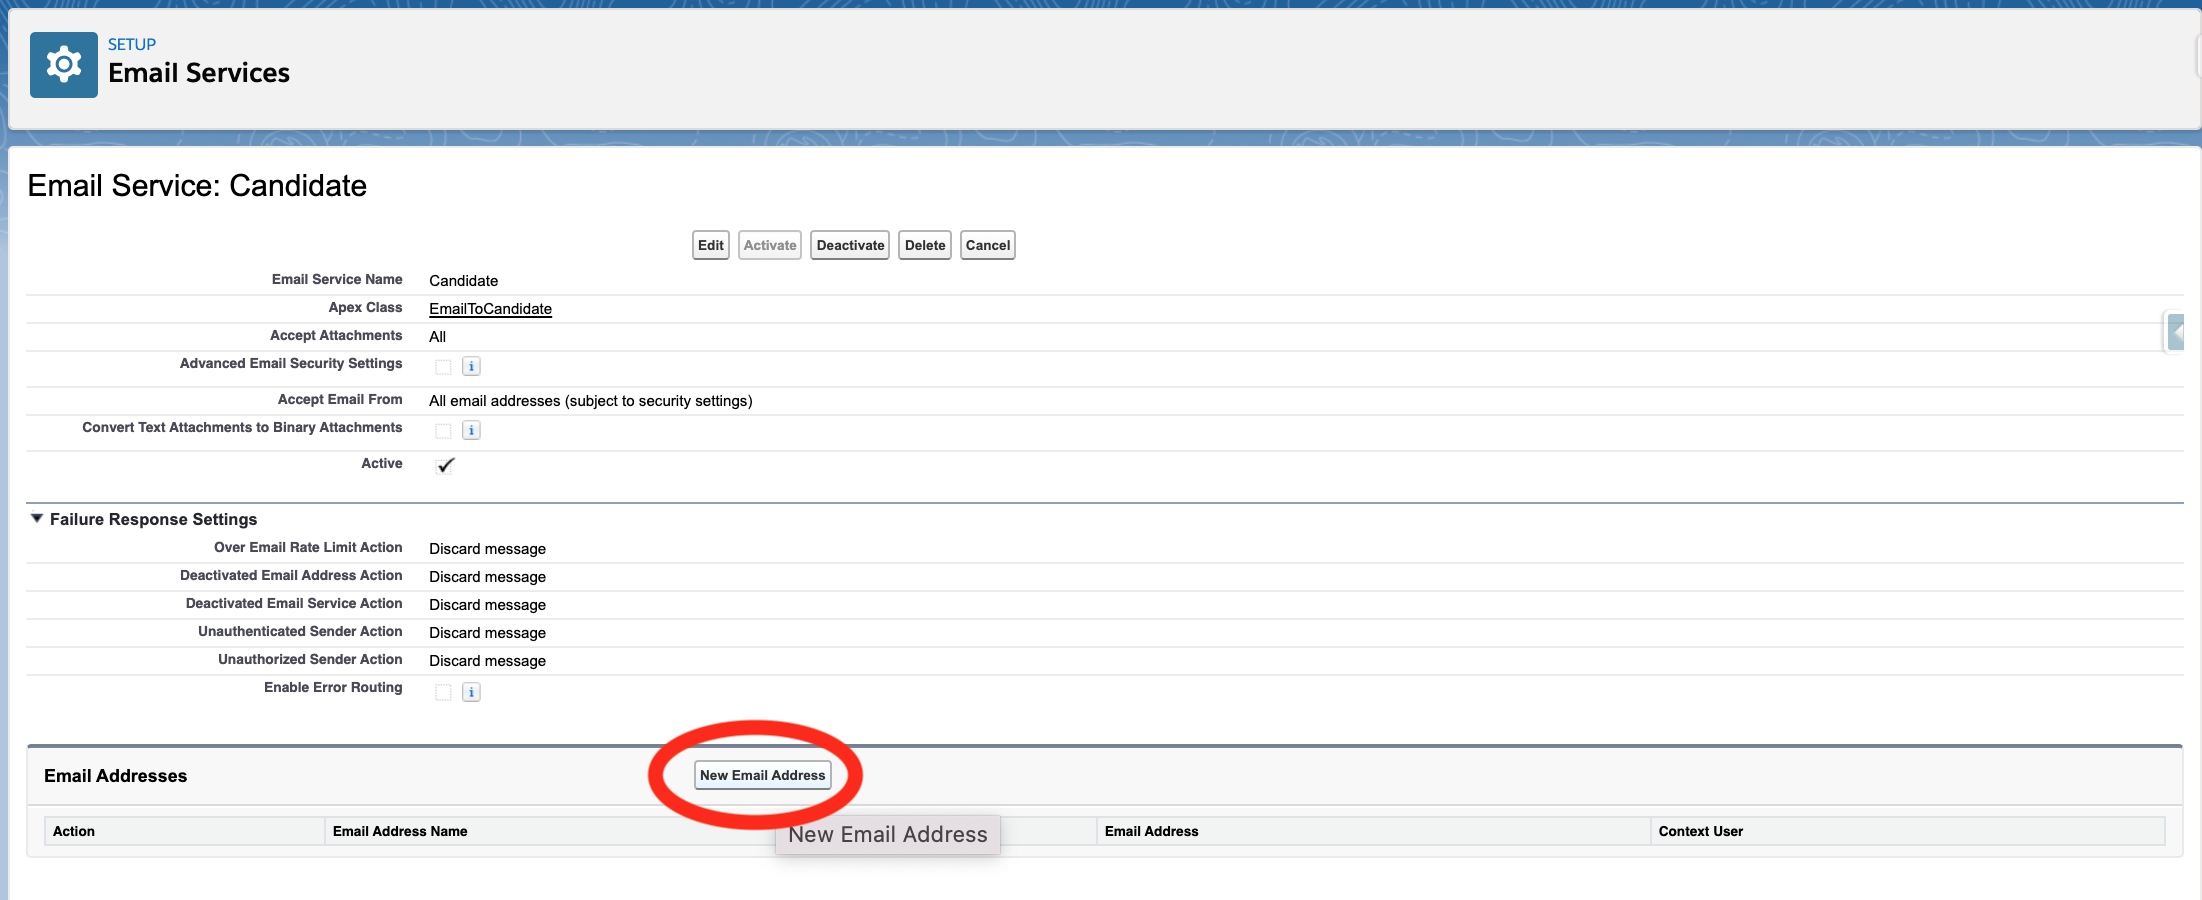
Now it's time to add a new email address.
You'll be redirected to a new page called Email Service: Candidate. Here, click New Email Address.
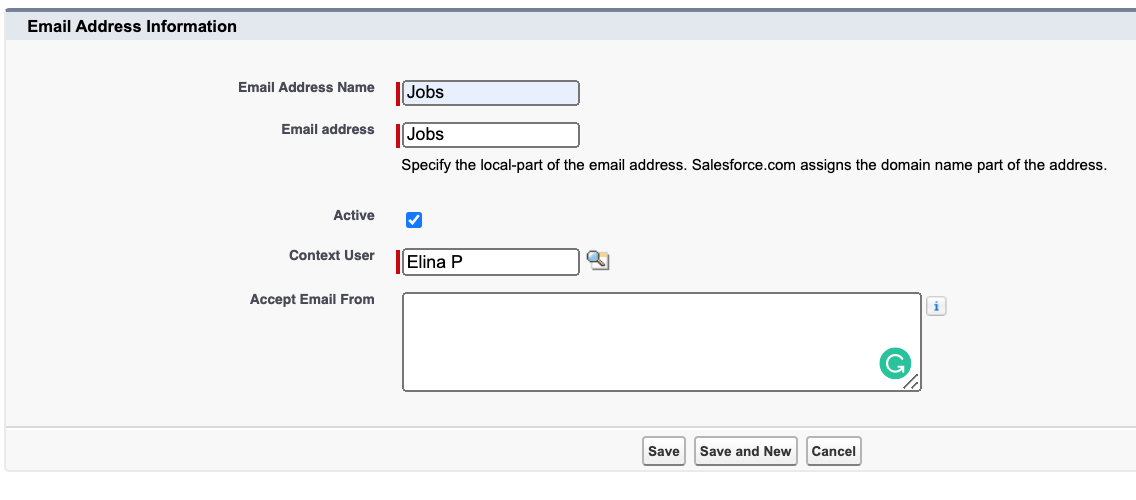
Give your email address a name by filling in the Email Address Name field. This will help you find the email address in Salesforce Setup if you need to make changes at a later date.
Define your email address by filling in the Email Addressfield. The word you enter here will appear before the @ symbol in the email address. For example, if you type ‘jobs’, the email address will start with jobs@. The part of the email address after the @ symbol will be automatically generated by Salesforce.
You can then use your email provider, such as Outlook or Google, to set up a redirect from this newly generated email address to an email address of your choice.
Choose a Context User who will receive notifications about new applications. This will be the Salesforce user of the account you are using to set up the recruiting email address. If you need to check the email address of the context user, you can do this by clicking on your profile avatar in Salesforce and going to Settings. Use Quick Find to search for the Personal Information section, and there you will find the email address that is connected to the context user.
After clicking Save, your new email address will appear in your list of email addresses.

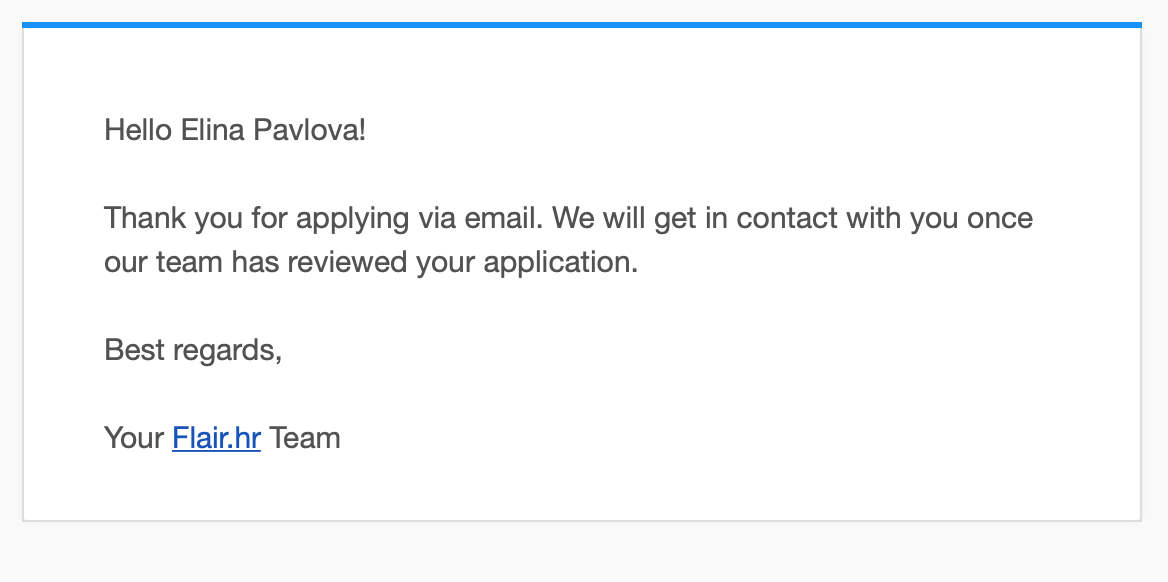
Now you can test it out by sending an email to the address you just created.

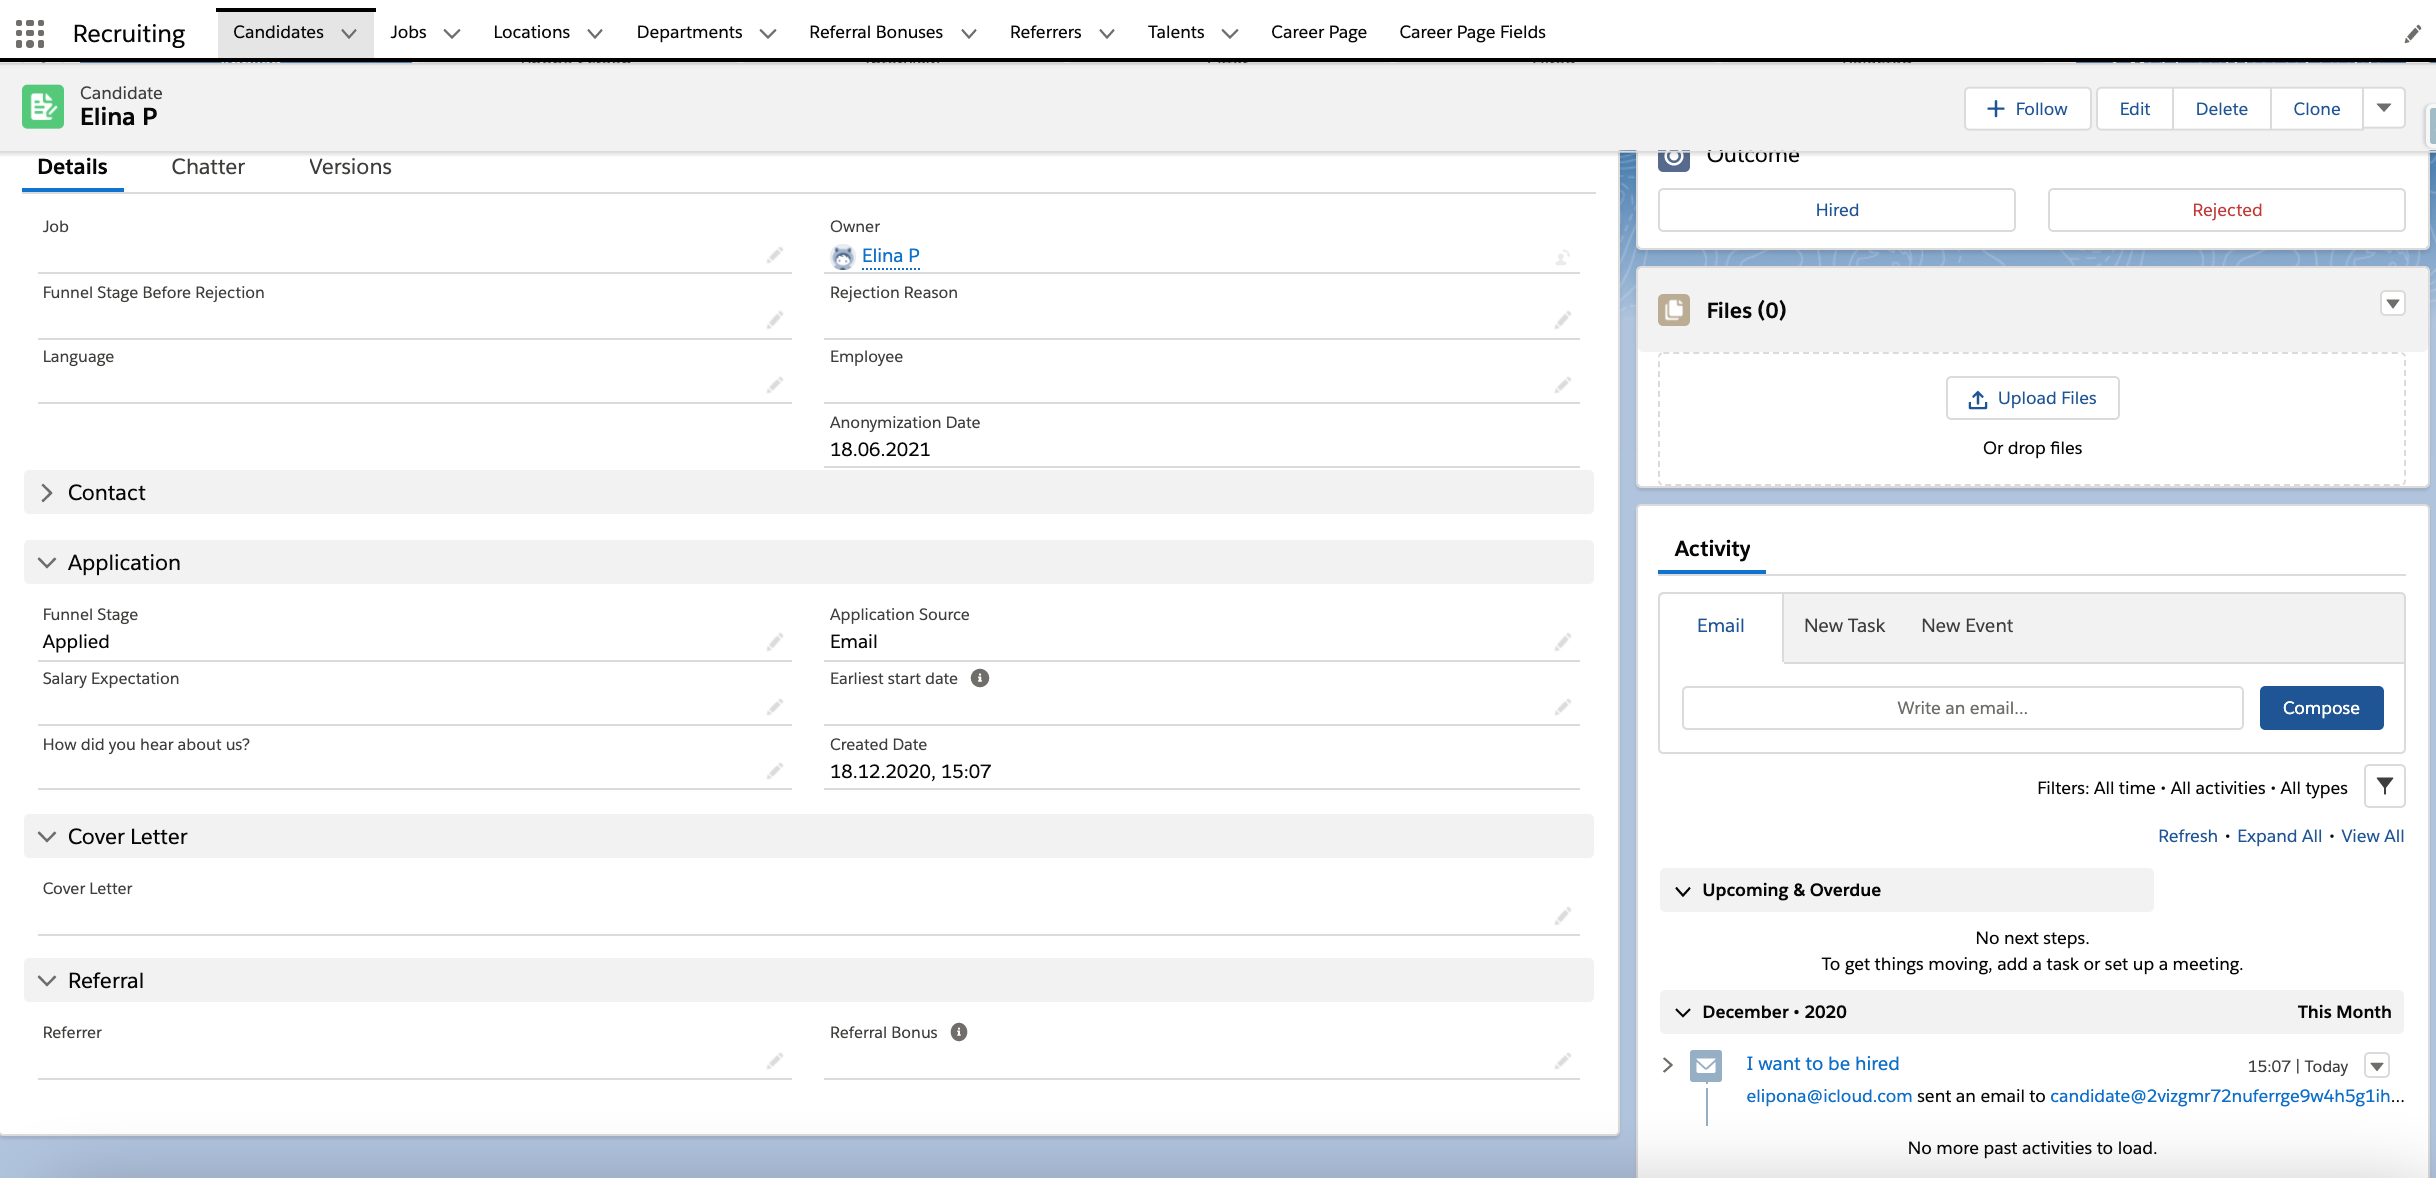
Once the email is sent, the candidate immediately receives a reply.
The Context User you defined earlier will also receive a notification.
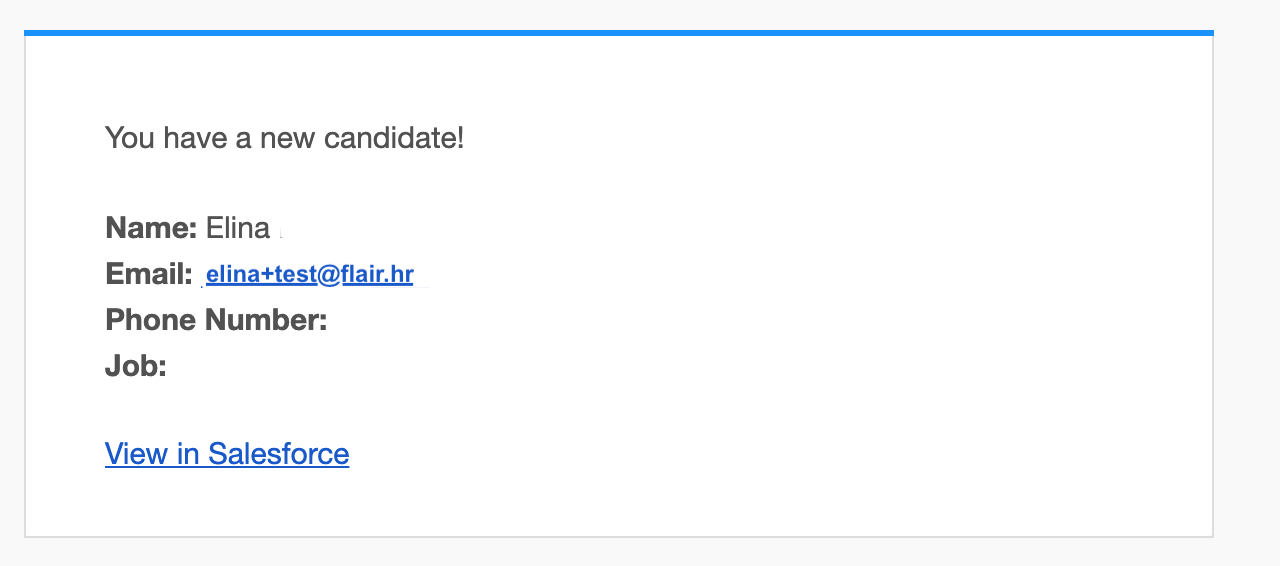
The new candidate is now automatically saved to Salesforce. You can view them in the Candidates tab in your flair Recruiting app.