Configure SAML SSO With Salesforce
Using SAML authentication for single sign-on (SSO) allows your users to securely log into the flair Employee Hub using their credentials from another account. Not only does this improve security, but it also improves the user experience by allowing faster access to the Employee Hub.
In this article, we’ll show you how to configure SAML to enable users to sign into the Employee Hub in just one click using their Salesforce log-in details.

Enable Identity Manager
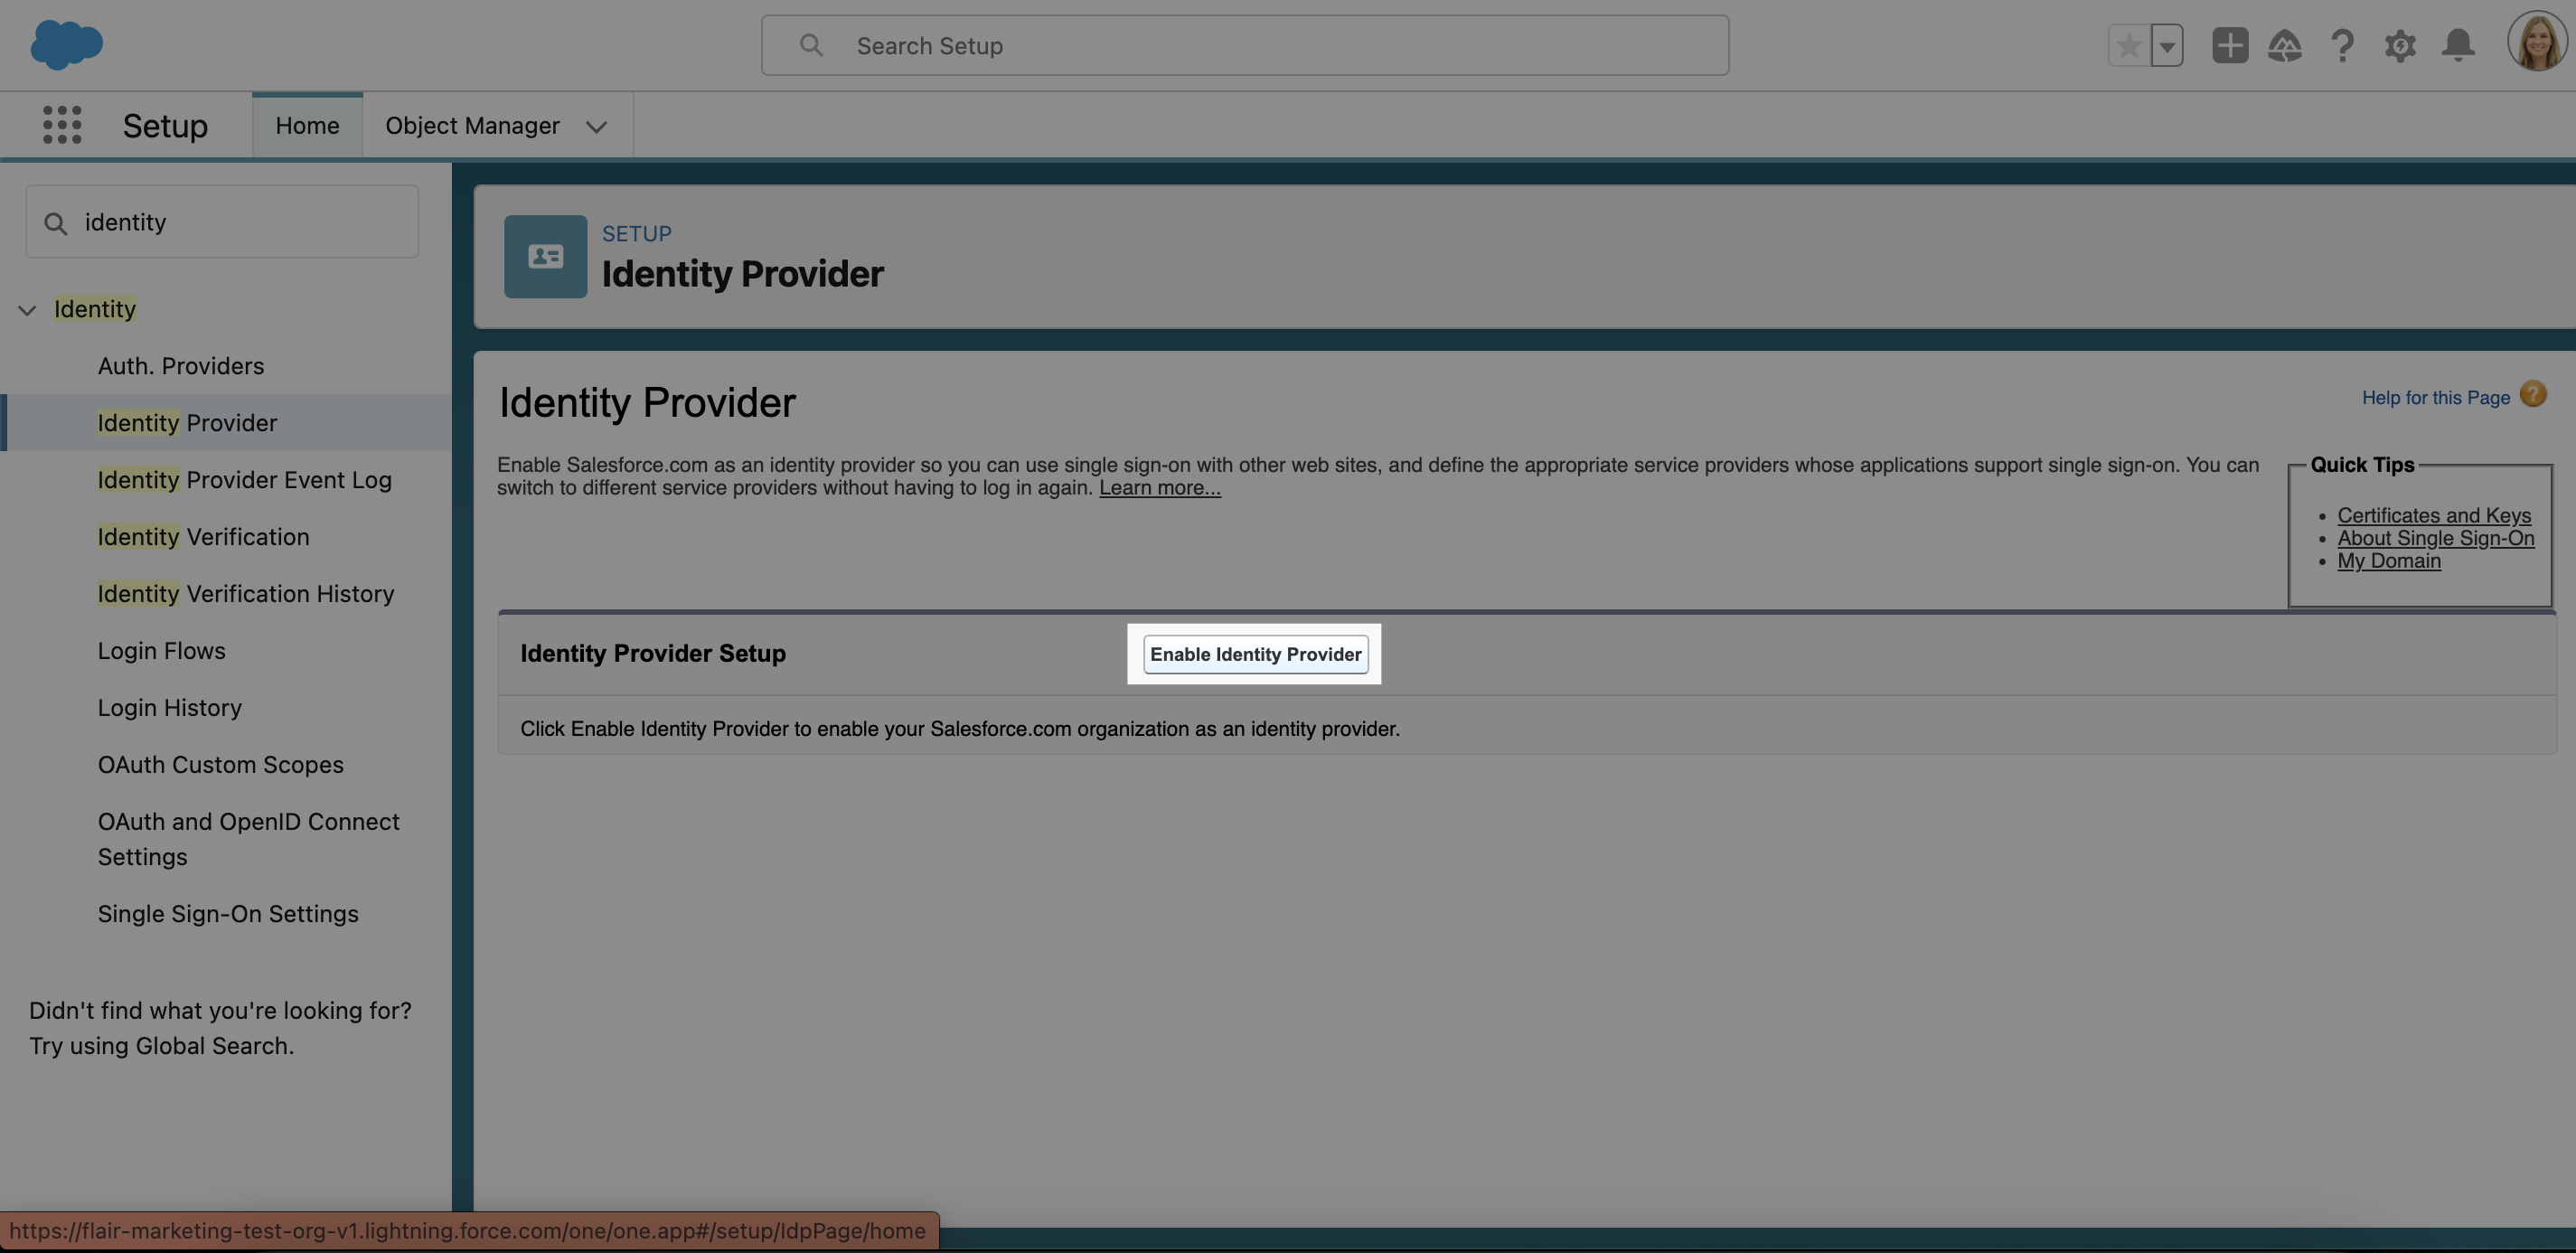
- Open the Salesforce Setup and use the search bar in the left-side menu to find Identity Provider.

- Click Enable Identity Provider.
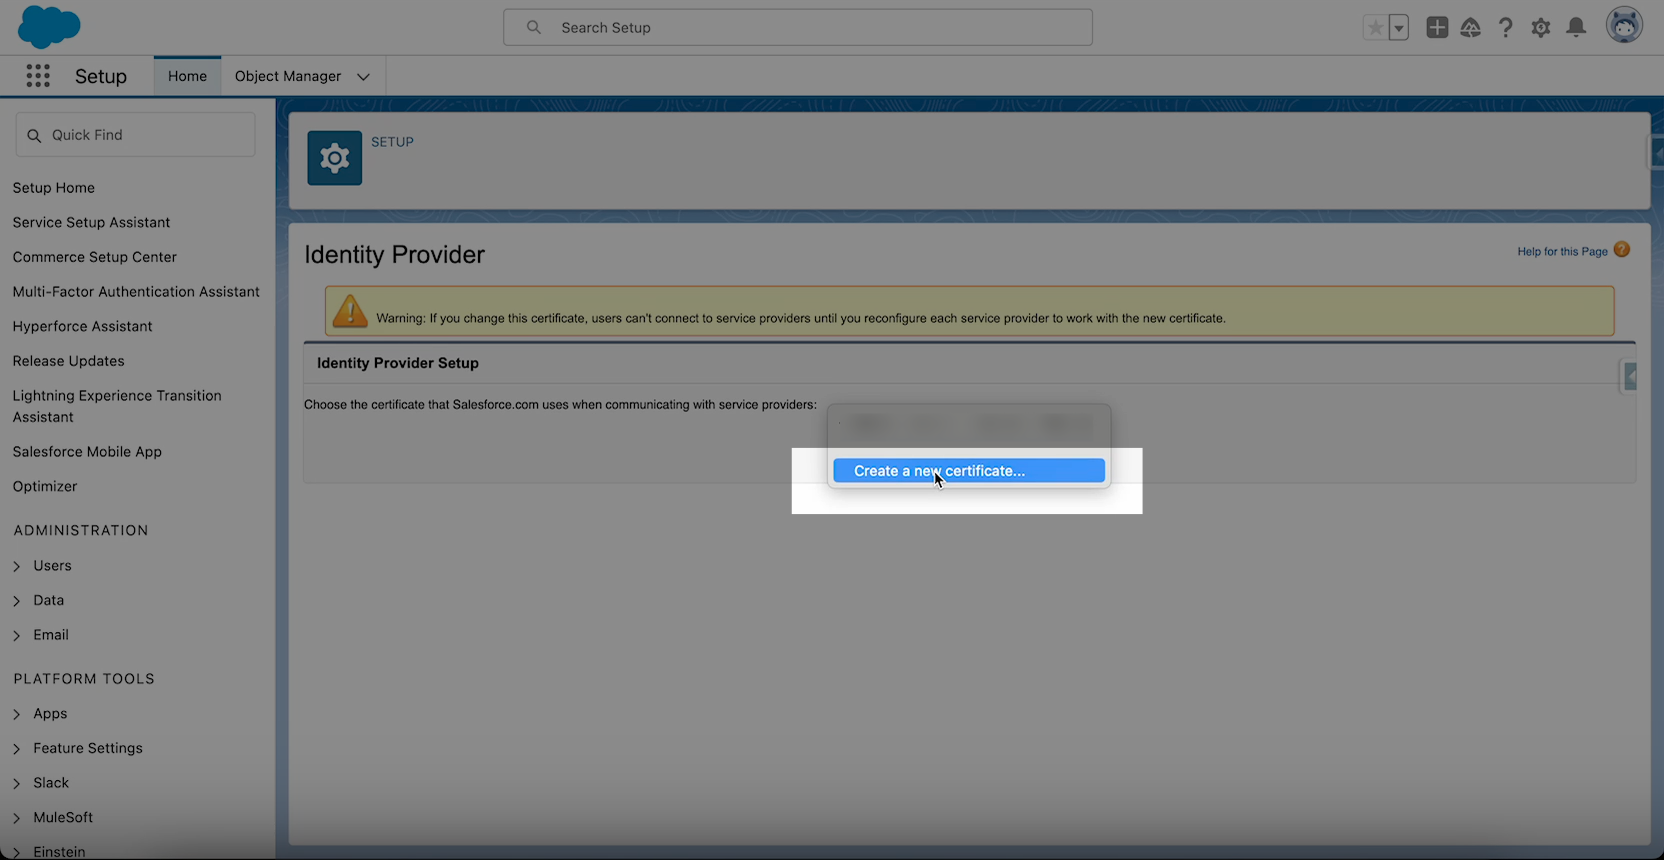
- Select the dropdown menu in the center of the screen and either select an existing certificate or click Create a New Certificate.
ℹ️ For more information on enabling Salesforce as a SAML Identity Provider, visit the Salesforce Help page.
- Now your Identity Provider is enabled.
Connect Employee Hub Login with Salesforce
- The next step is to create an app to connect your Employee Hub login with Salesforce. Use the left-menu search bar to find the App Manager page.
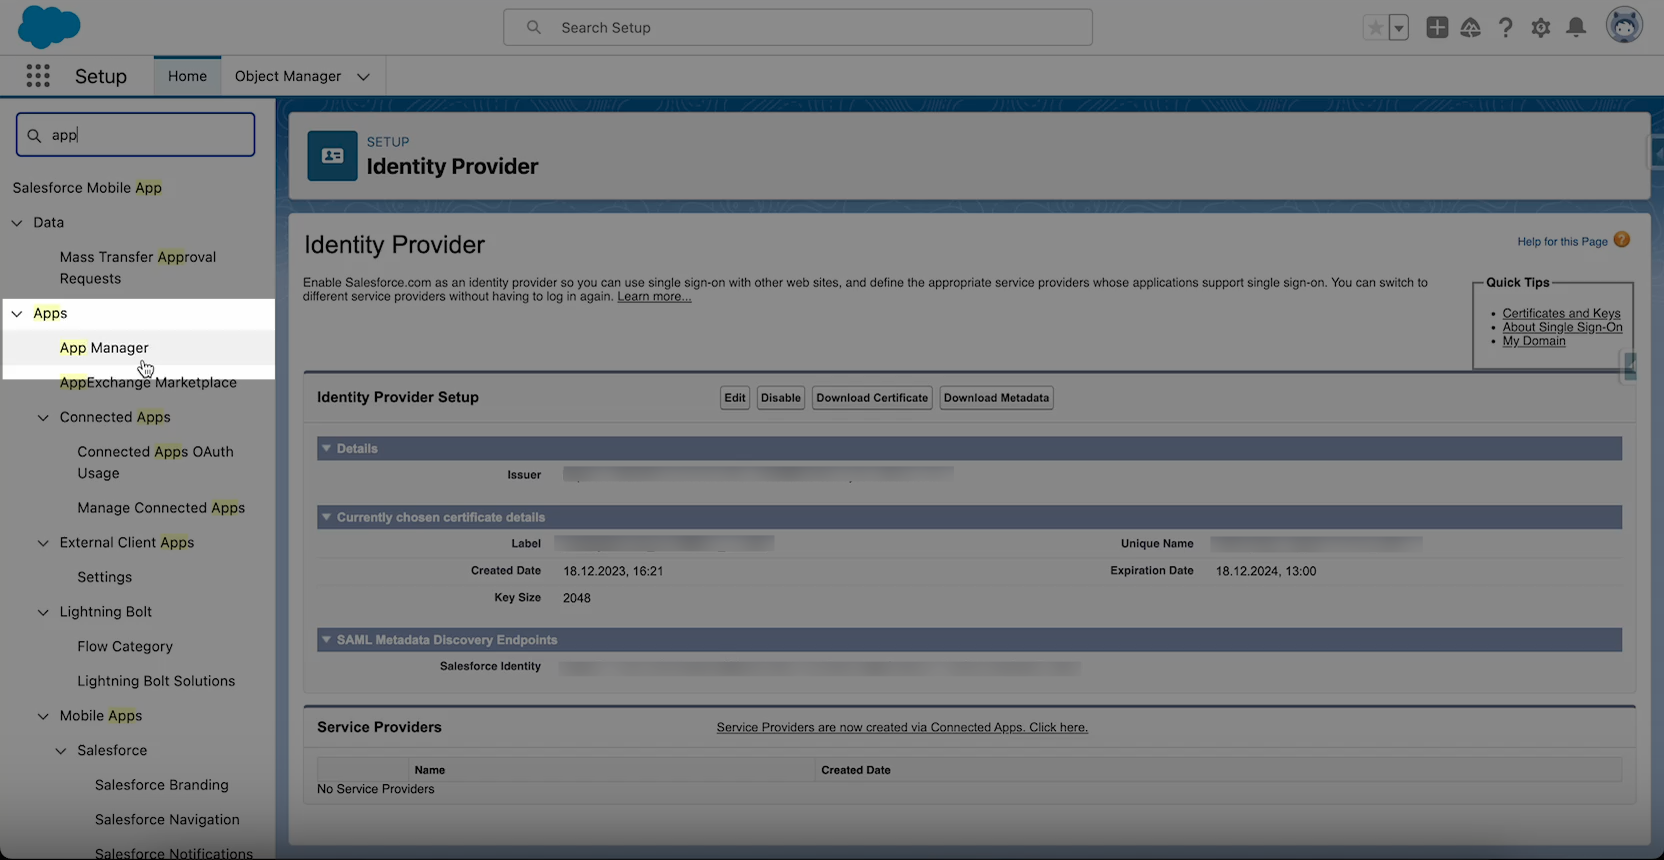
- Select New Connected App.

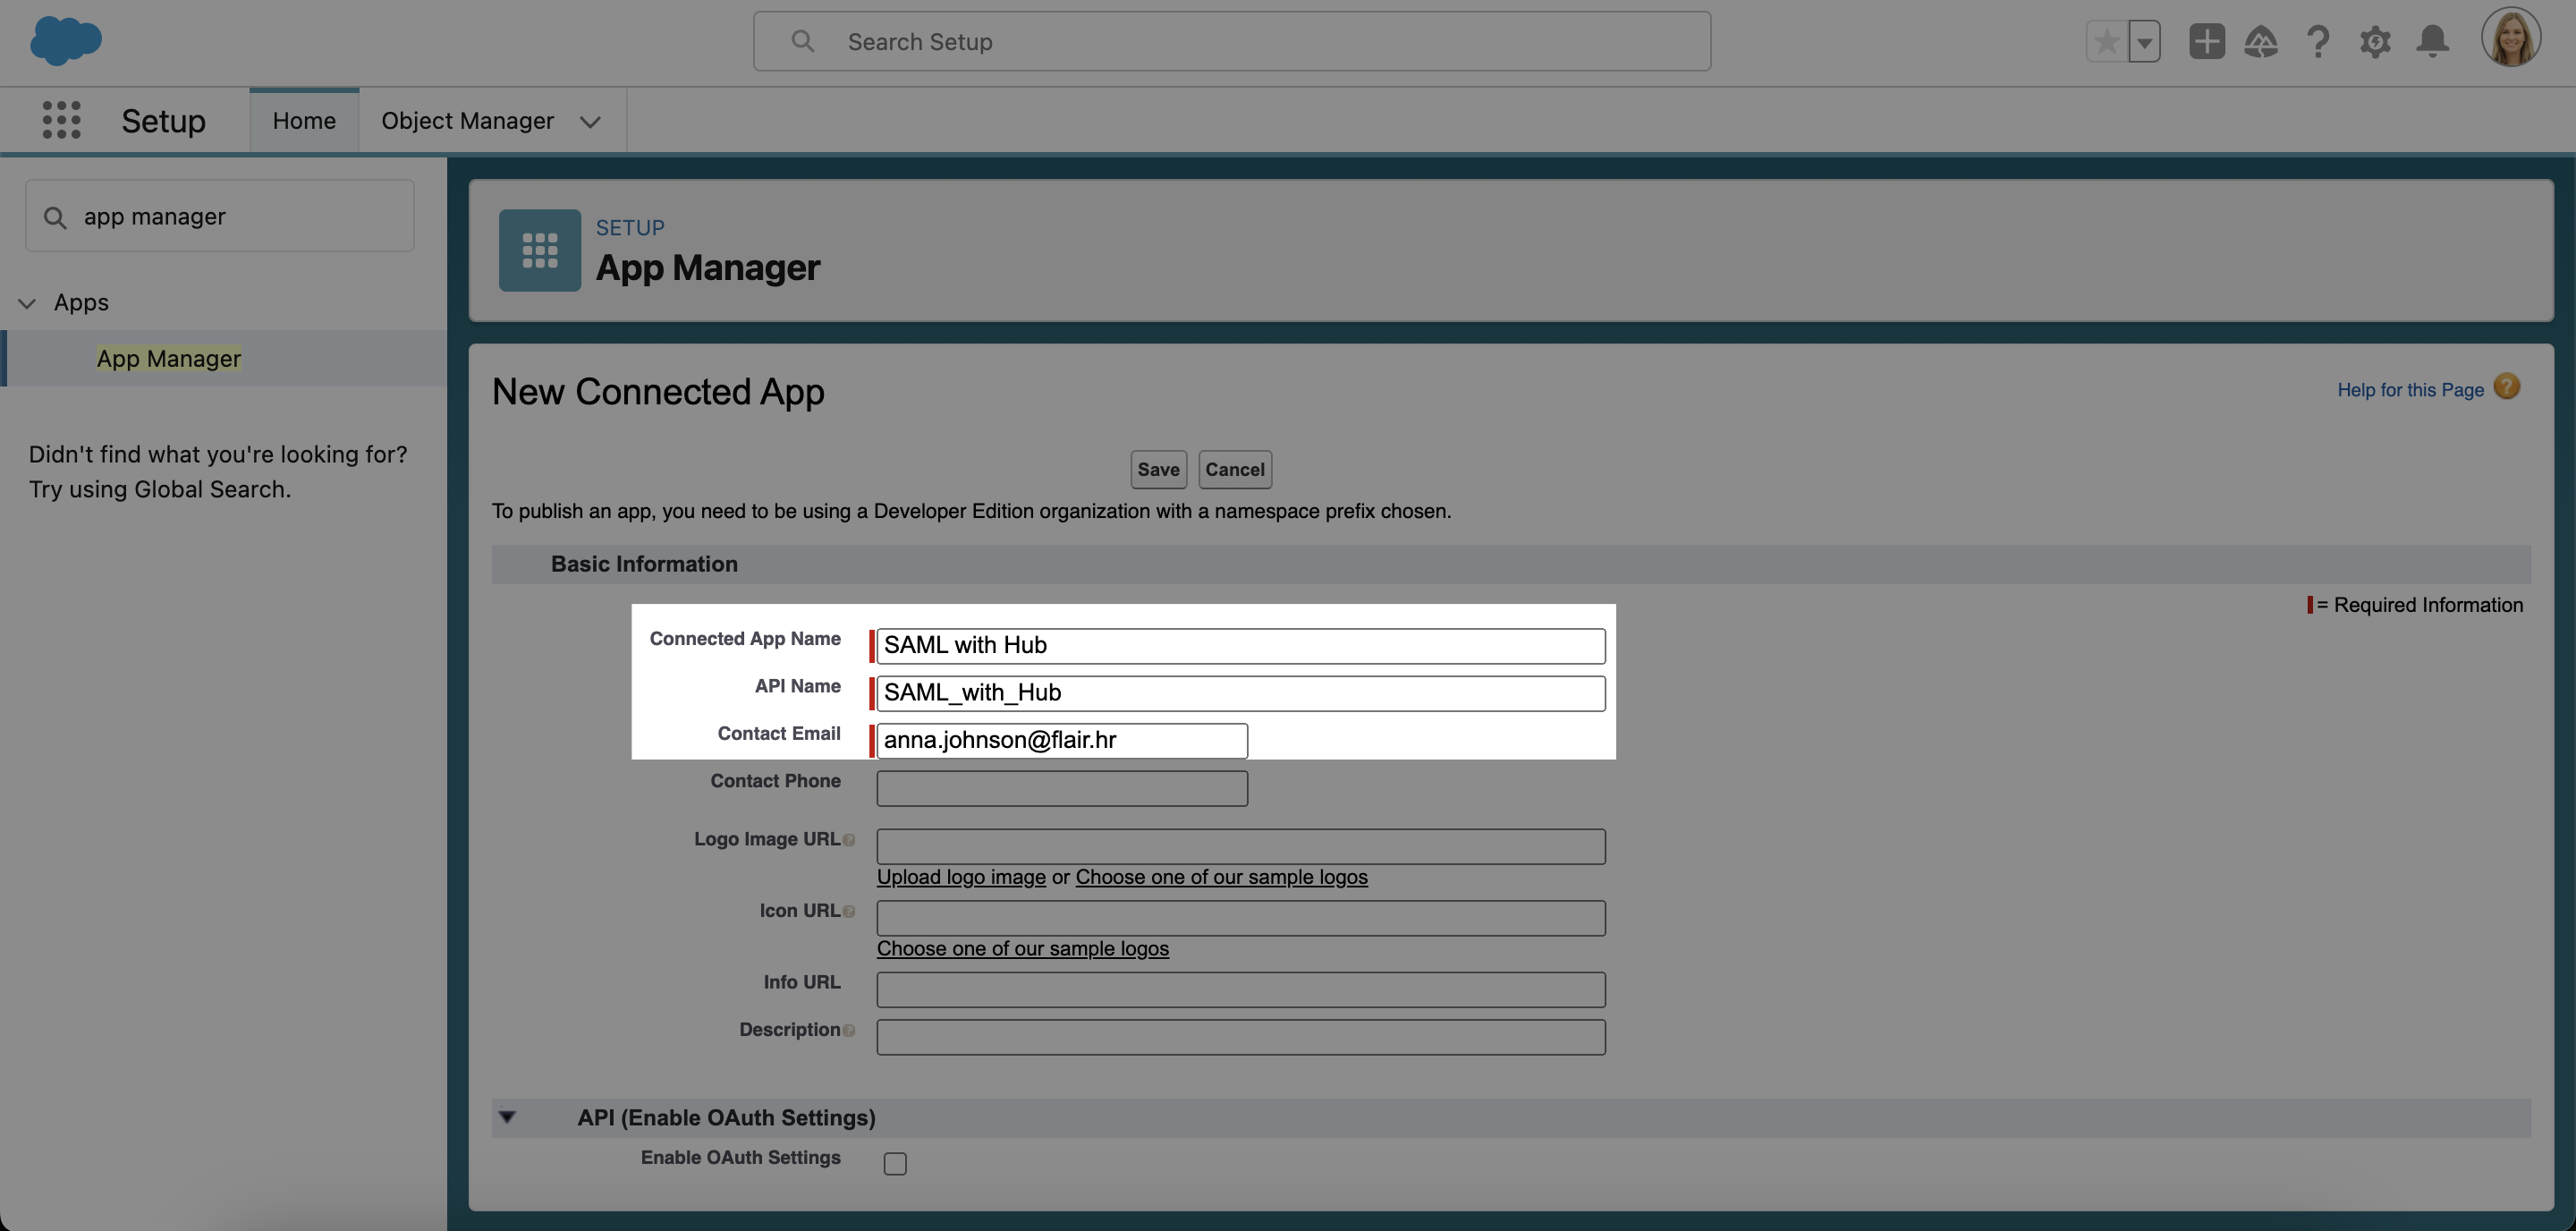
- Give your app a name, e.g. SAML With Hub. This name will automatically be used to fill the API Name field. Enter a Contact Email address.
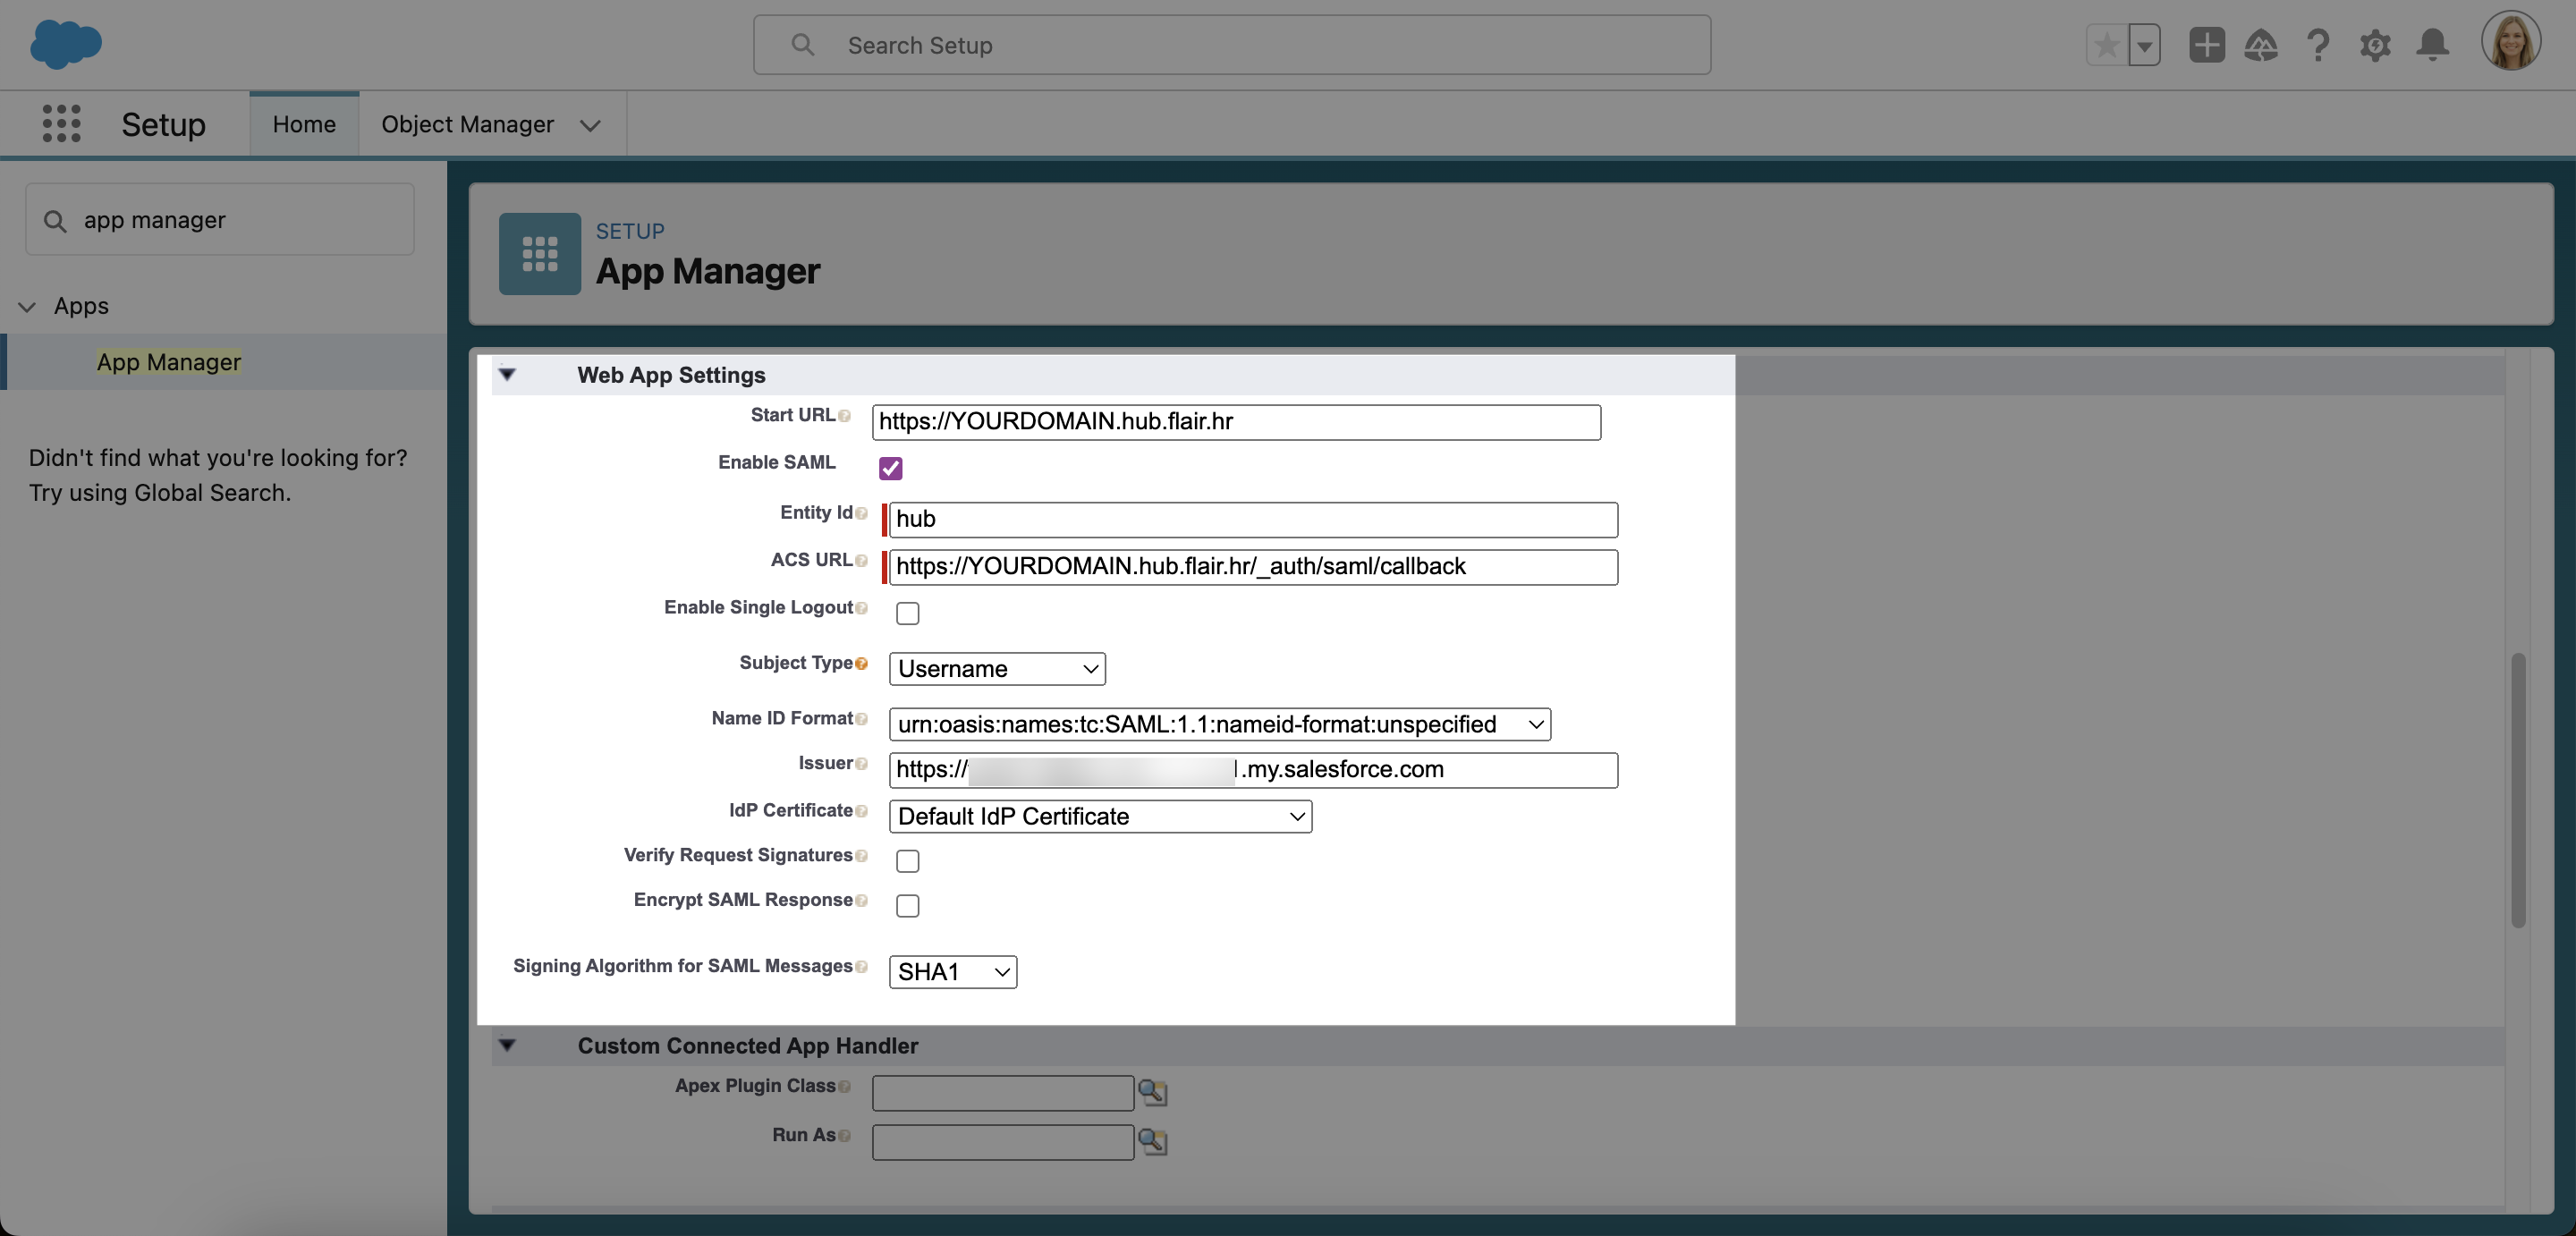
- Scroll down to Web App Settings and check the Enable SAML checkbox. Now fill in the following fields:
- Start URL: Enter your Employee Hub URL. You can find this by opening the Employee Hub. The URL is structured like this:
https://YOURDOMAIN.hub.flair.hr, where ‘YOURDOMAIN’ should be replaced with the real domain name of your Hub. - Entity ID: This can be anything you like, for example, ‘hub’.
- ACS URL: This is the same as your Start URL but with /_auth/saml/callback added to the end. For example:
https://YOURDOMAIN.hub.flair.hr/_auth/saml/callback - Enable Single Logout: This is currently not supported, so please leave the box unchecked.
- Subject Type: This section defines which information is required from the user. Select Username to allow users to log in with their Salesforce username.
- Name ID Format: Select the first item in the dropdown, which ends in ‘unspecified’.
- Issuer: This field should be prefilled and does not need to be changed.
- IdP Certificate: Select a certificate from the dropdown or leave it as the Default IdP Certificate.
You can leave the remaining fields unchanged. Then scroll down to the bottom of the page and click Save.
Now you will see a summary screen with all the details of your newly created SAML app.
Add New Hub SAML Configuration to flair
The next step is to add your new SAML configuration to the flair HR app.
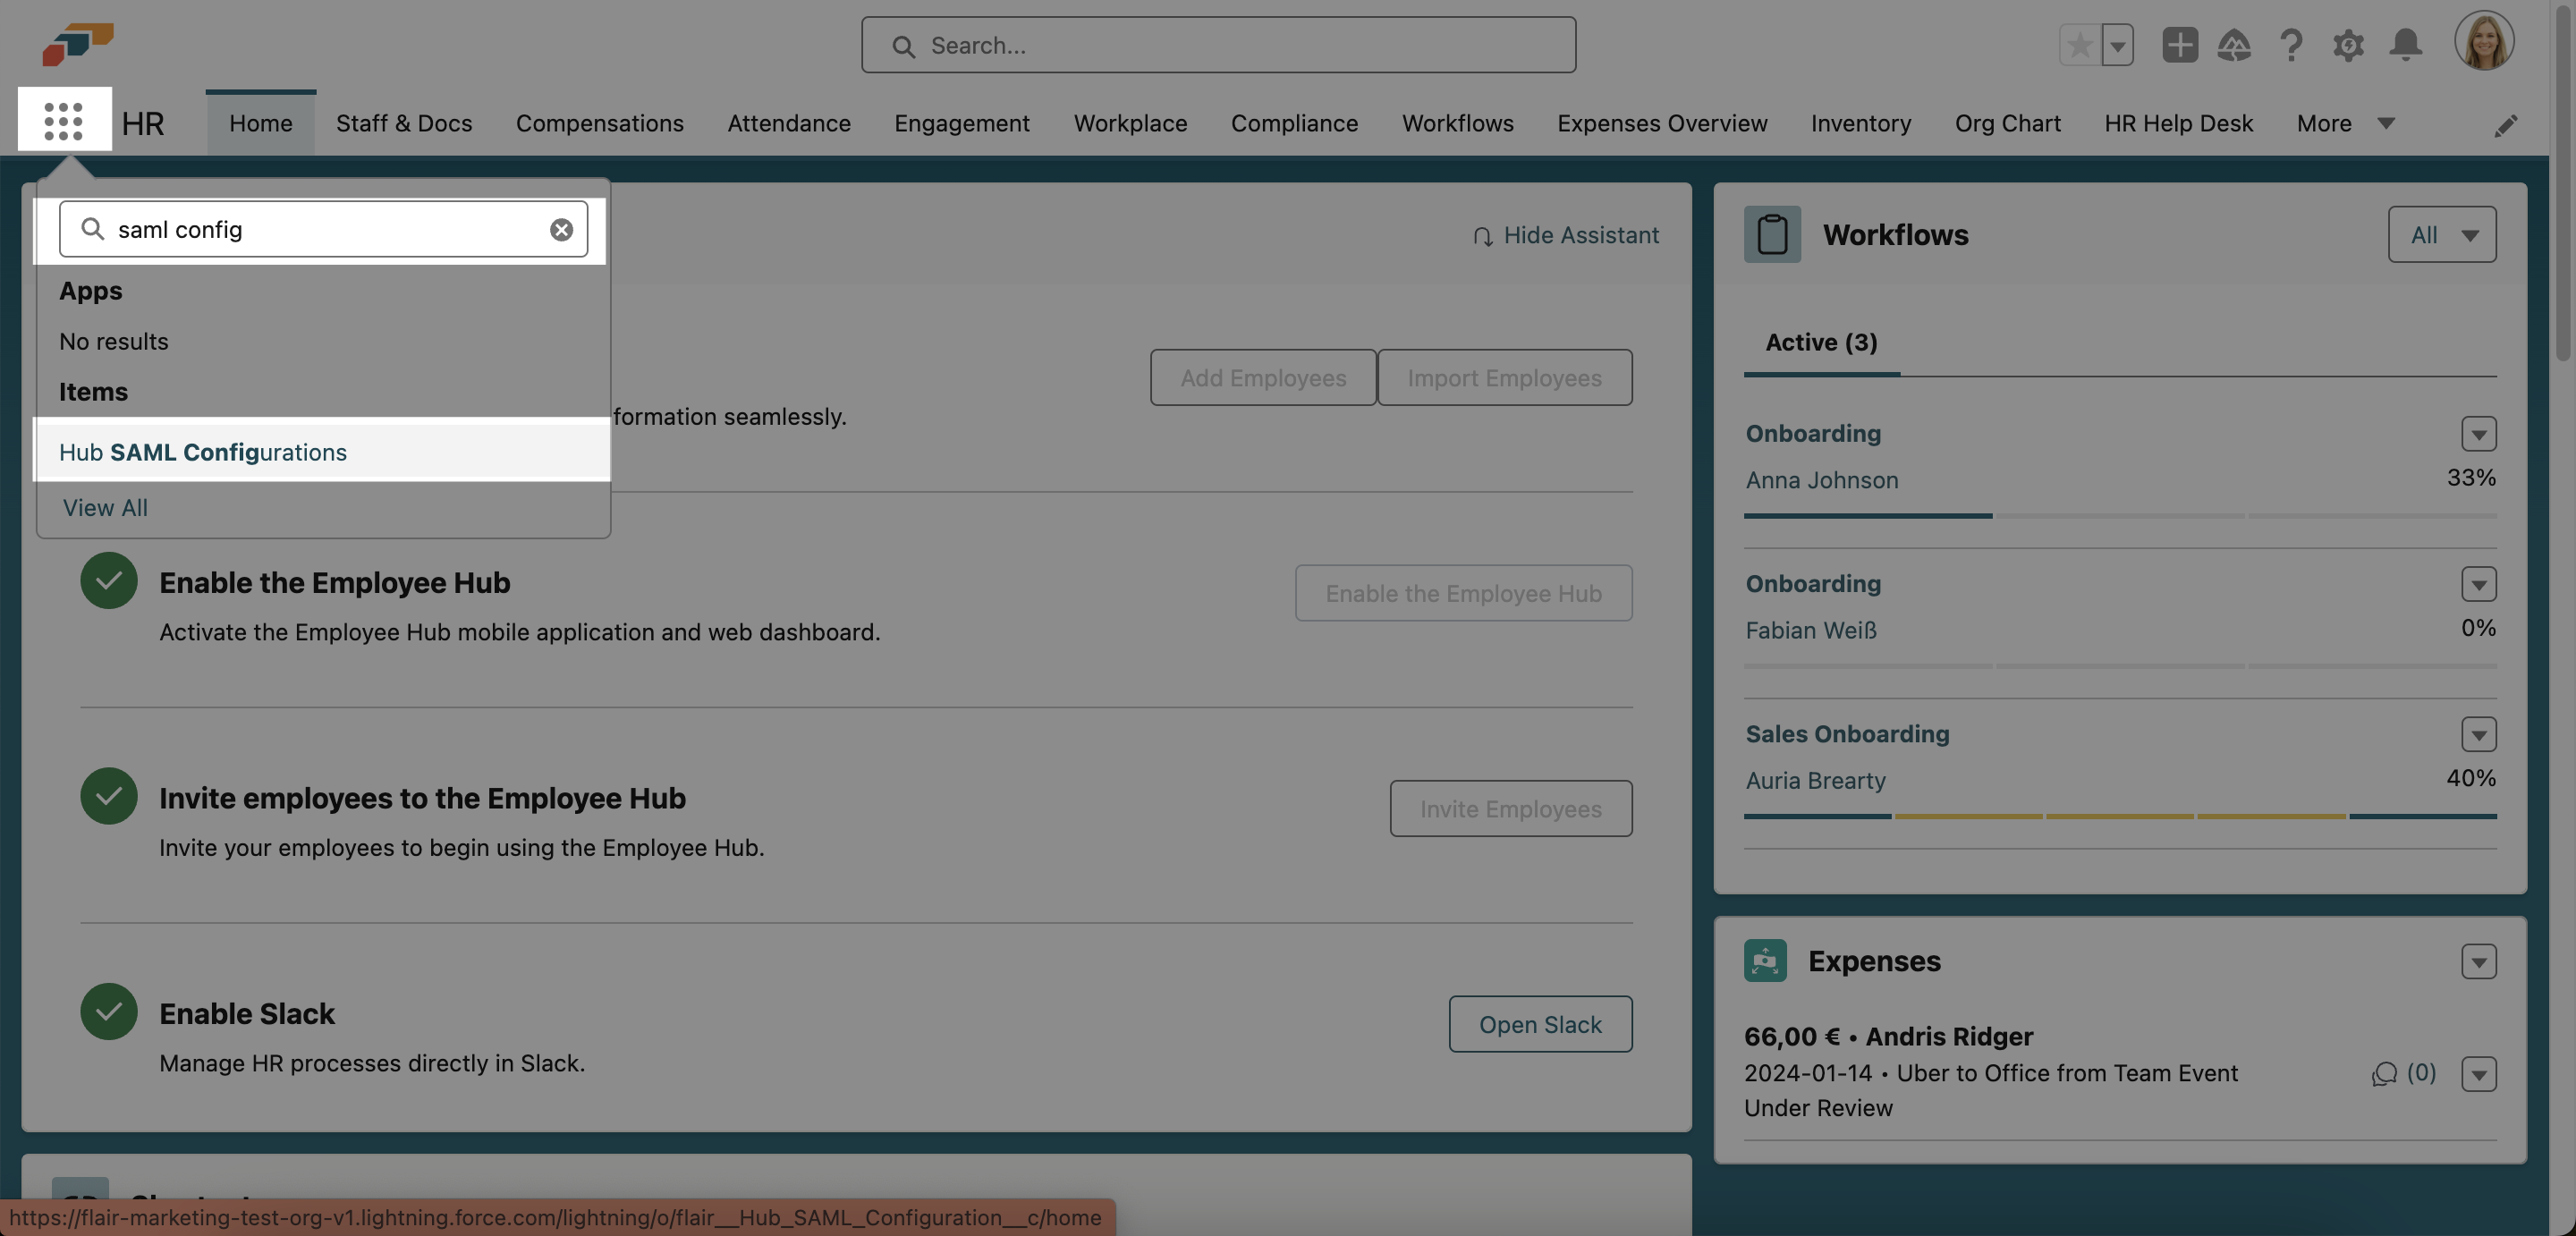
- In the flair HR app, open the App Launcher 𓃑 and search for Hub SAML Configurations.
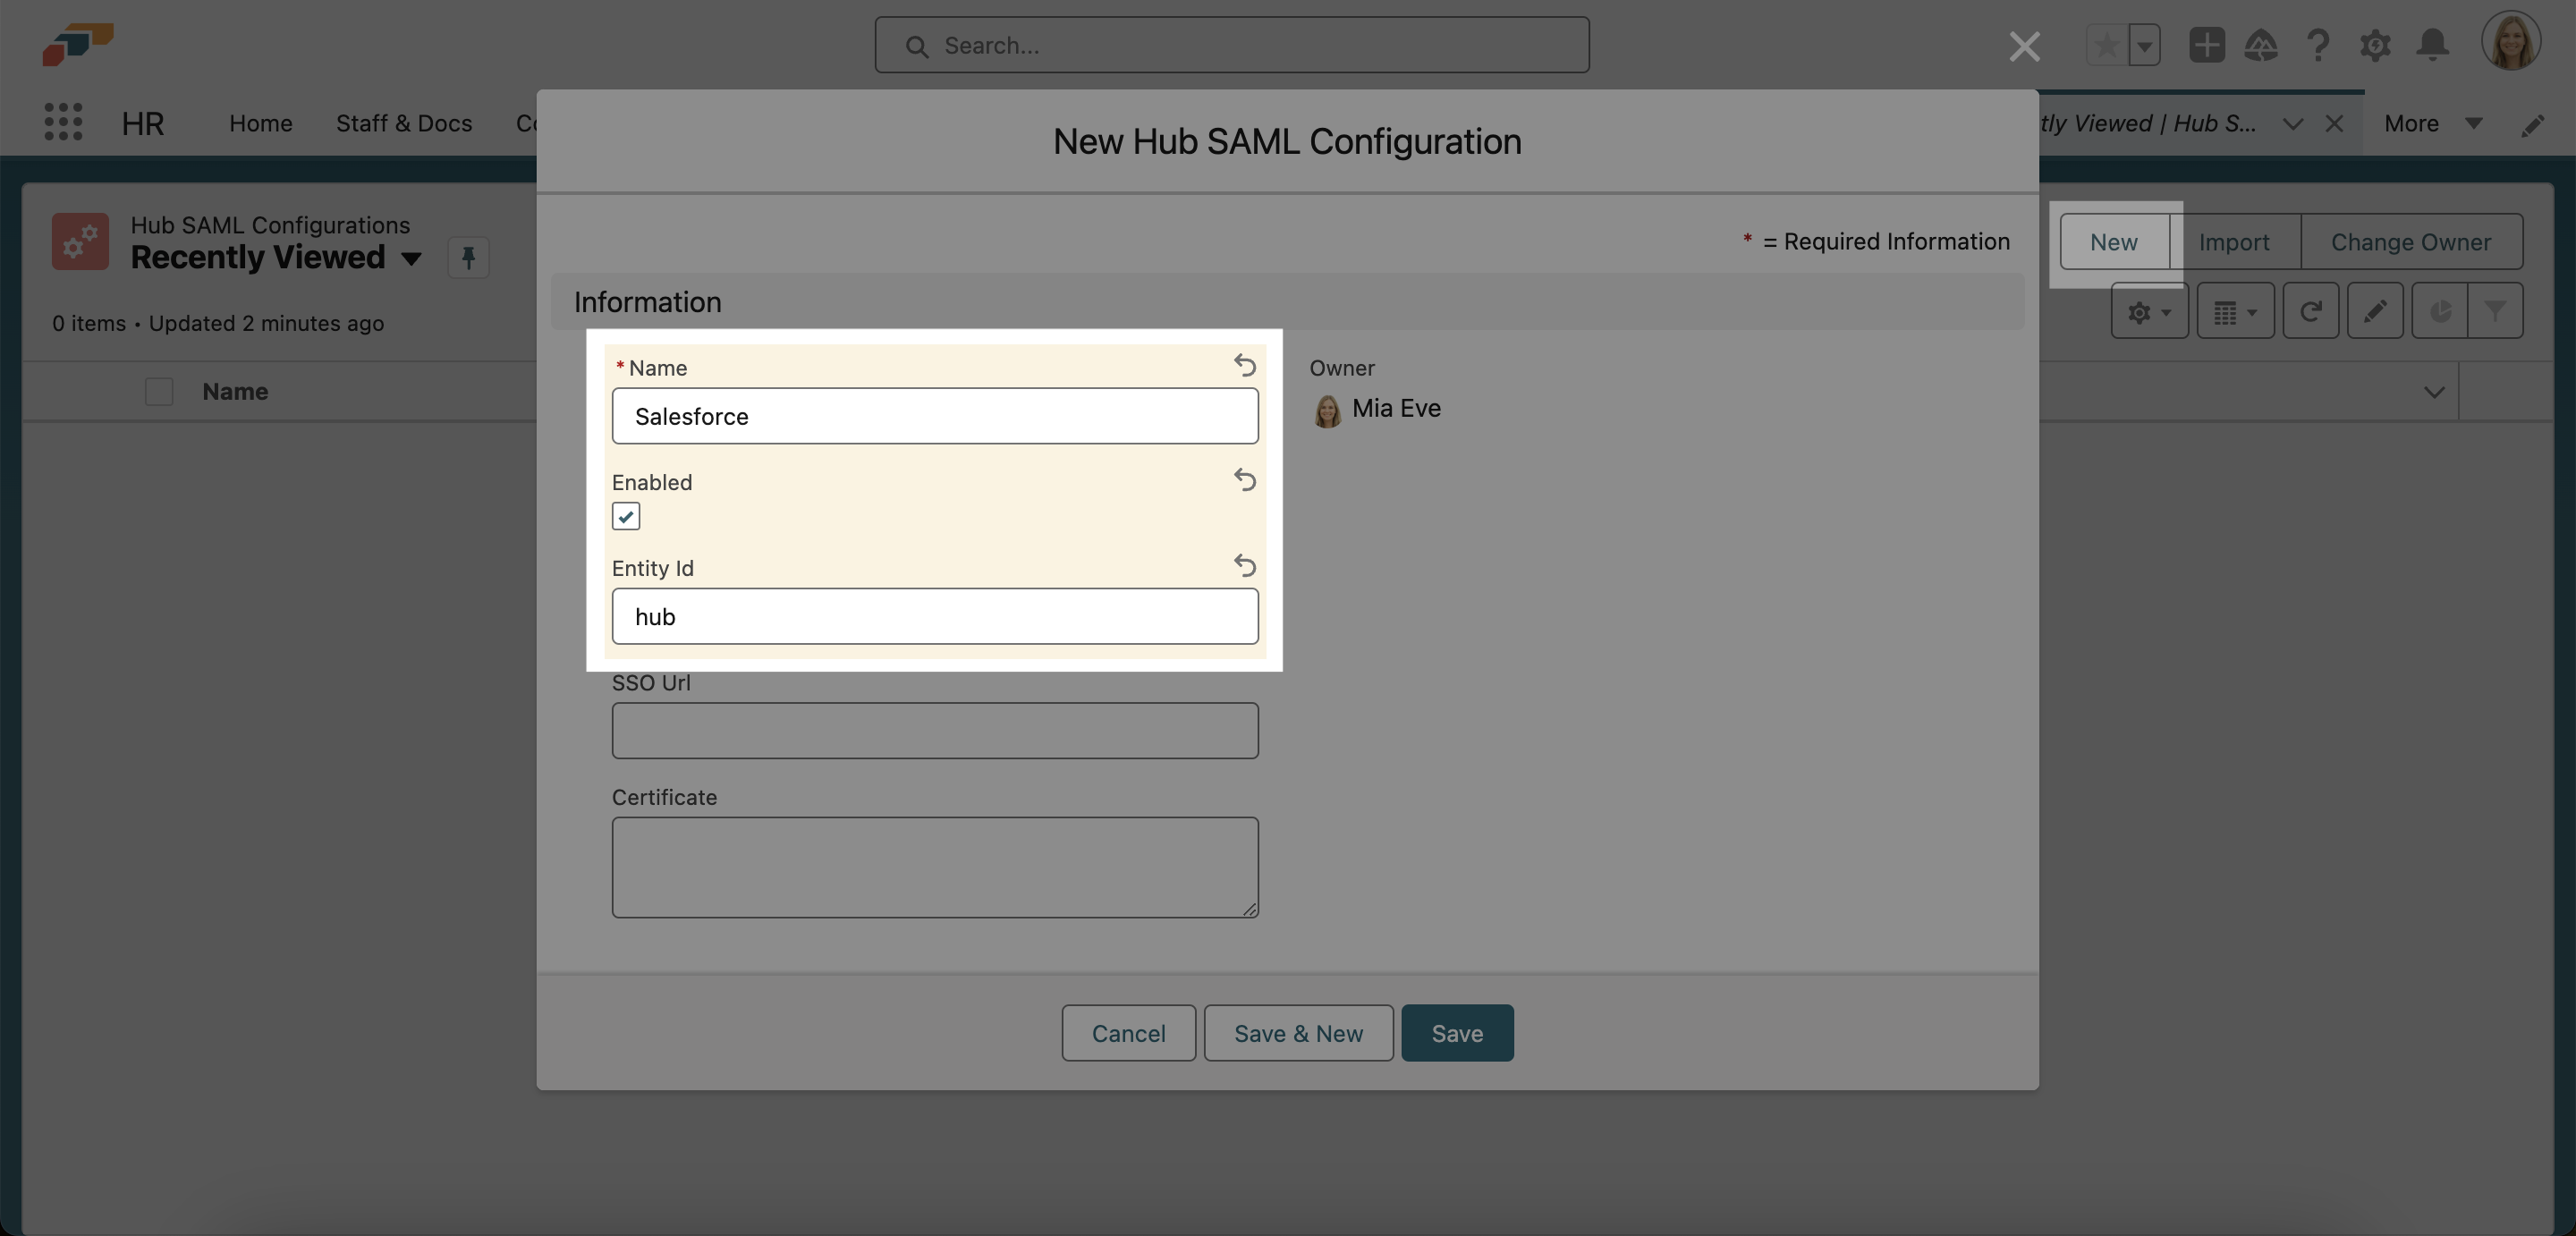
- Select New and fill in the fields.
a) Give your SAML configuration a name, e.g. Salesforce.
b) Check the Enabled checkbox.
c) Type in the Entity ID you defined in the App Manager (step 4 of Connect Employee Hub Login with Salesforce).
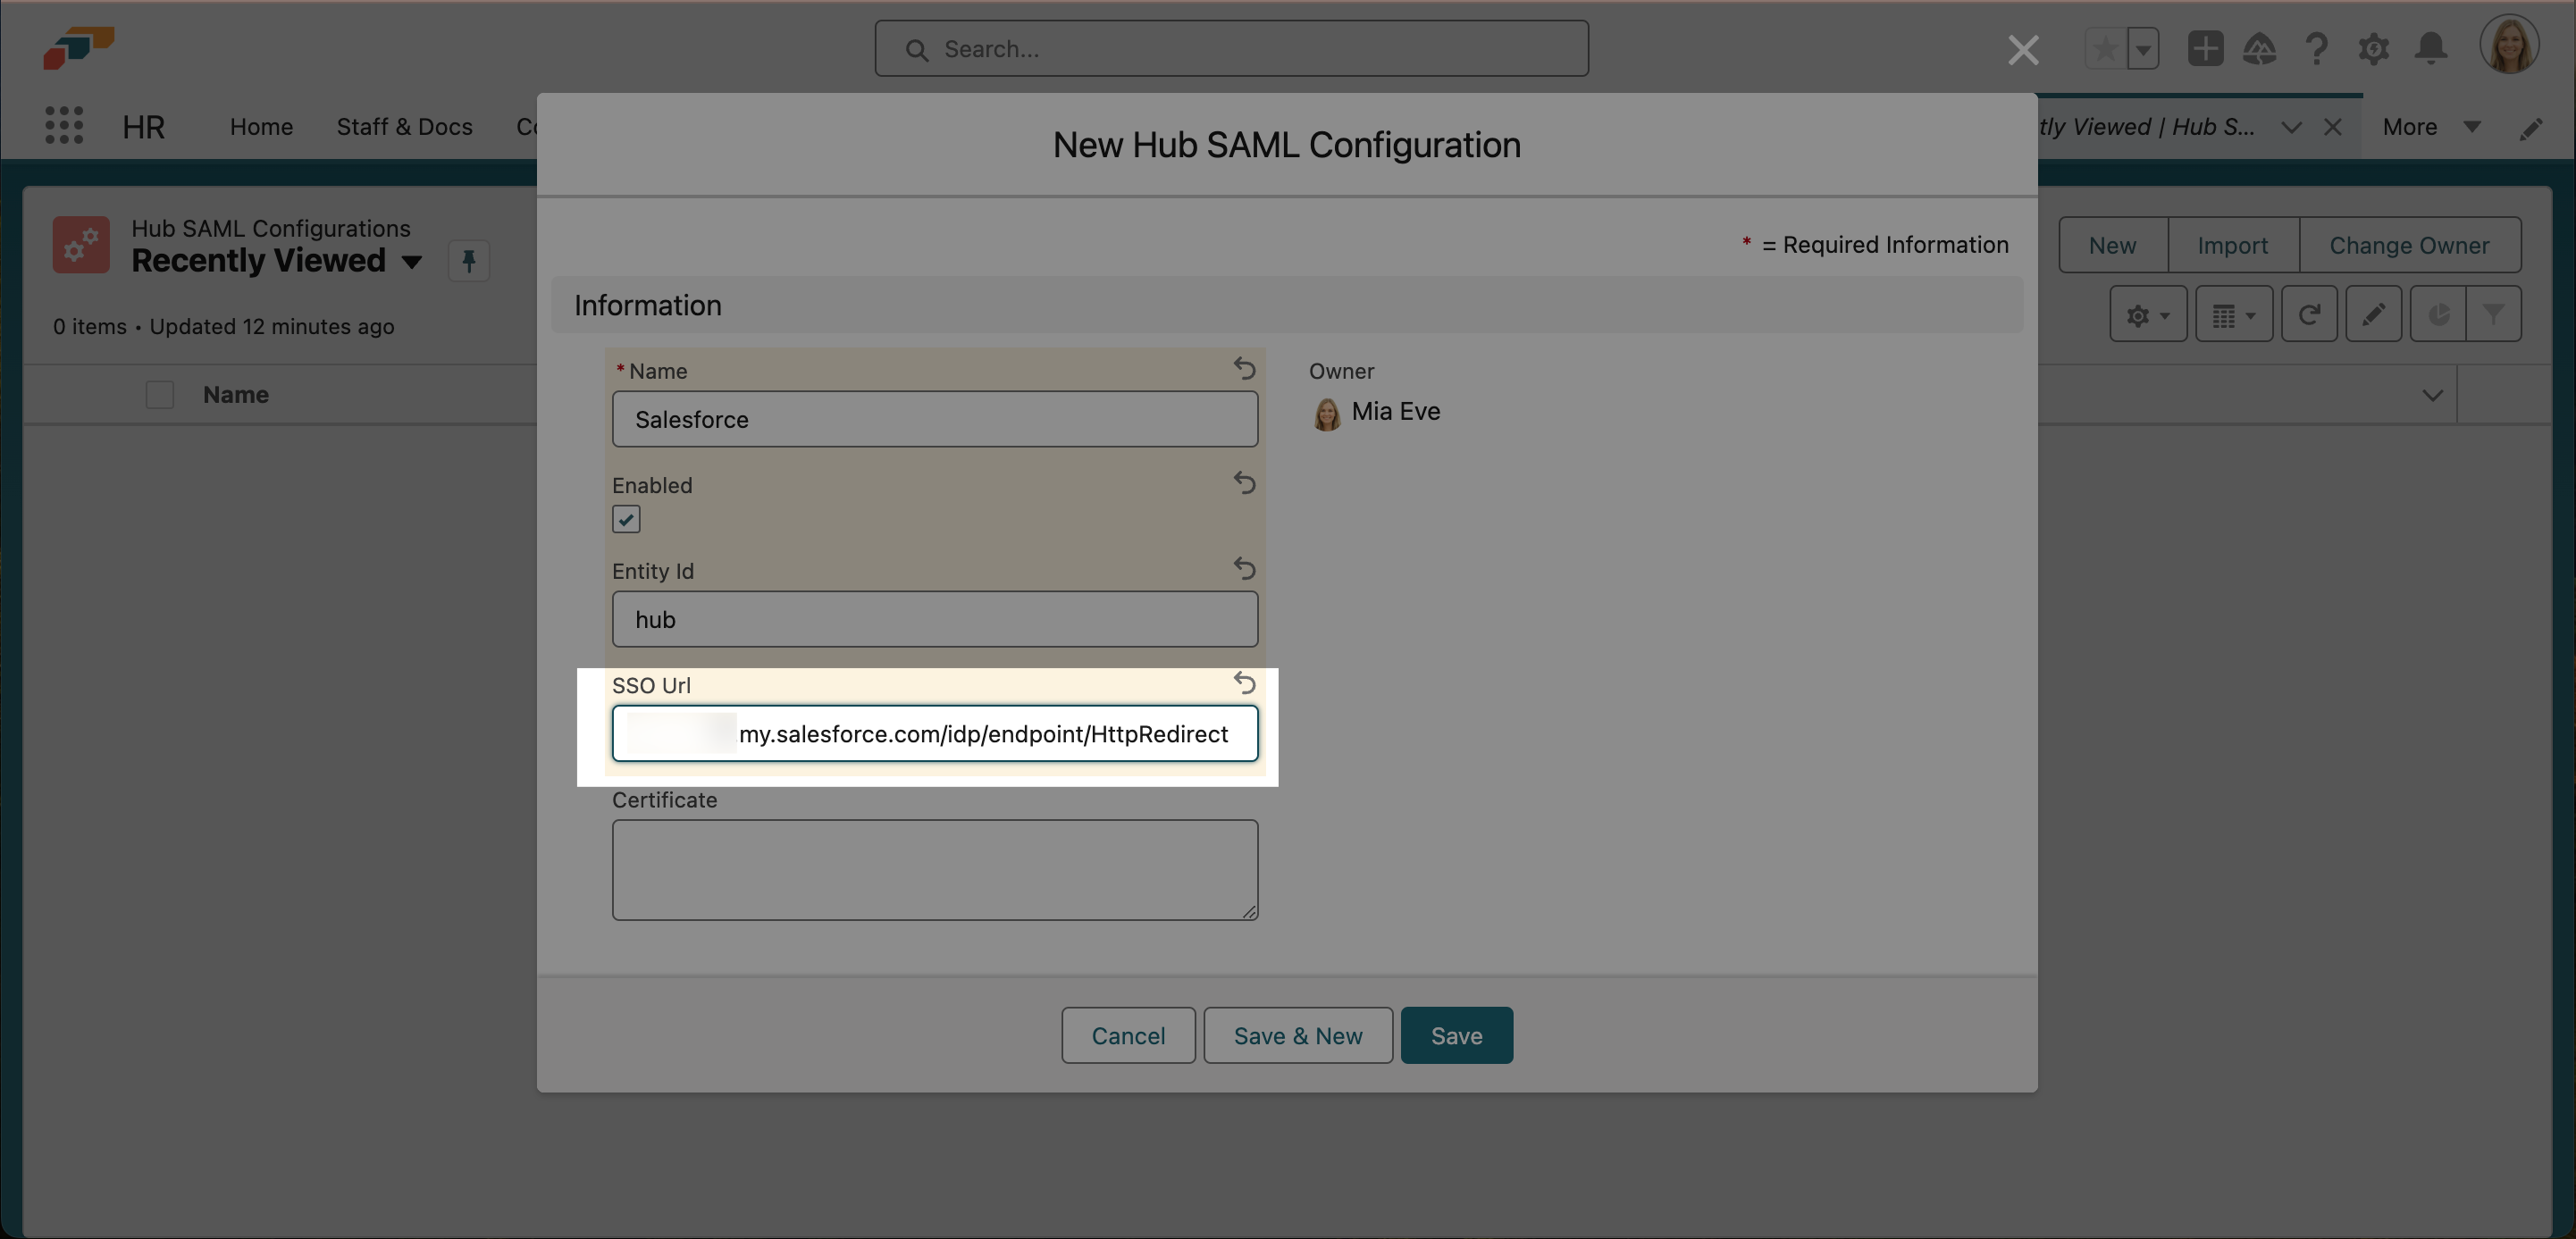
- Fill in the SSO URL.
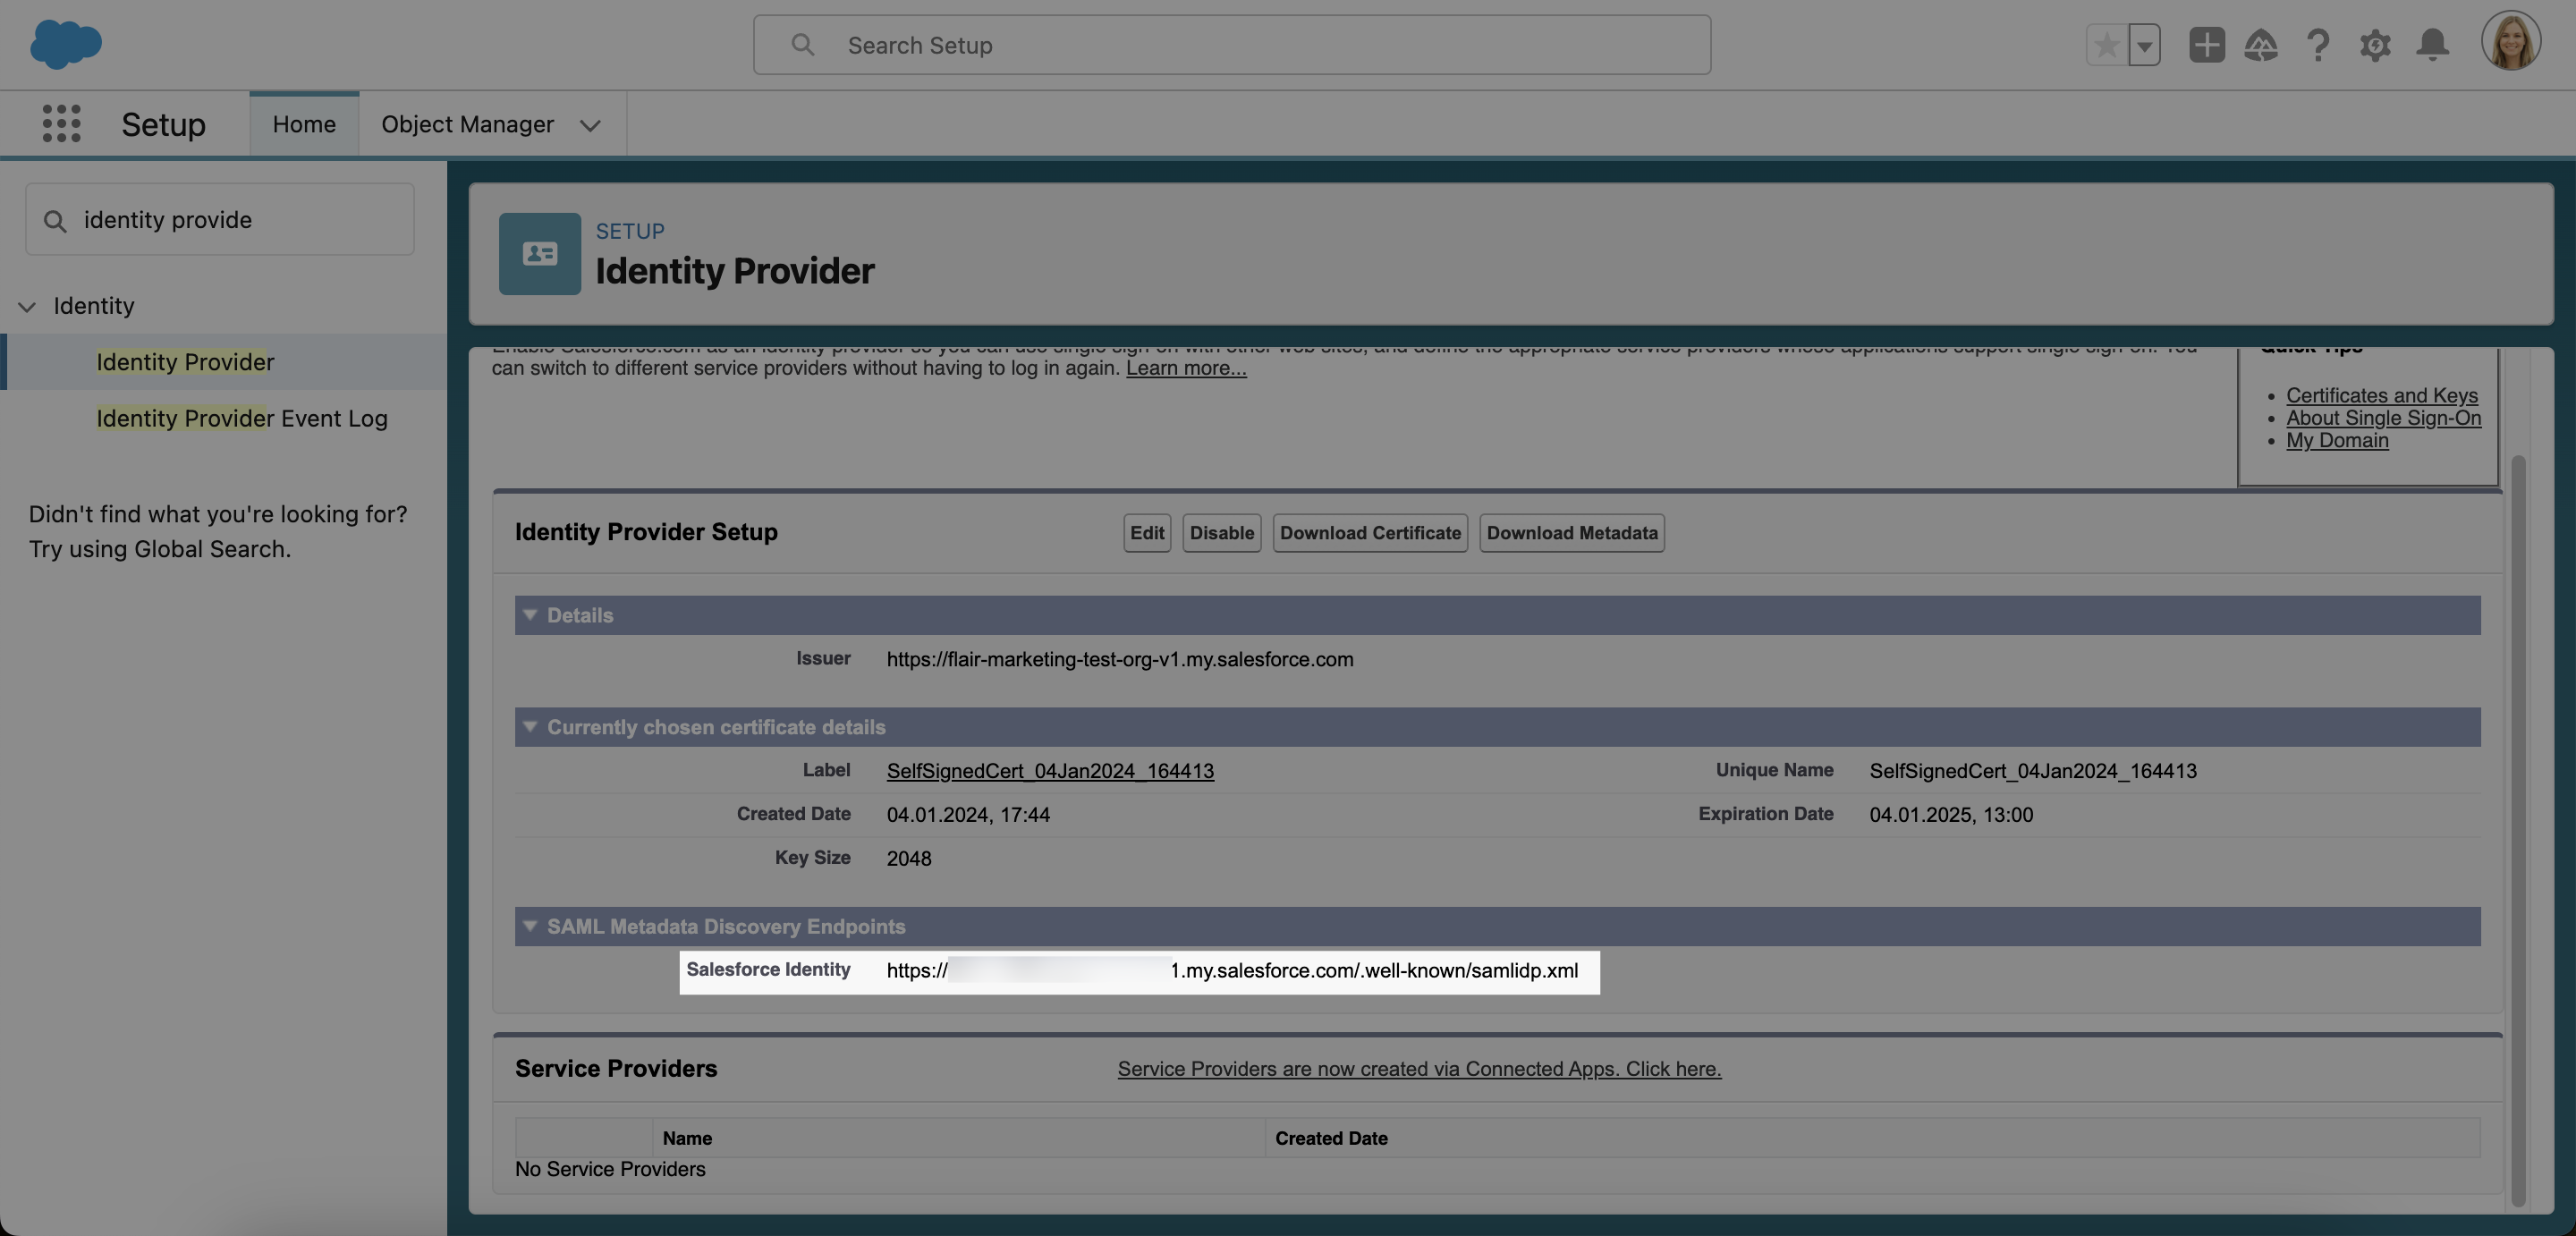
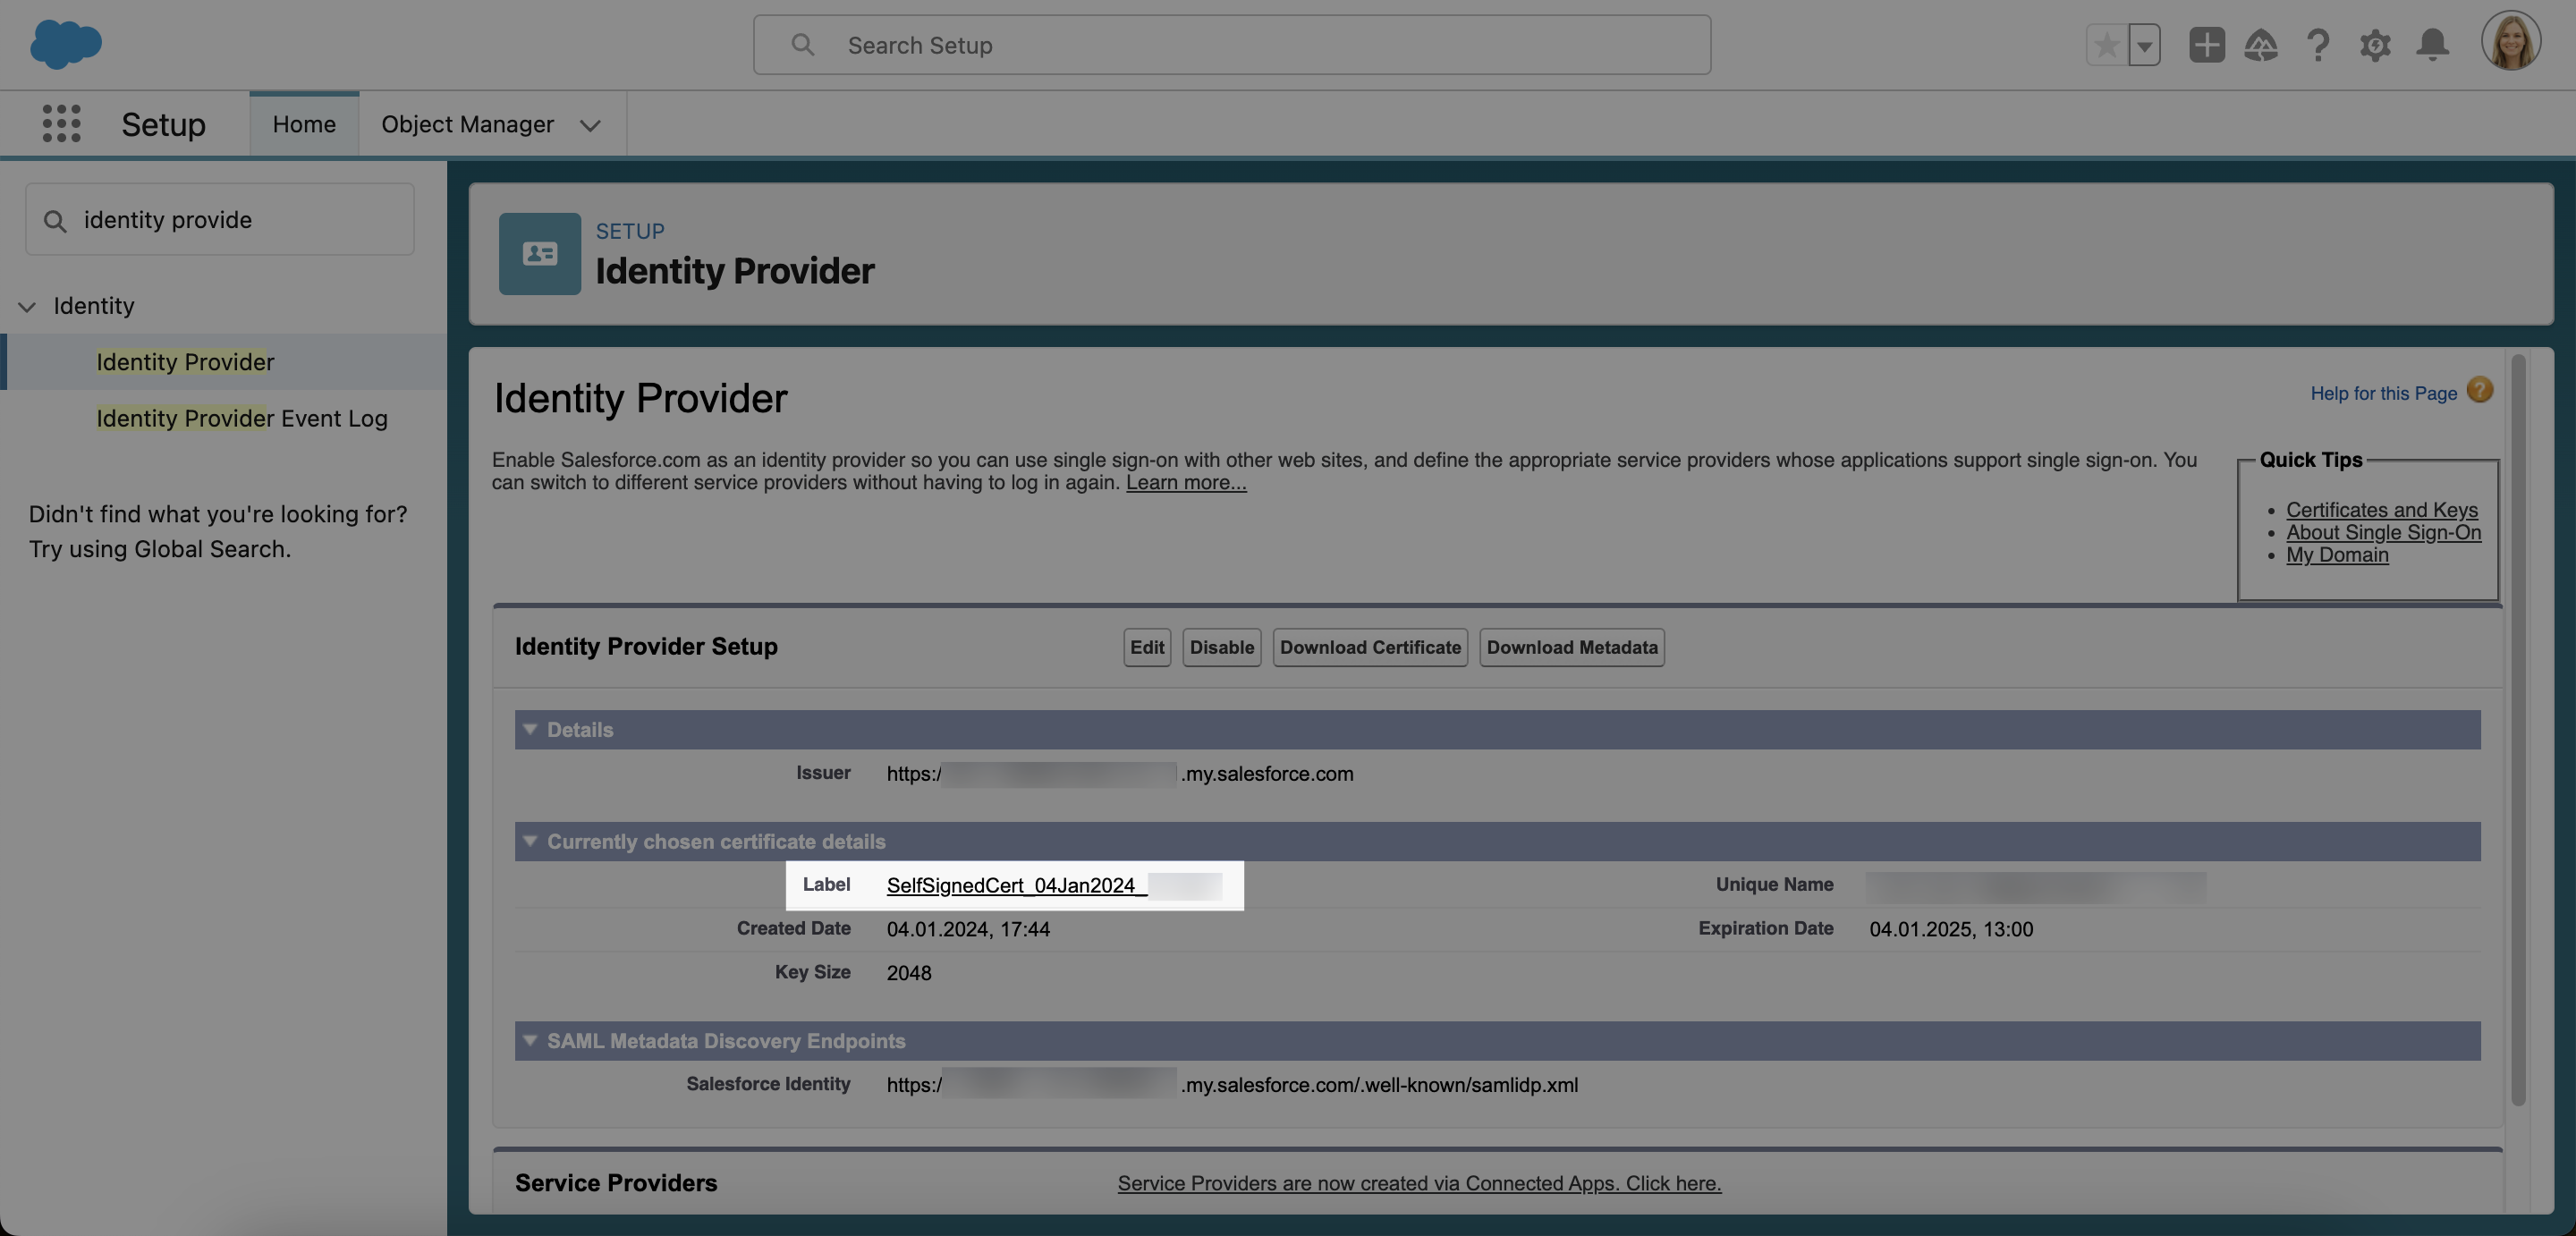
a) To find the SSO URL, go back to the Identity Provider page in Setup and copy the URL that appears next to Salesforce Identity.
b) Paste the URL into a browser window to open the XML file.
c) In the XML file, find the last URL ending in /HttpRedirect. This URL is your SSO URL. Copy it and paste it into the SSO URL field in your Hub SAML configuration.
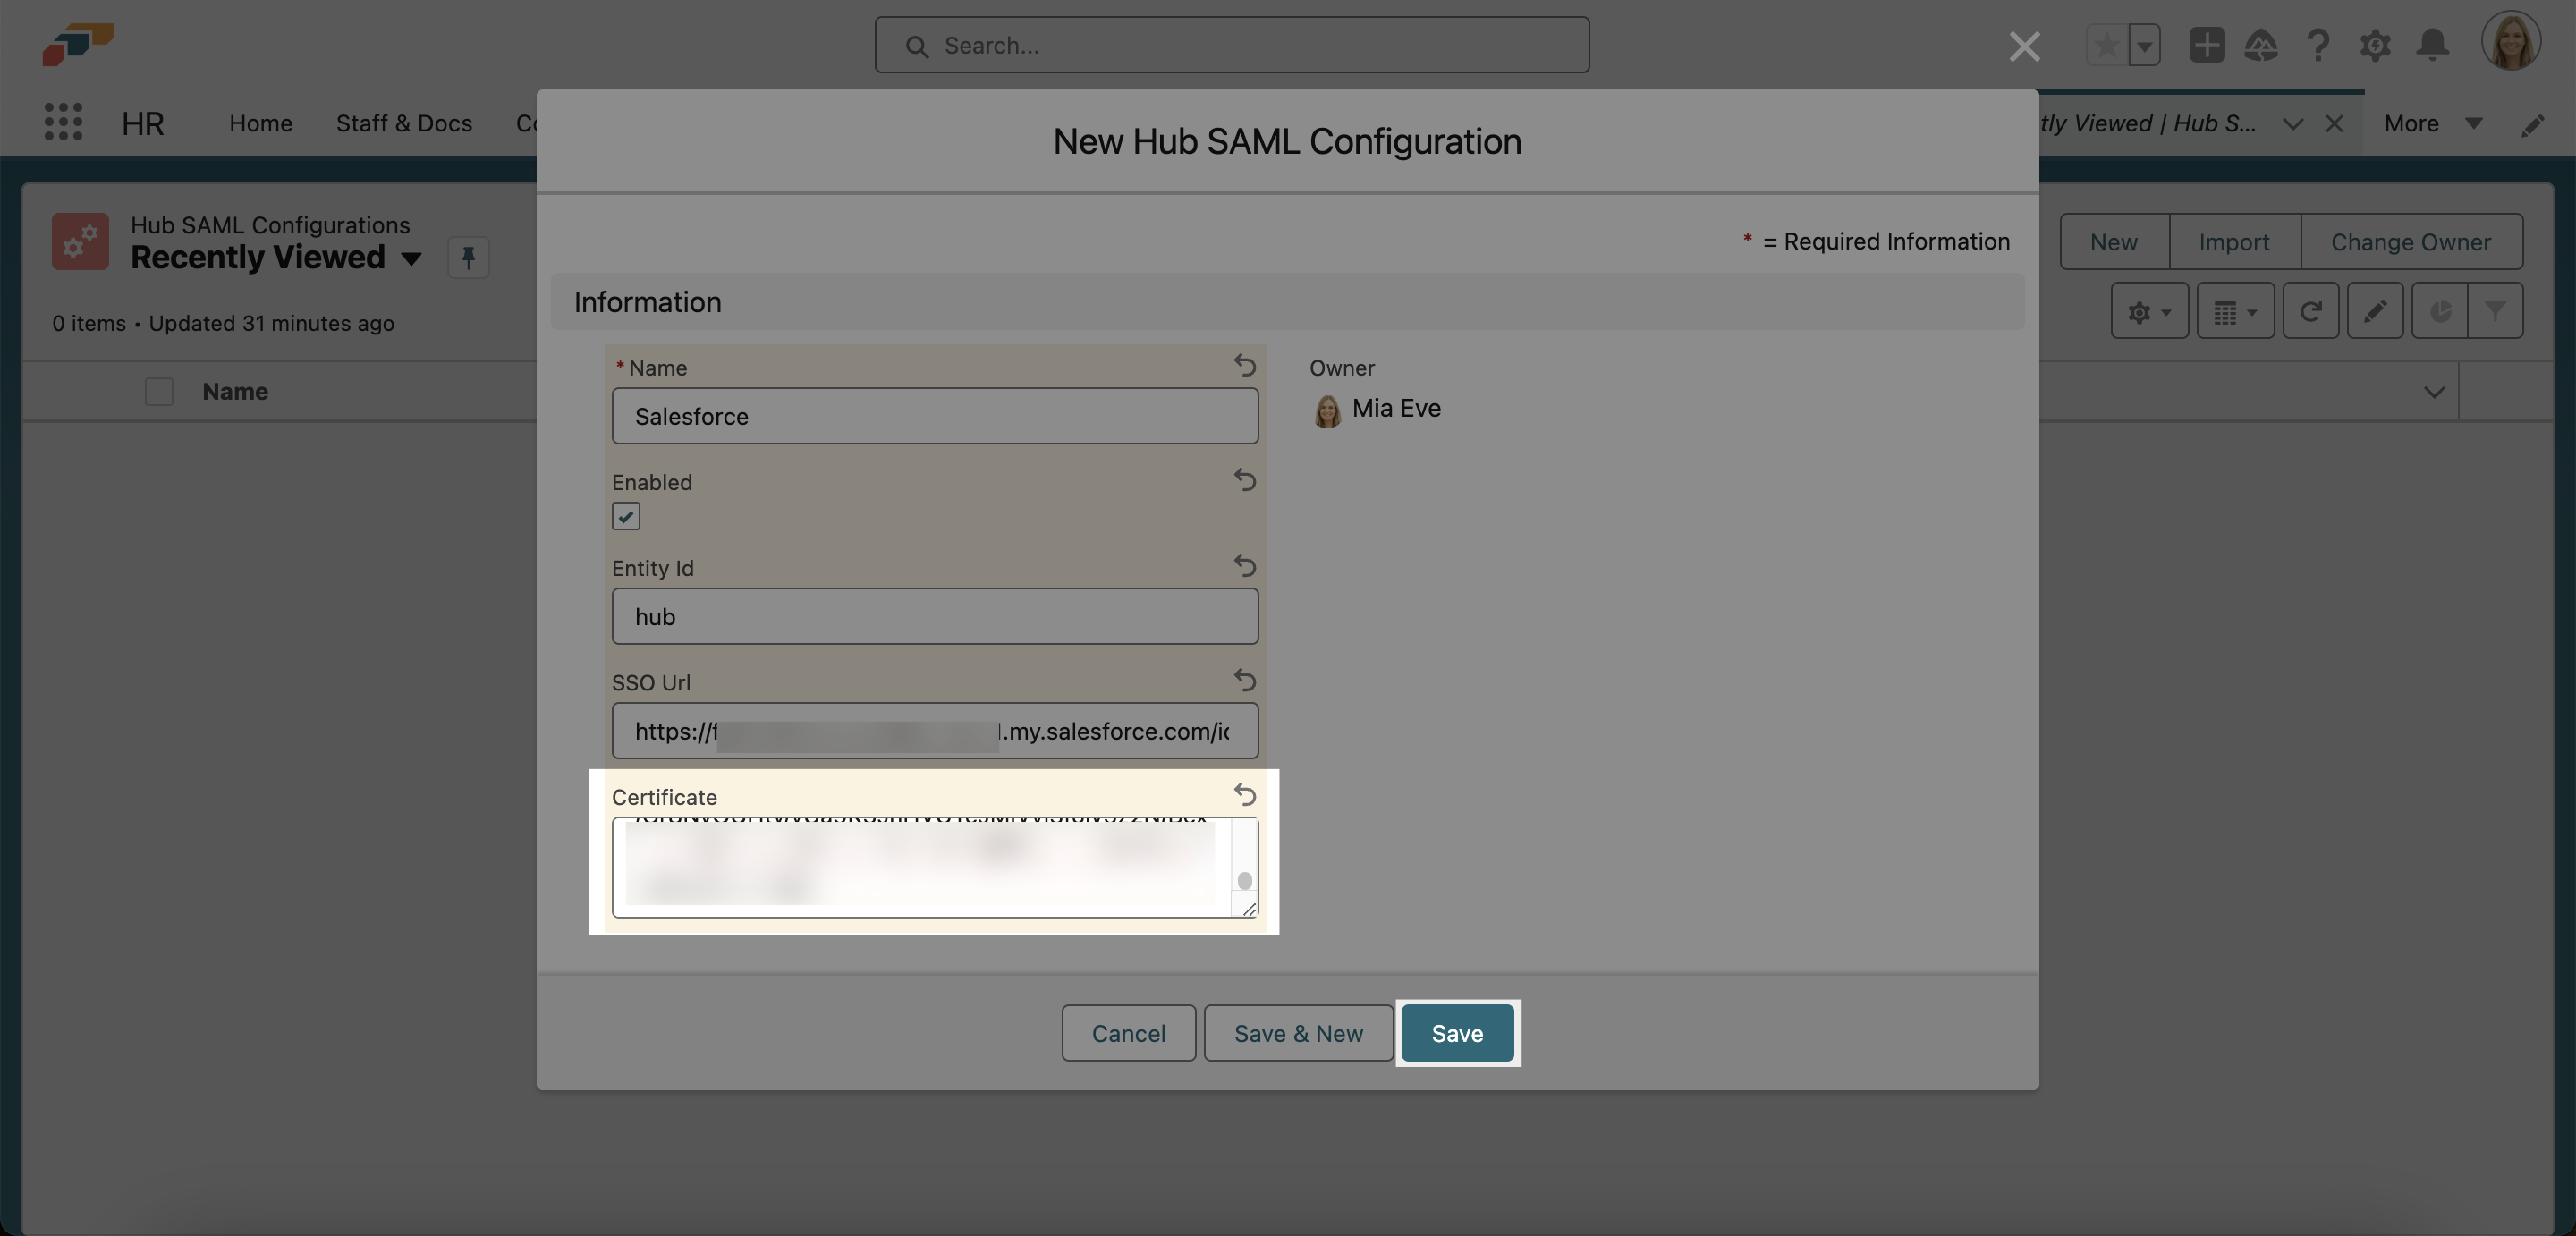
- Fill in the Certificate field.
a) To find your certificate, return to the Identity Provider page and click the link next to Label.
b) Click Download Certificate. When the .crt file has been downloaded, open it in a code editor and copy the text that appears.
c) Go back to the flair HR app and paste the certificate code into the Certificate field. Then click save.

Allow Users To Use SAML
The final step is to give users permission to use SAML to sign in.
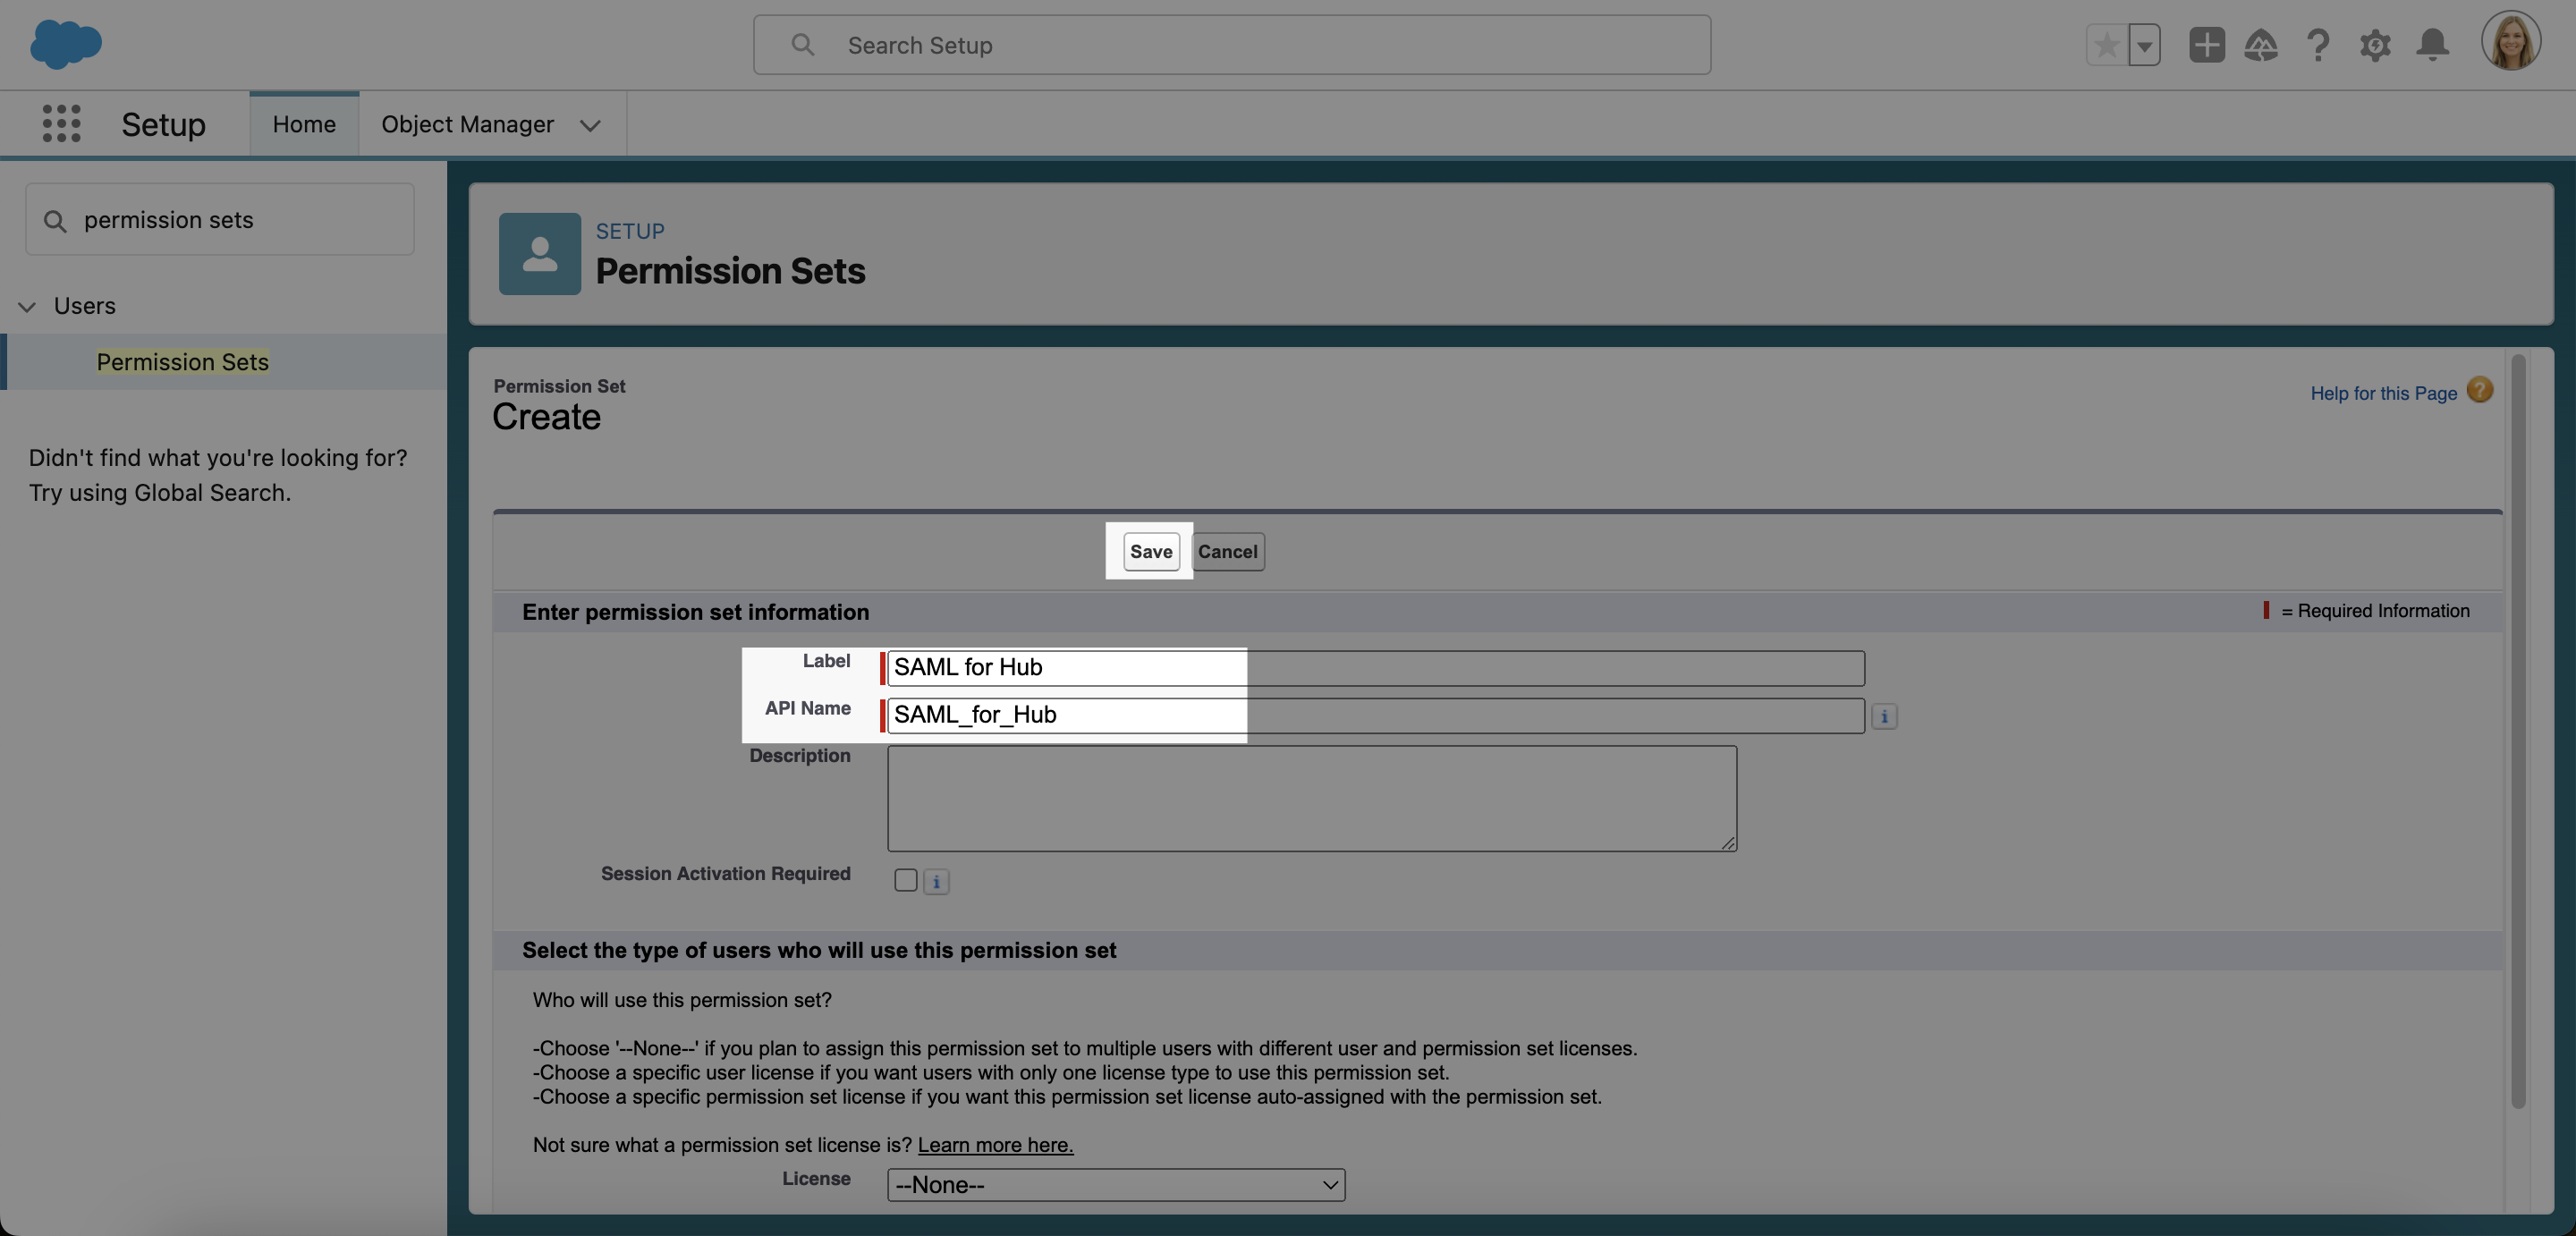
- Go to Salesforce Setups and open the Permission Sets page. Click New to create a new permission set.
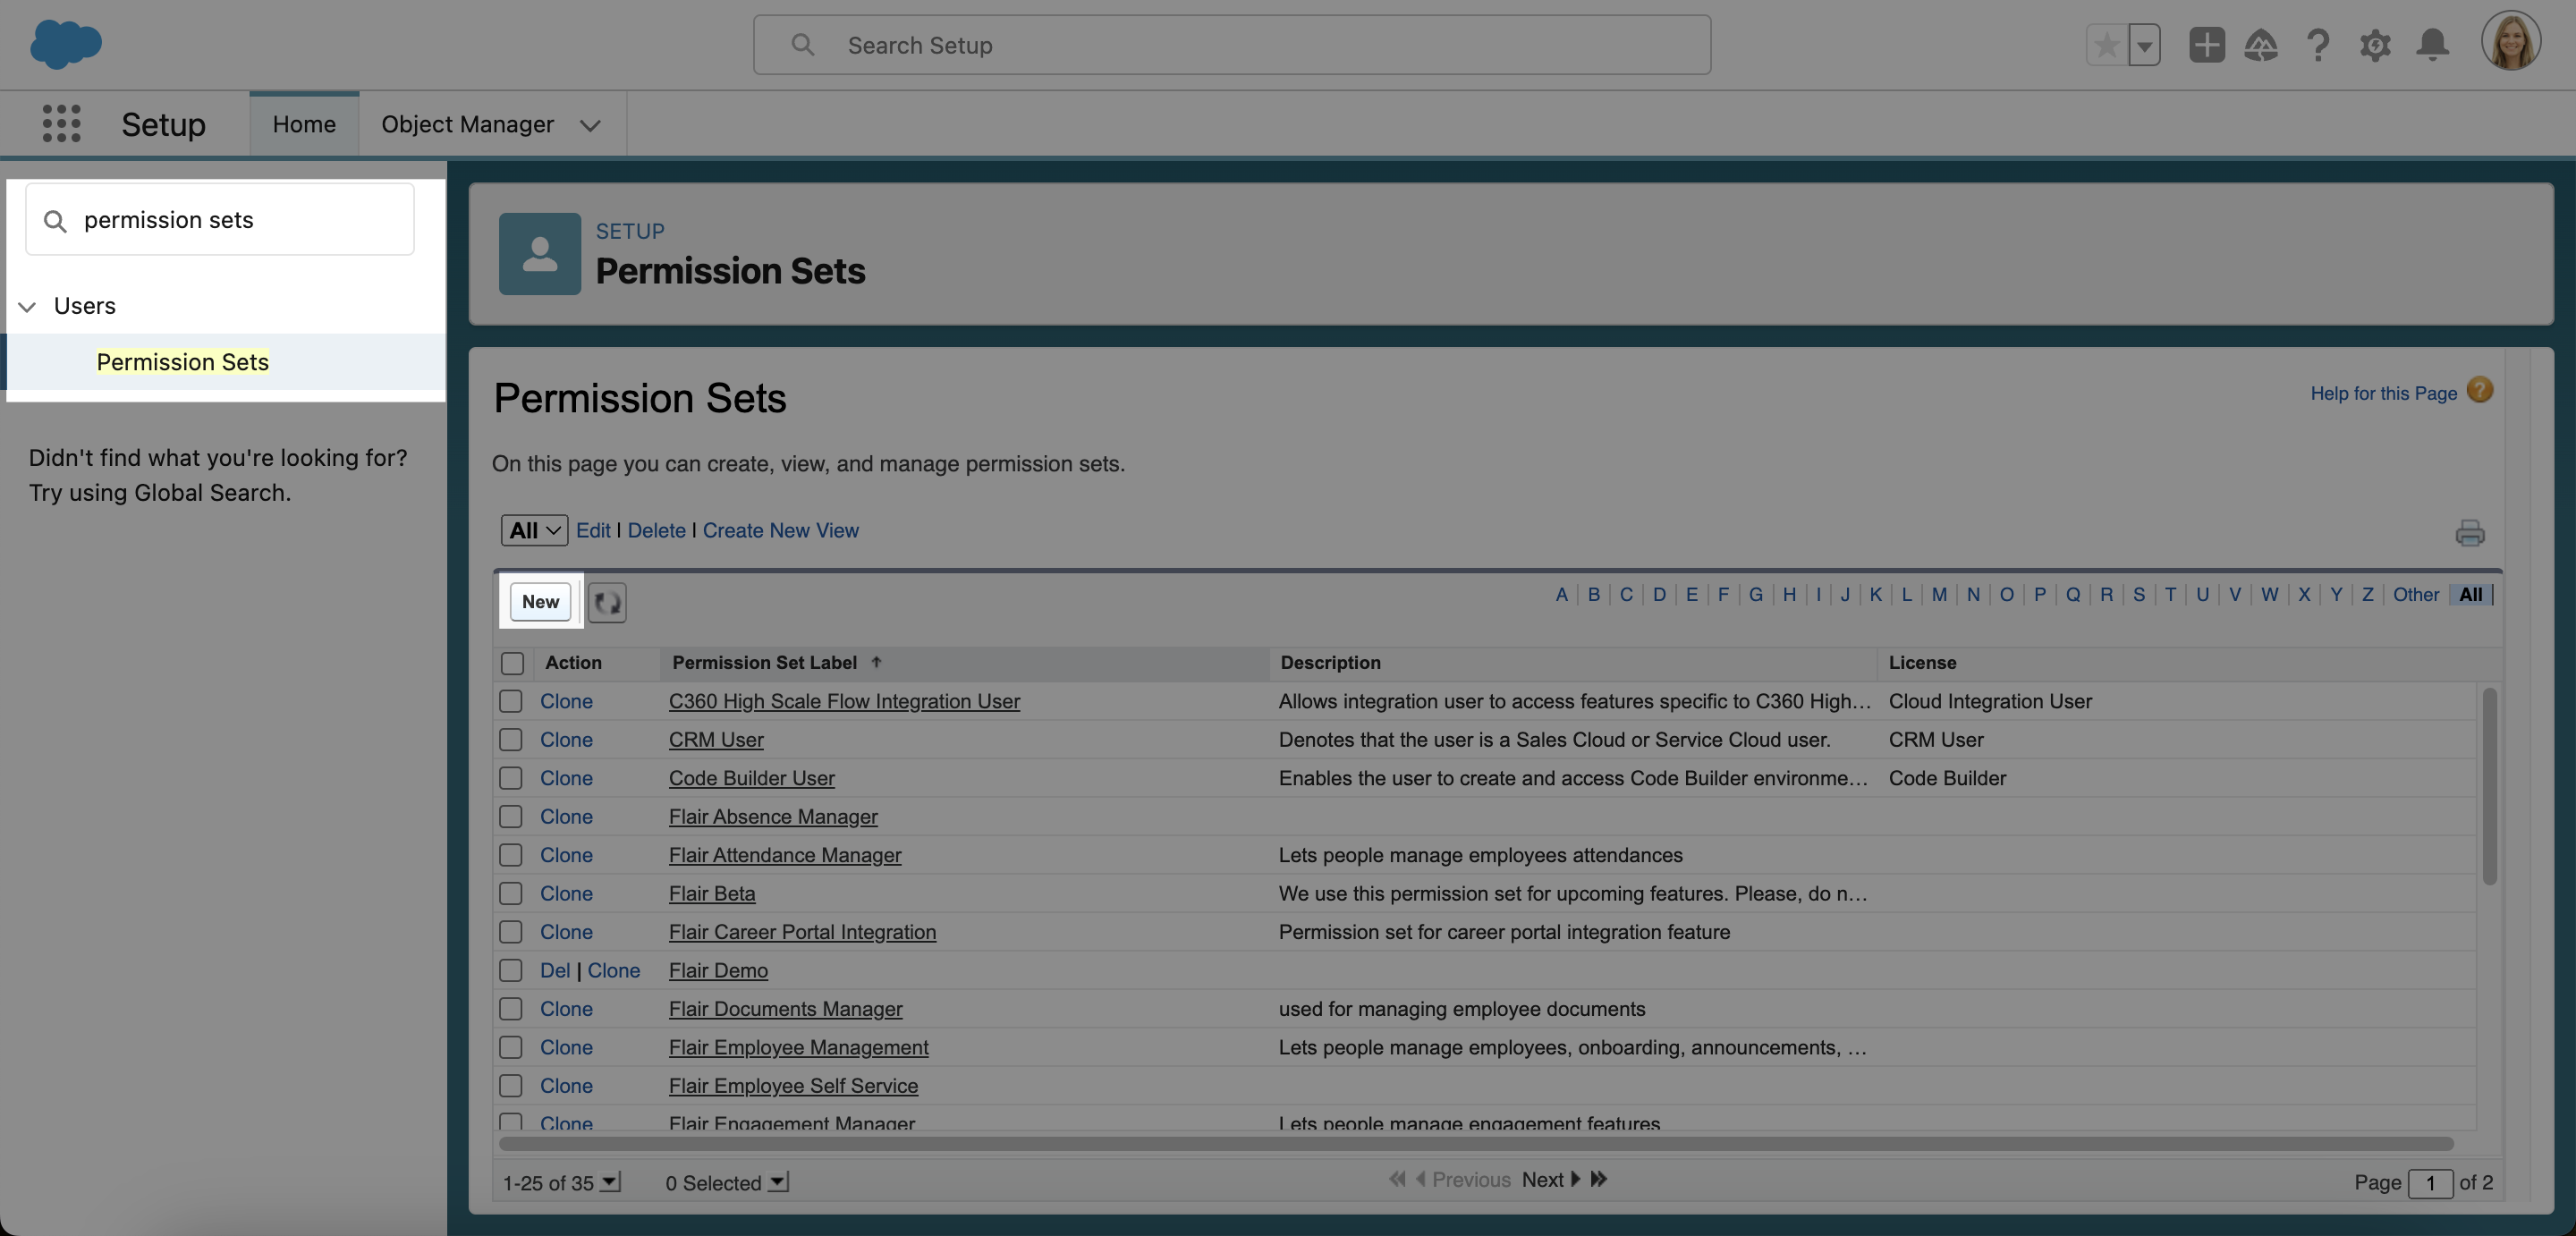
- Give your permission set a Label, e.g. SAML for Hub. The API Name will be auto-filled. Add a Description if you would like, and then click Save.
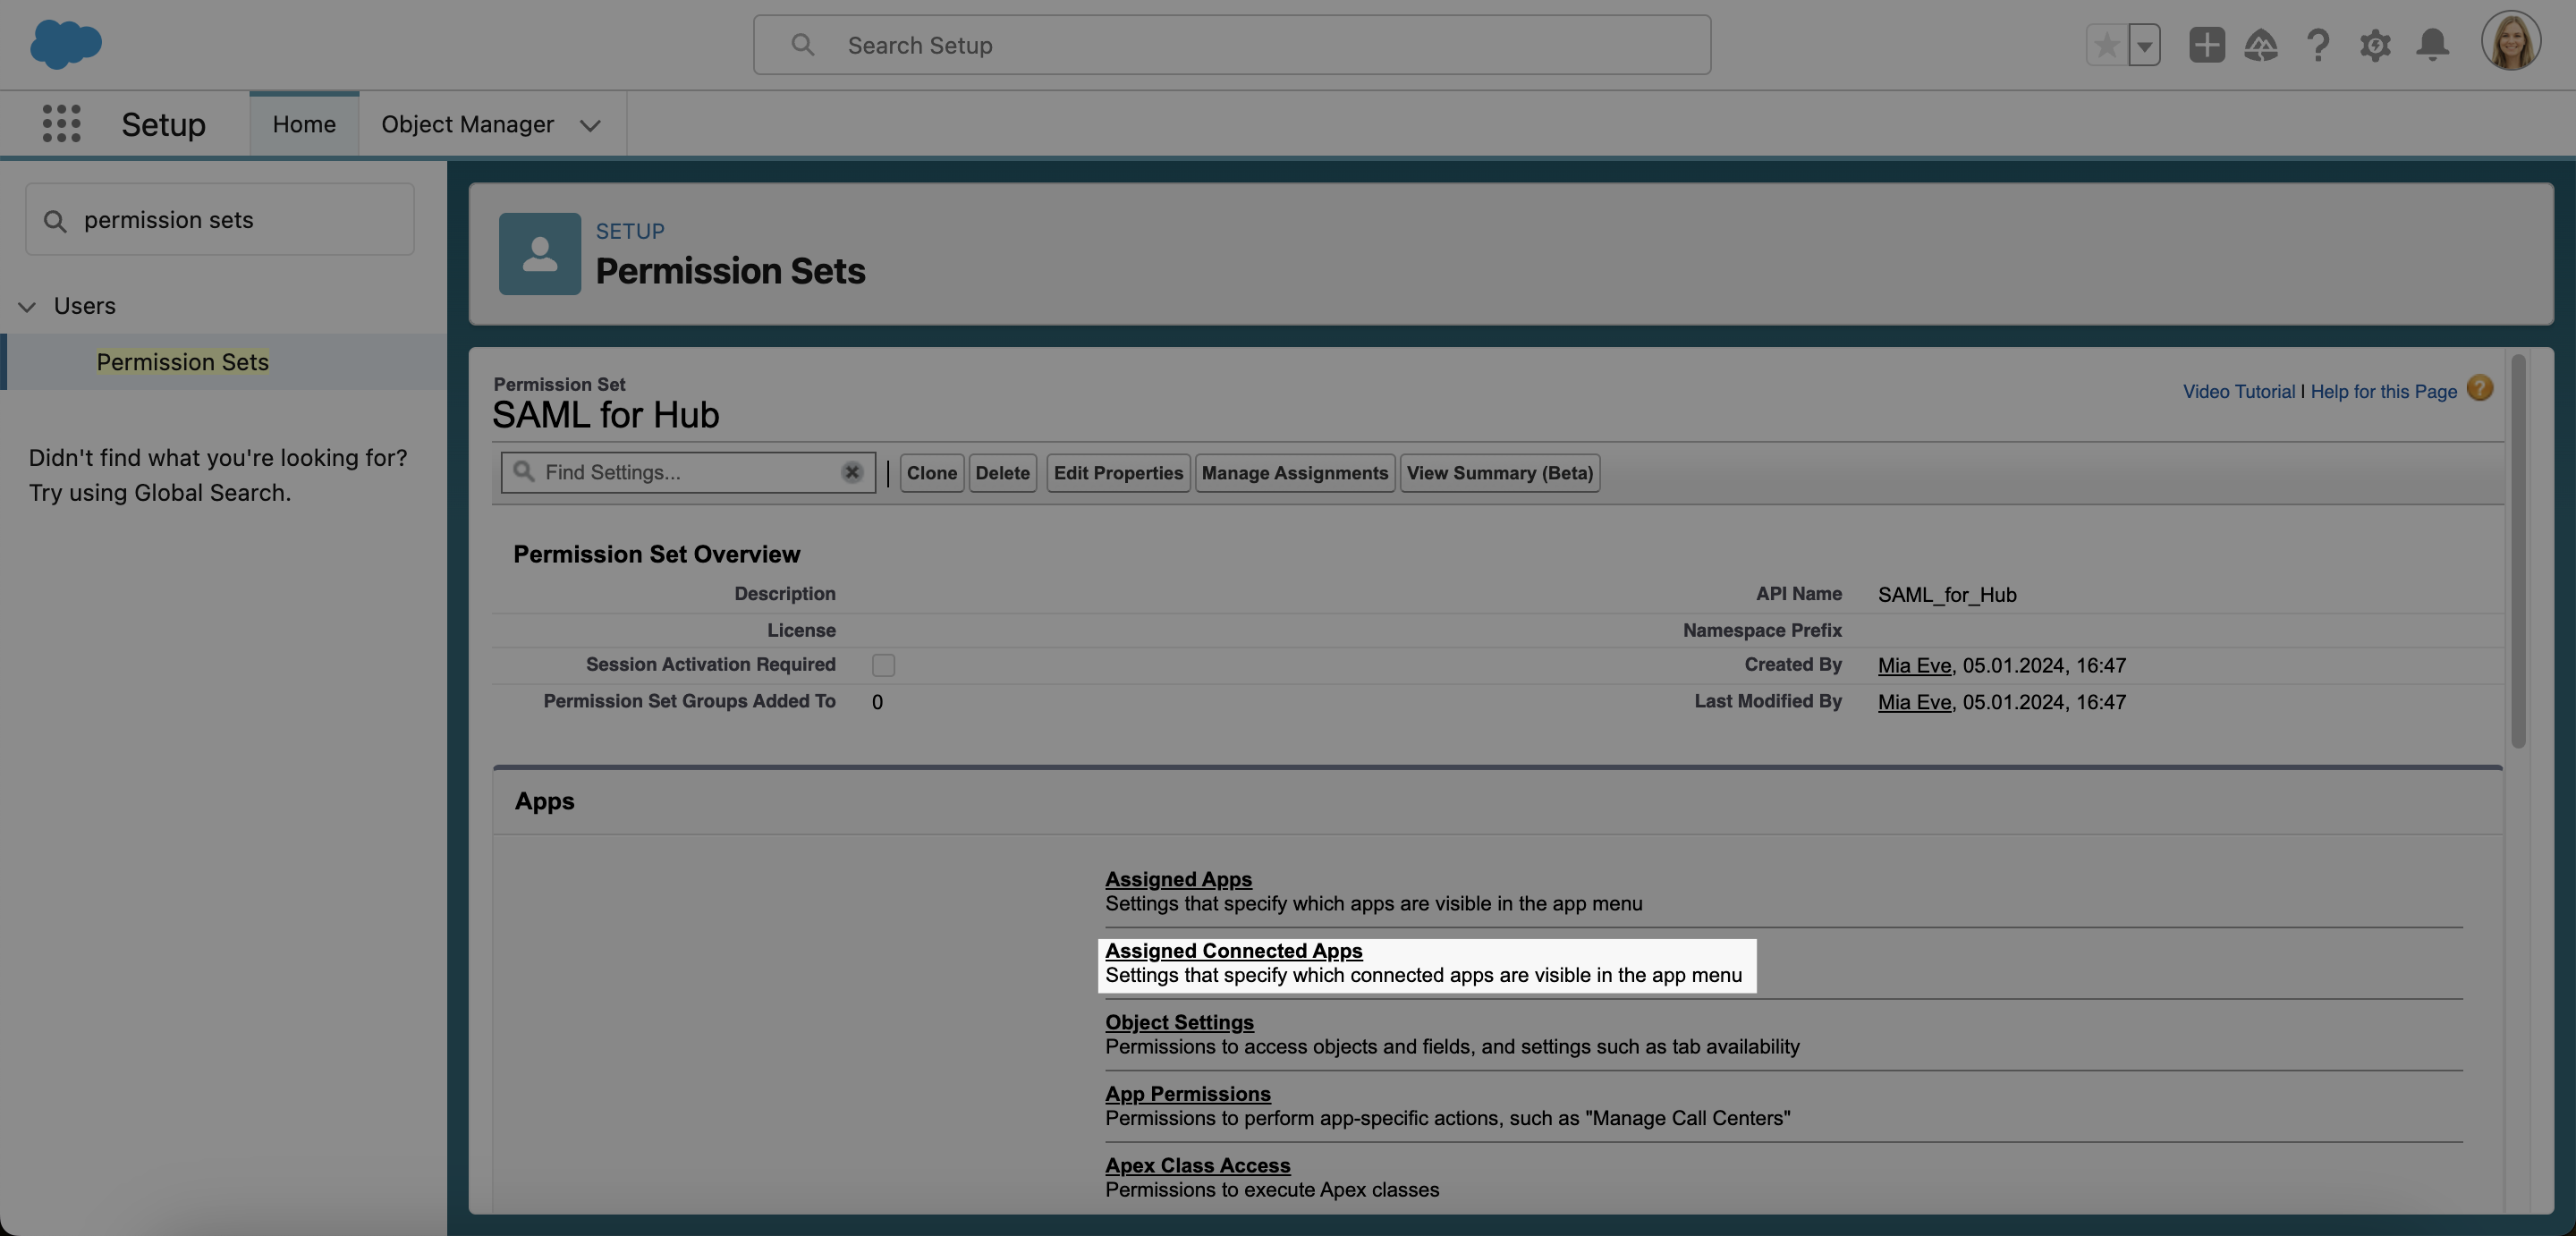
- With your new permission set open, scroll down to Apps and select Assigned Connected Apps.
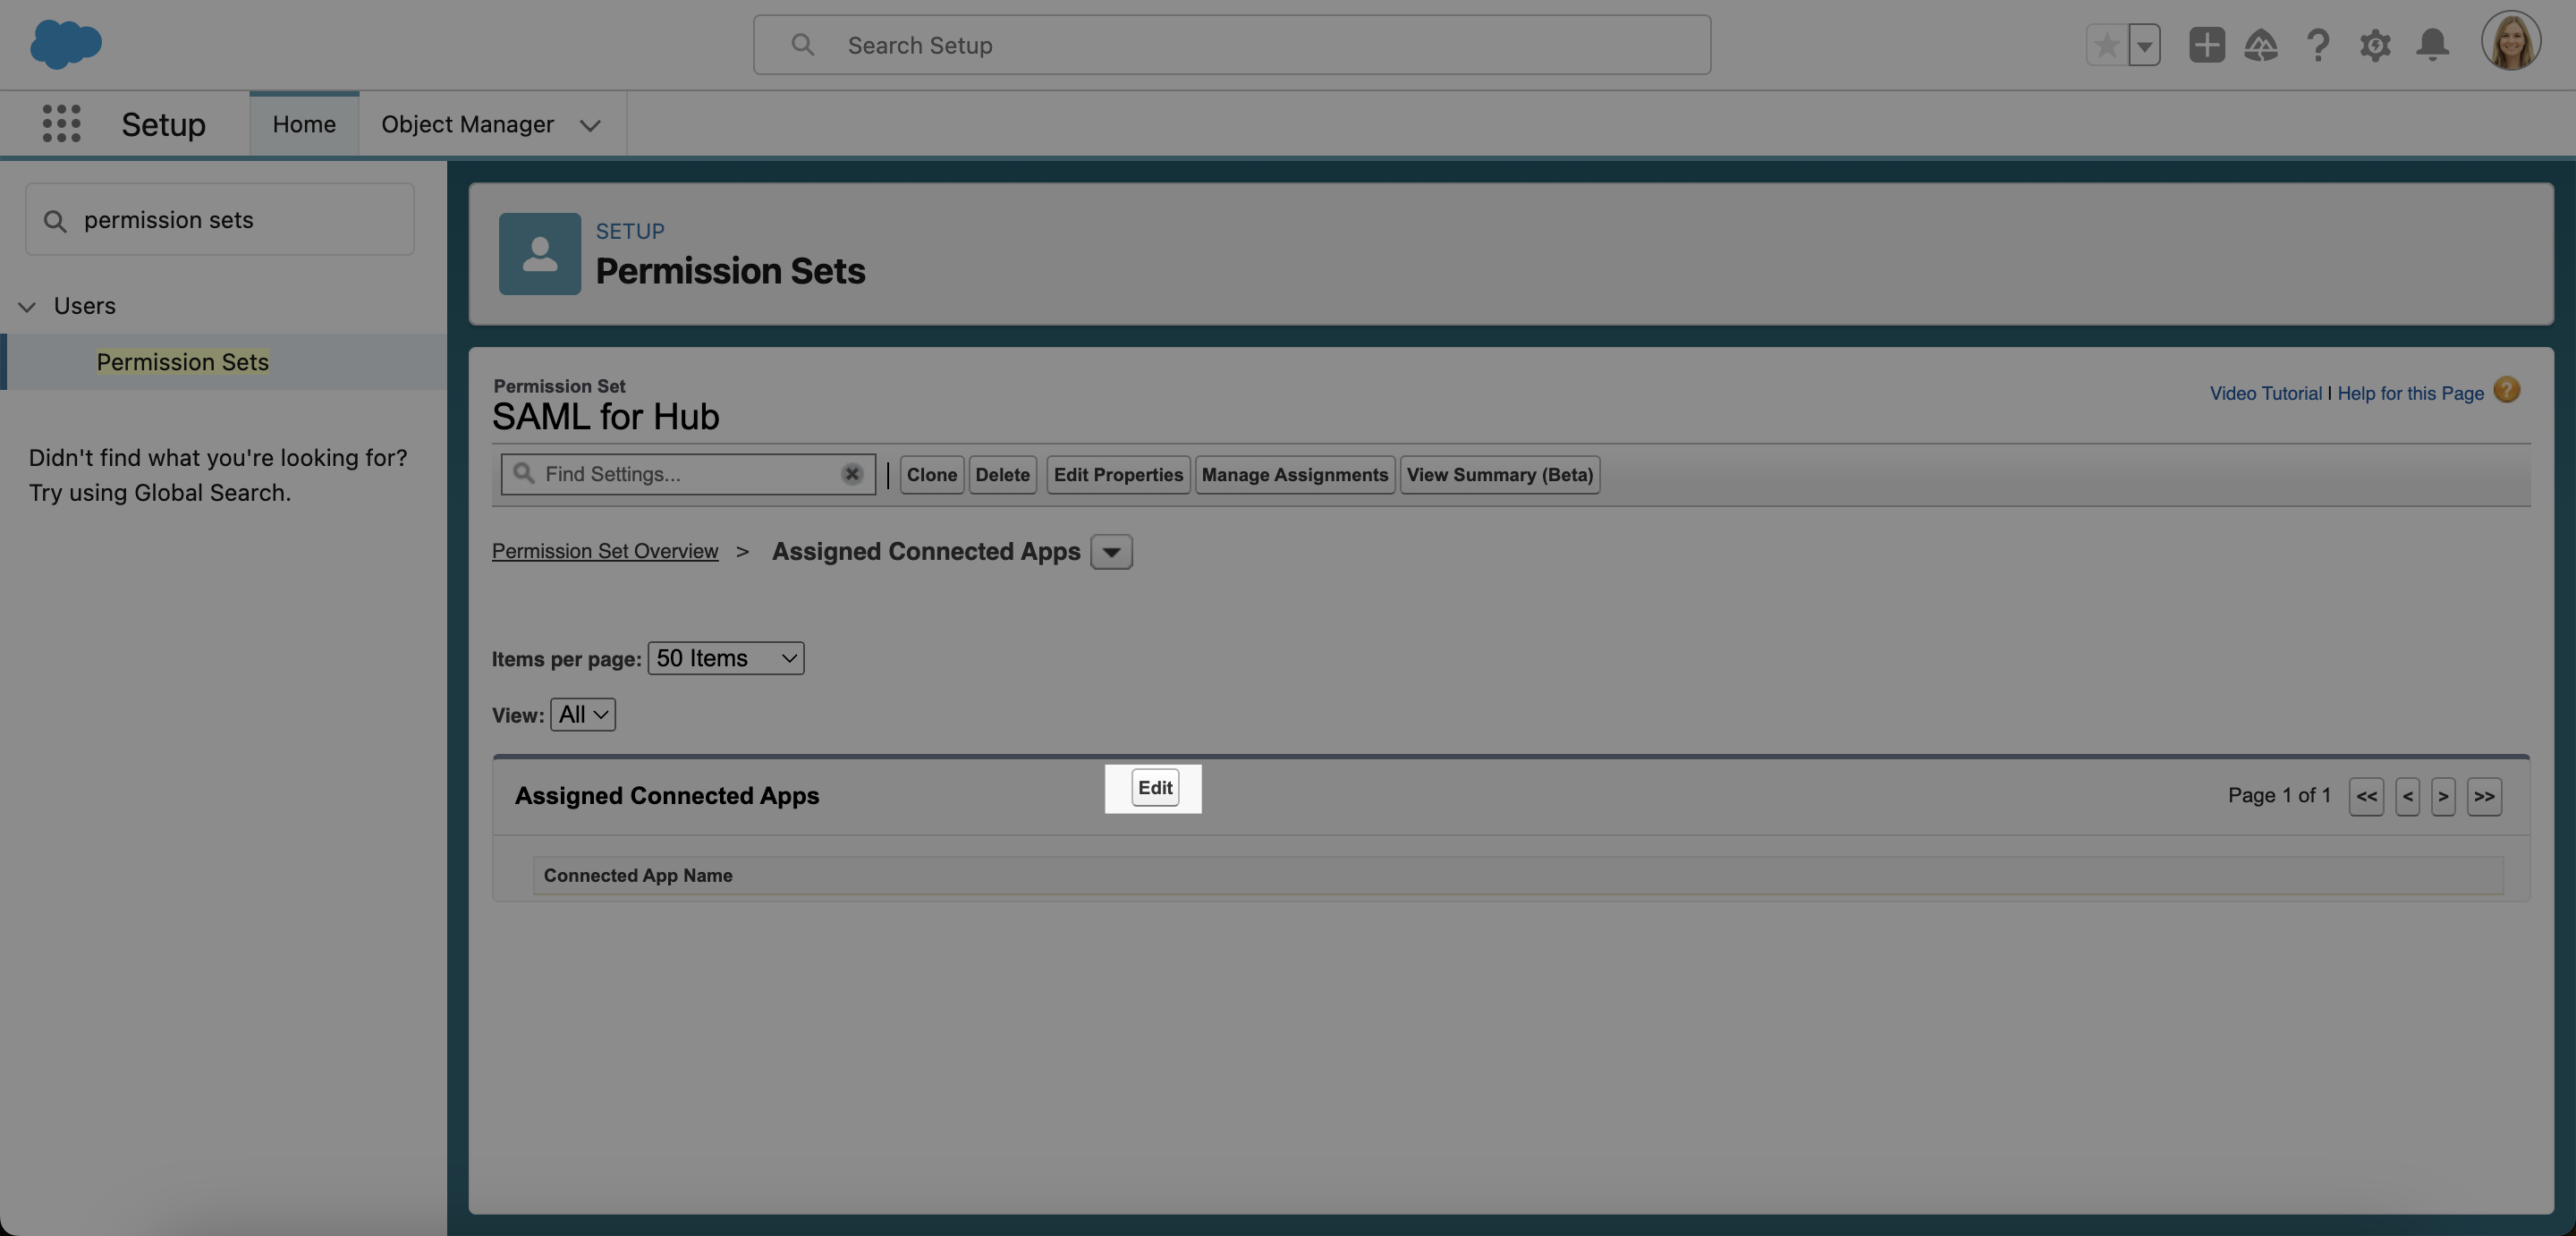
- Click Edit.
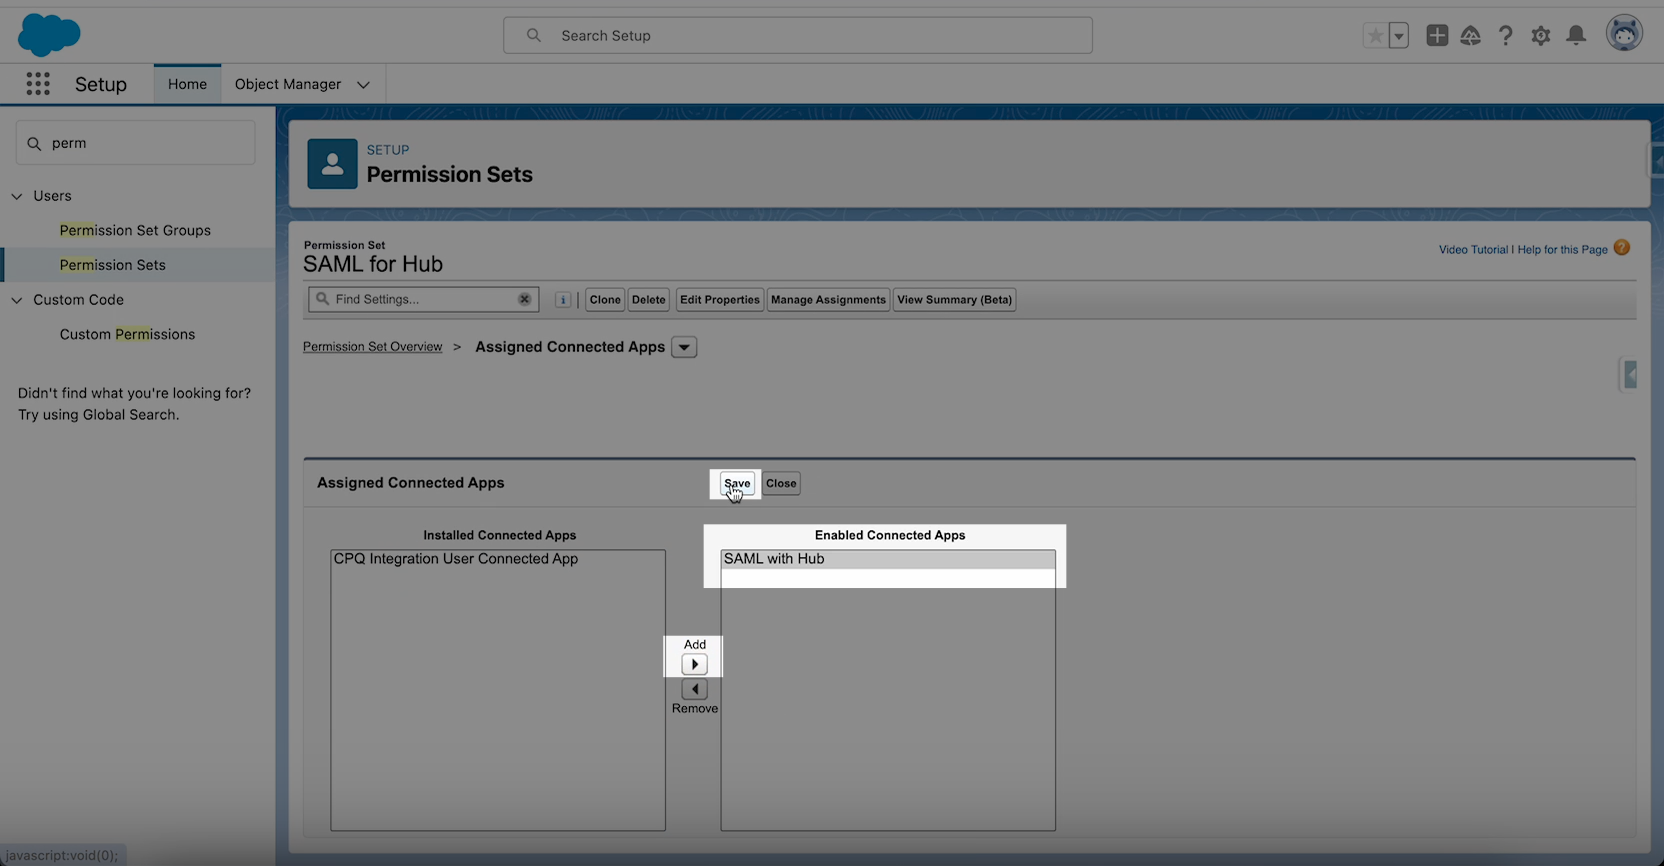
- Add the SAML app you created earlier to the list of Enabled Connected Apps. Then click Save.
- Type Users into the search bar and select the Users page. Now click on the user you wish to assign SAML access.

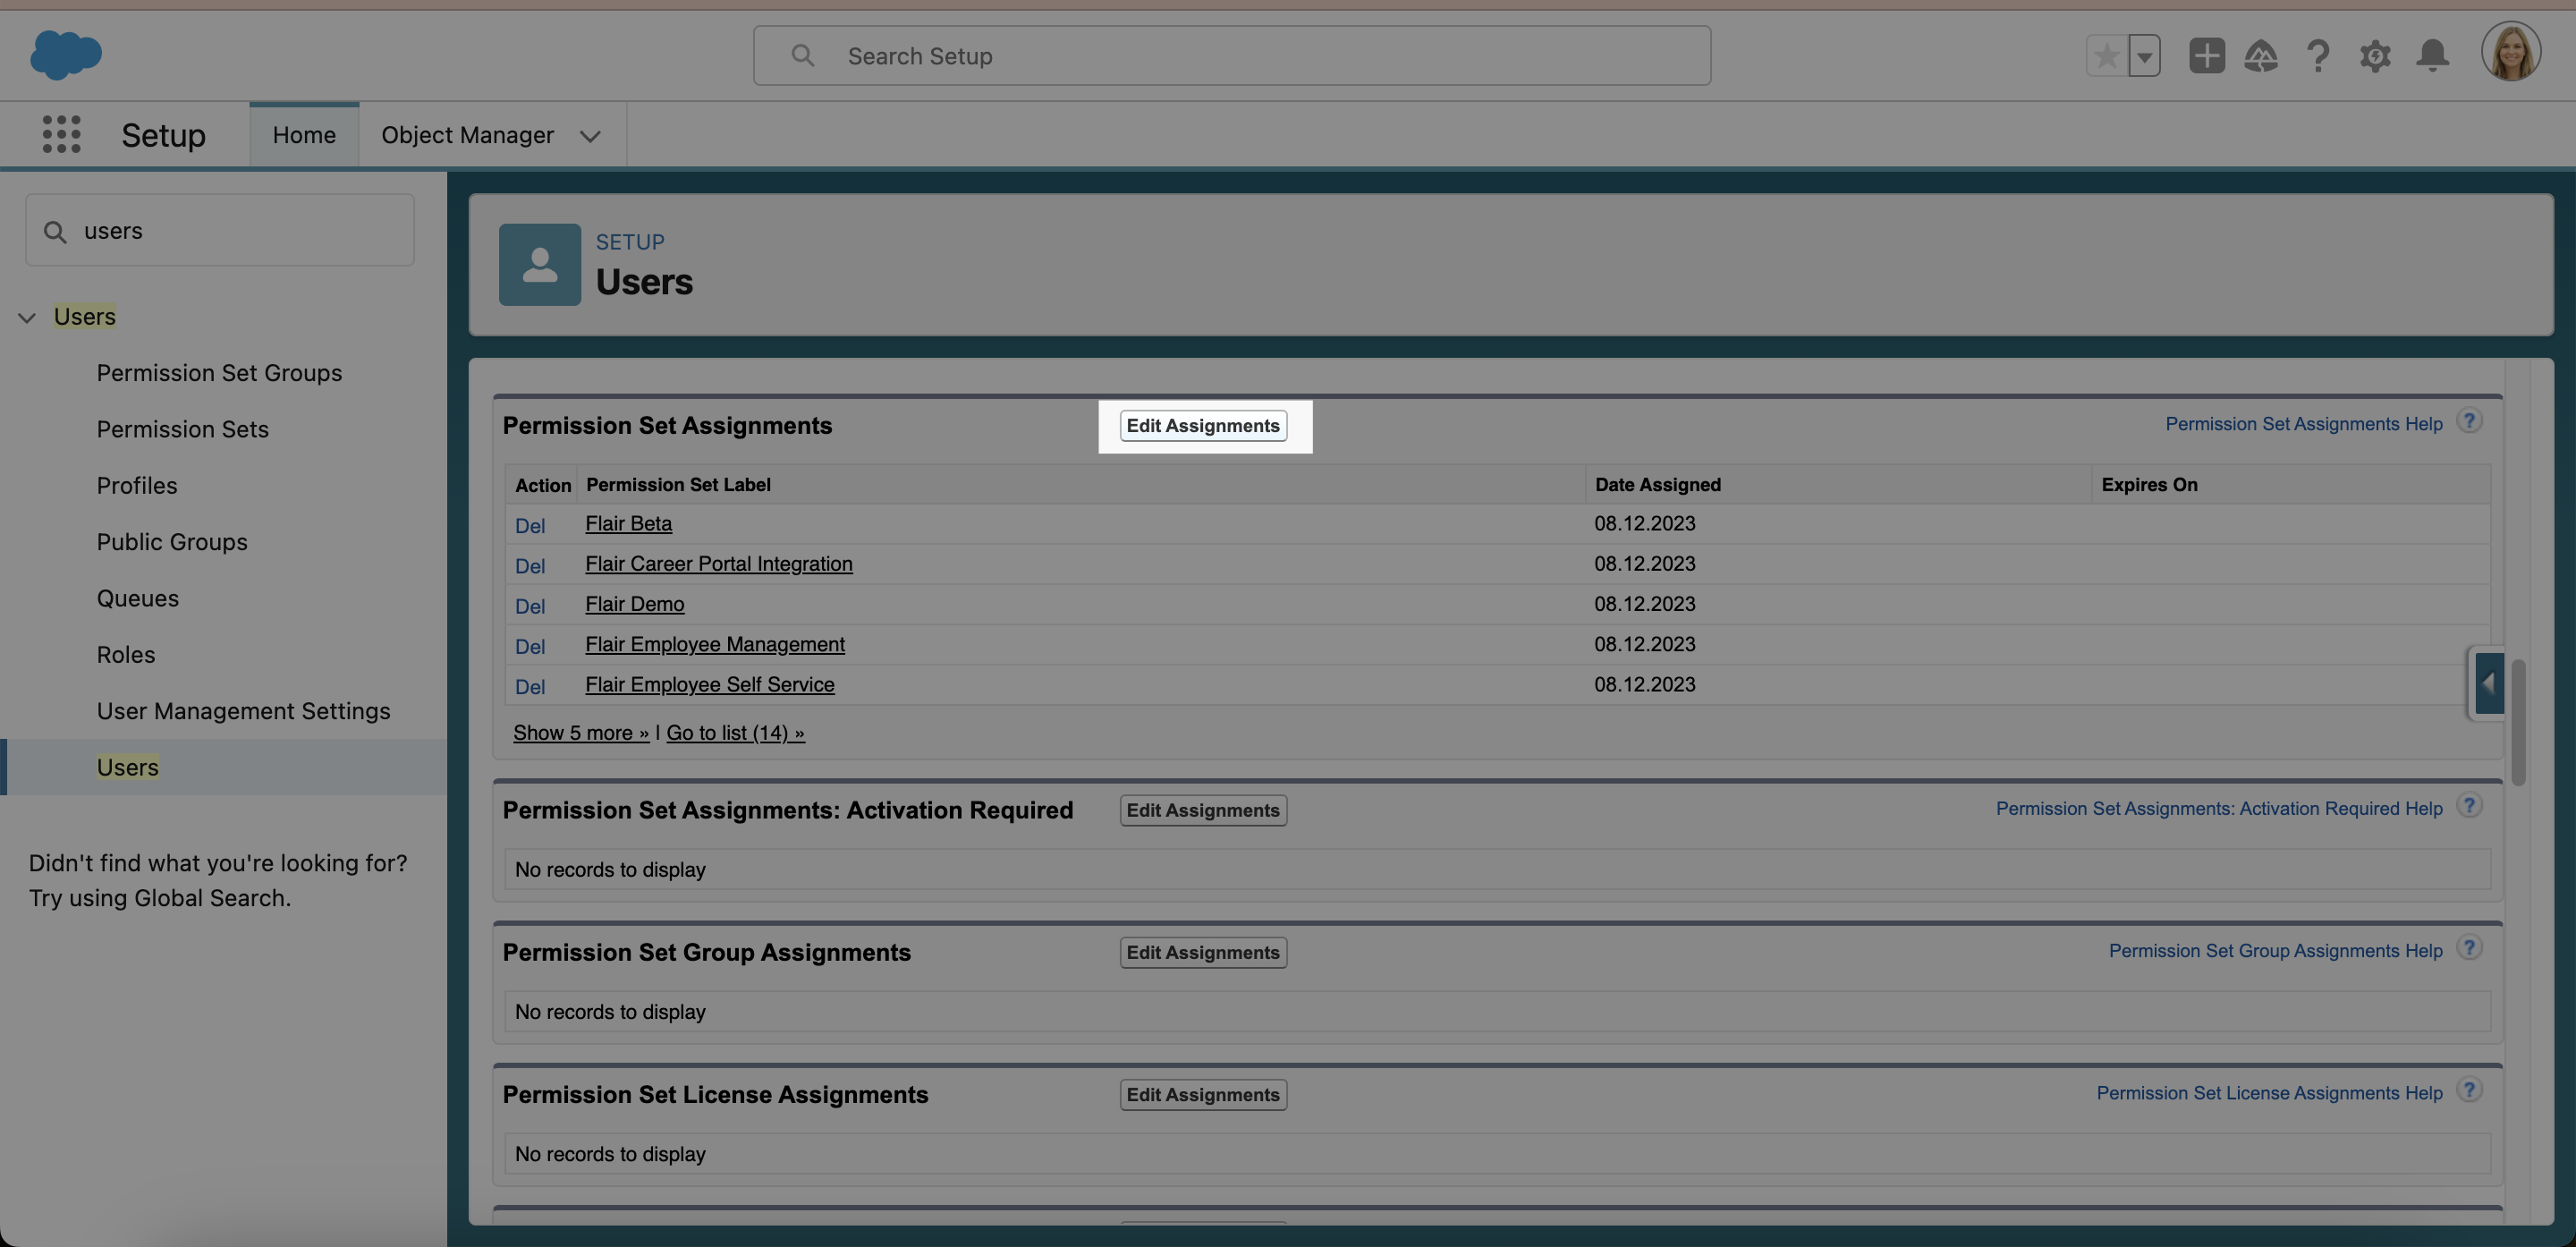
- Scroll down to Permission Set Assignments and click Edit Assignments.
- Select the SAML permission set you created earlier, add it to Enabled Permission Sets, and then click Save.

Now this user will be able to log into the Employee Hub using their Salesforce SSO credentials.