Configure SAML SSO With Microsoft Entra ID
You can configure your flair Employee Hub to allow employees to sign in using Microsoft Entra ID (formerly known as Azure Active Directory). Follow these steps to set up single sign-on.
Create Azure SSO App
- Open the HR Admin page in the flair app on Salesforce. You can find HR Admin in your Navigation Bar or via the Salesforce App Launcher 𓃑.
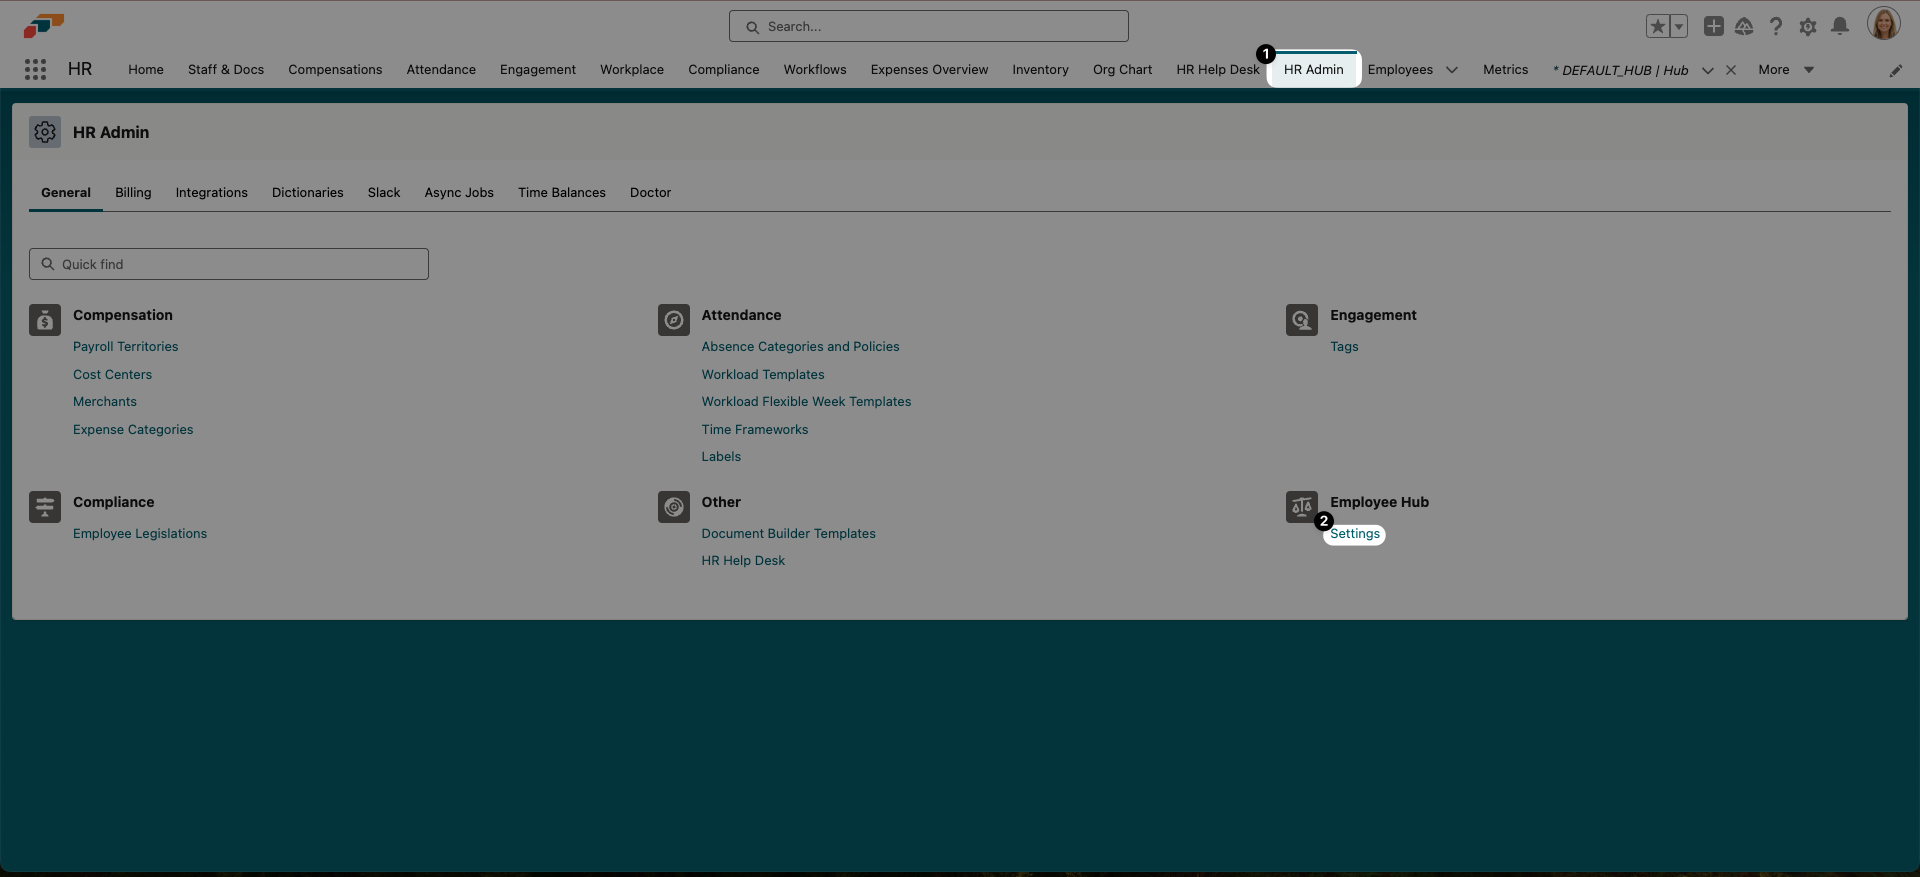
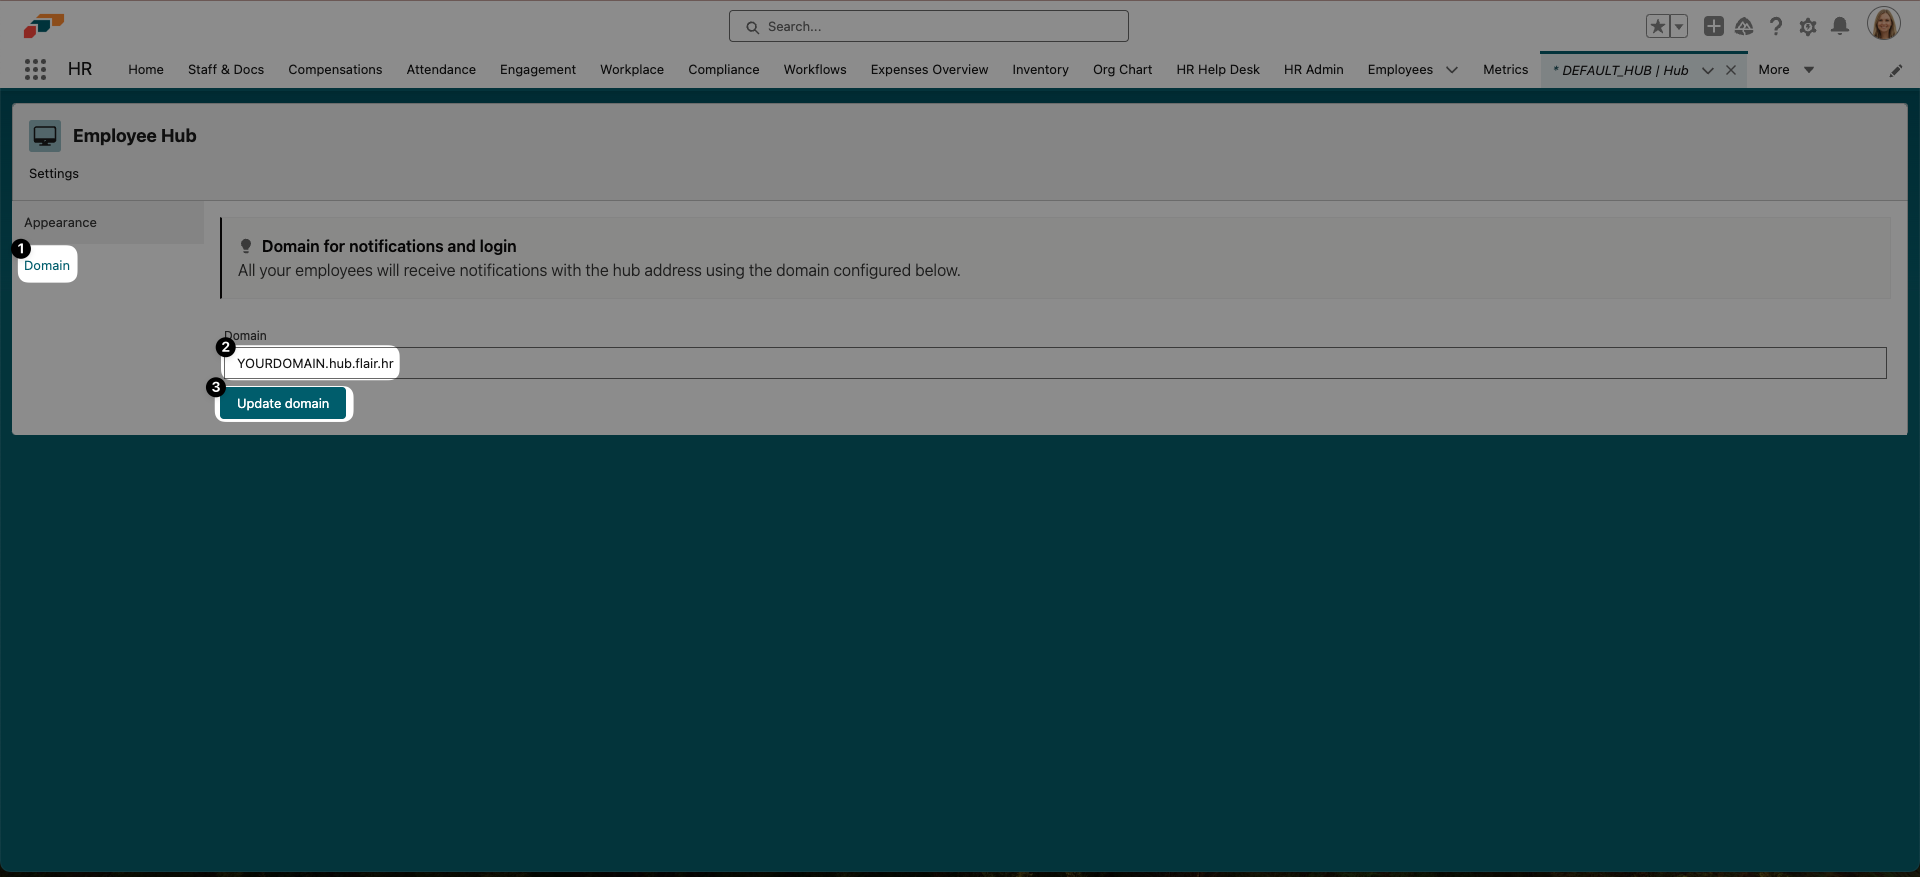
- Click Domain in the menu on the left and enter your Employee Hub domain into the Domain field. It should look like this: YOURDOMAIN.hub.flair.hr (YOURDOMAIN should be replaced with your domain name, which you can find in your Hub’s URL). Then click Update Domain.
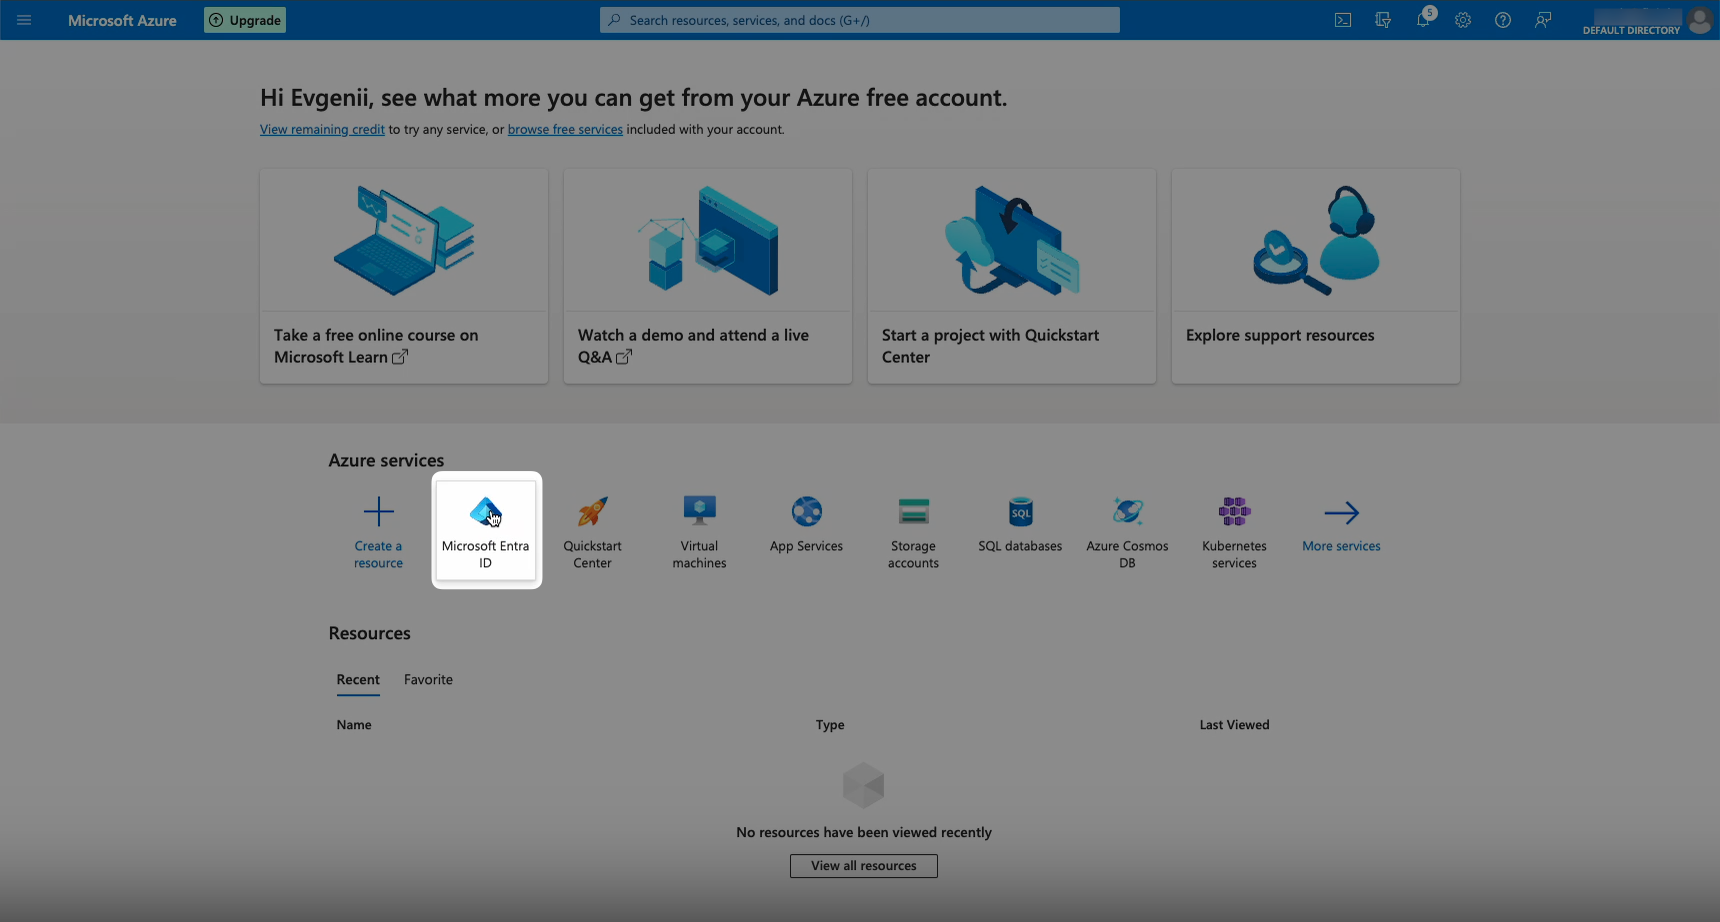
- Open Microsoft Azure and select Microsoft Entra ID from the Azure Services.
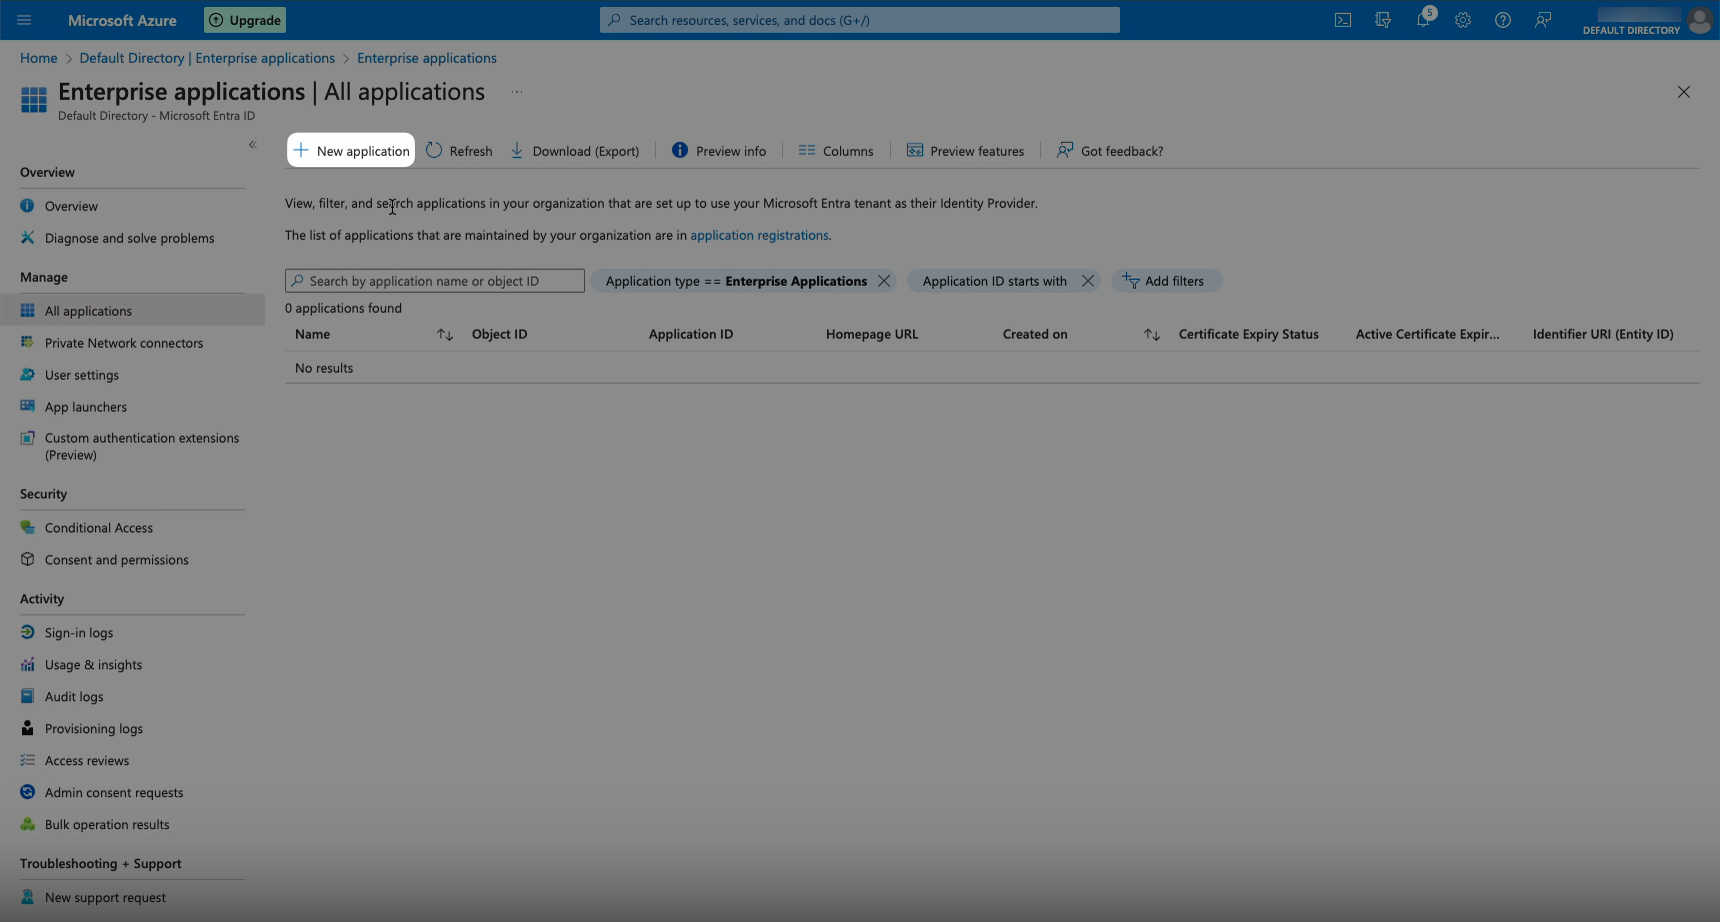
- Select Enterprise Applications from the left-side menu, then click New Application in the tabs at the top of the screen.
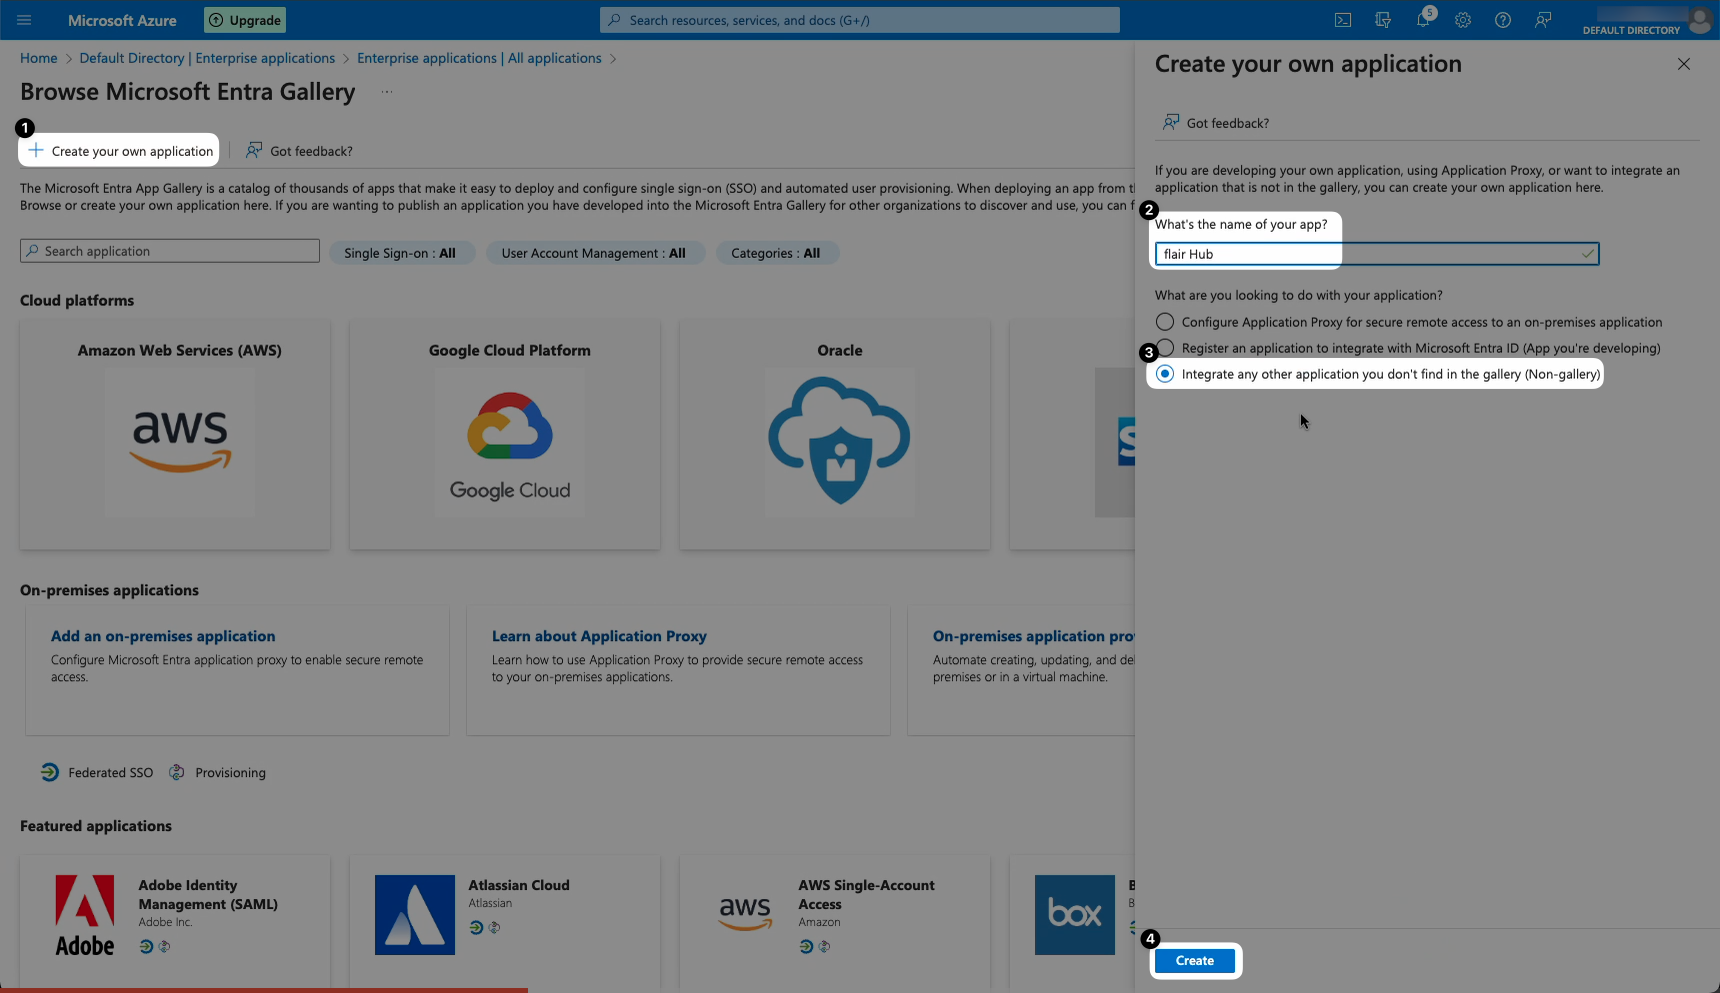
- Click Create Your Own Application from the tabs at the top of the screen. Give your app a name (e.g. flair Hub), select the option “Integrate any other application you didn’t find in the gallery (Non-gallery)”, and then click Create.
Create New SAML Configuration
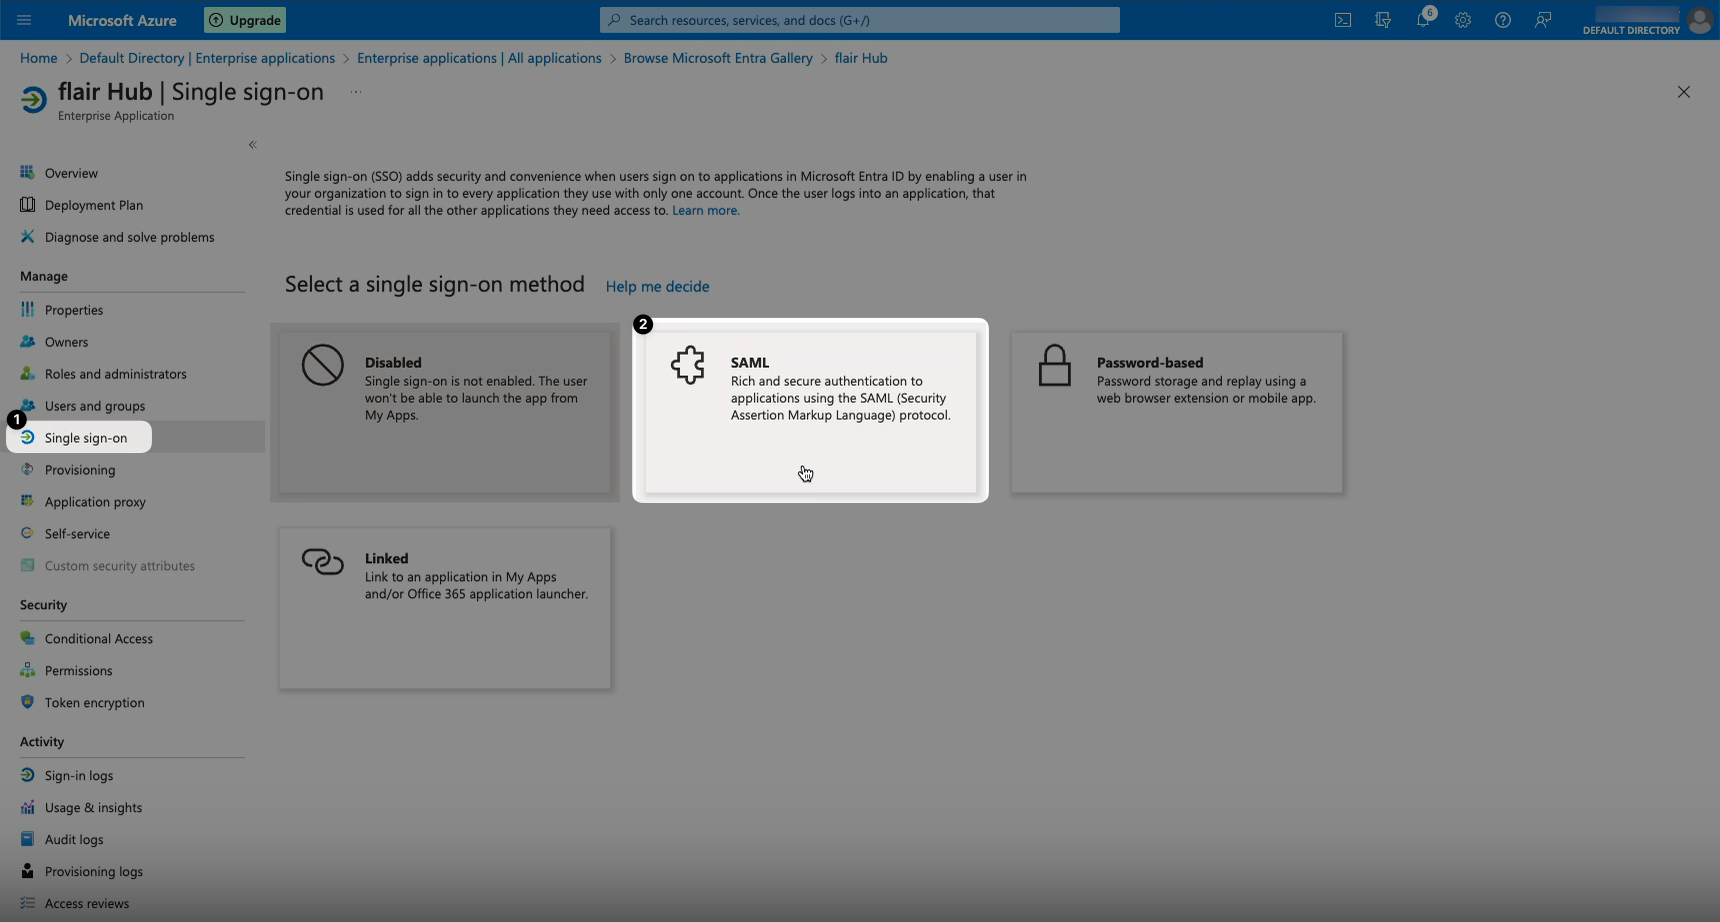
- Now that you have created your SSO app in Azure, select Single Sign-On from the left-side menu. Choose SAML as your single sign-on method.
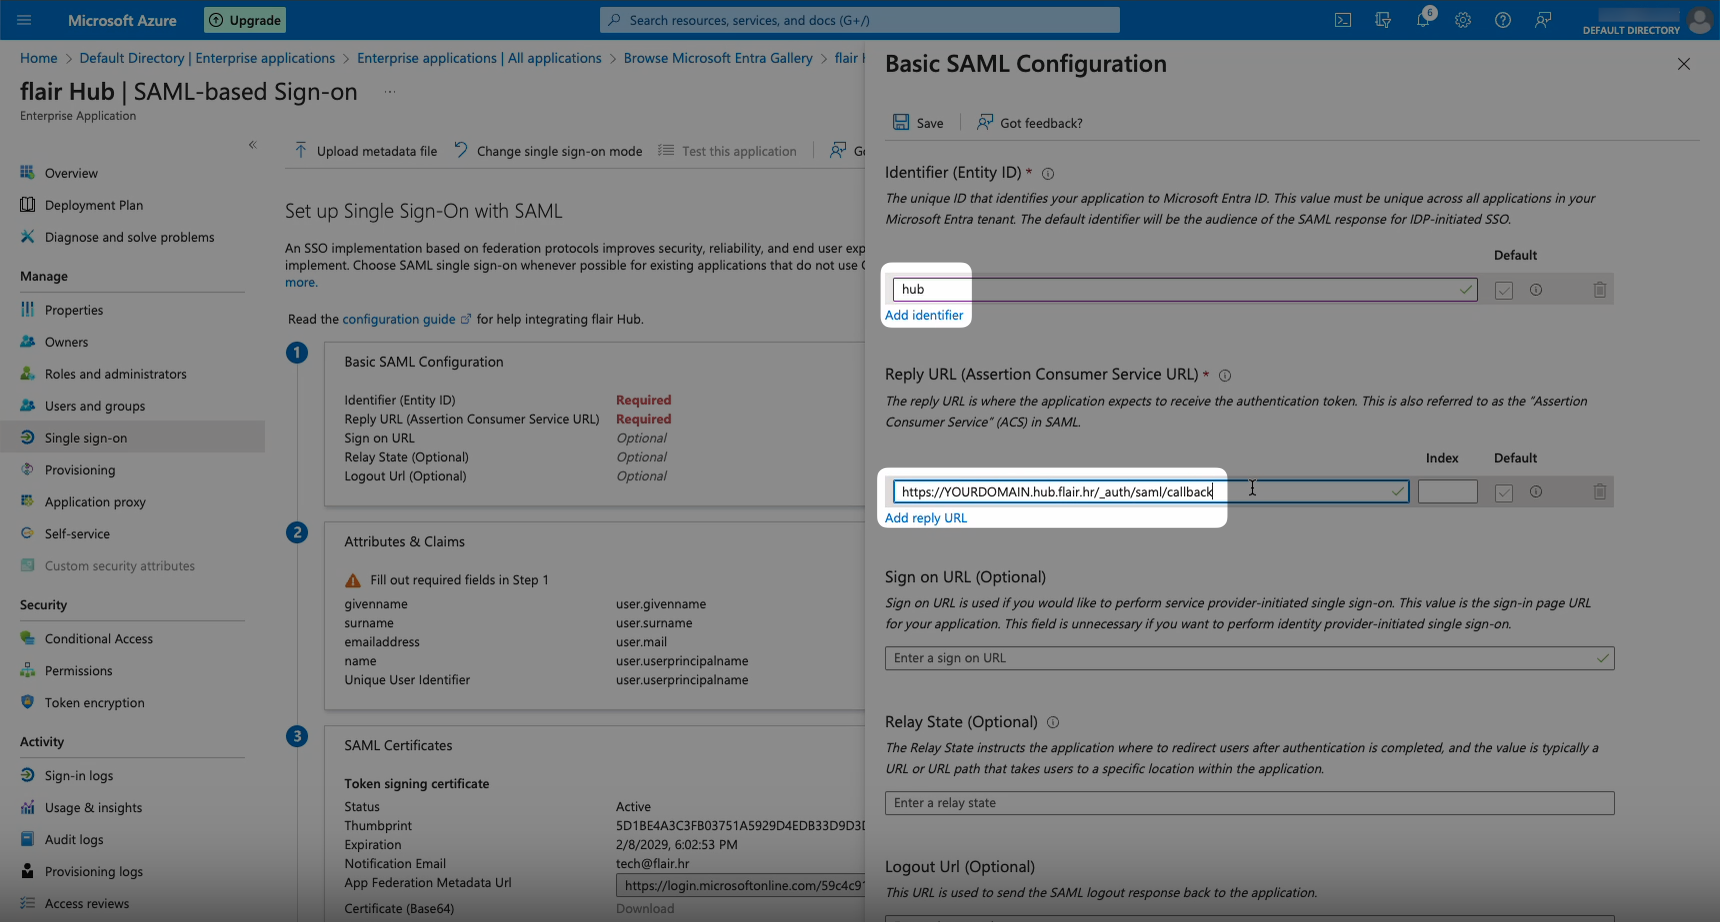
- In the Basic SAML Configuration box, click the Edit button.
a) Click Add Identifier and typehubinto the field.
b) Click Add Reply URL and enterhttps://YOURDOMAIN.hub.flair.hr/_auth/saml/callback(YOURDOMAIN should be replaced with the same domain name you entered in the flair Employee Hub Settings in step 2 of this guide).
c) You can also specify the Sign On URL if you want to change the sign-in page URL, but this is optional.
d) Click Save 💾
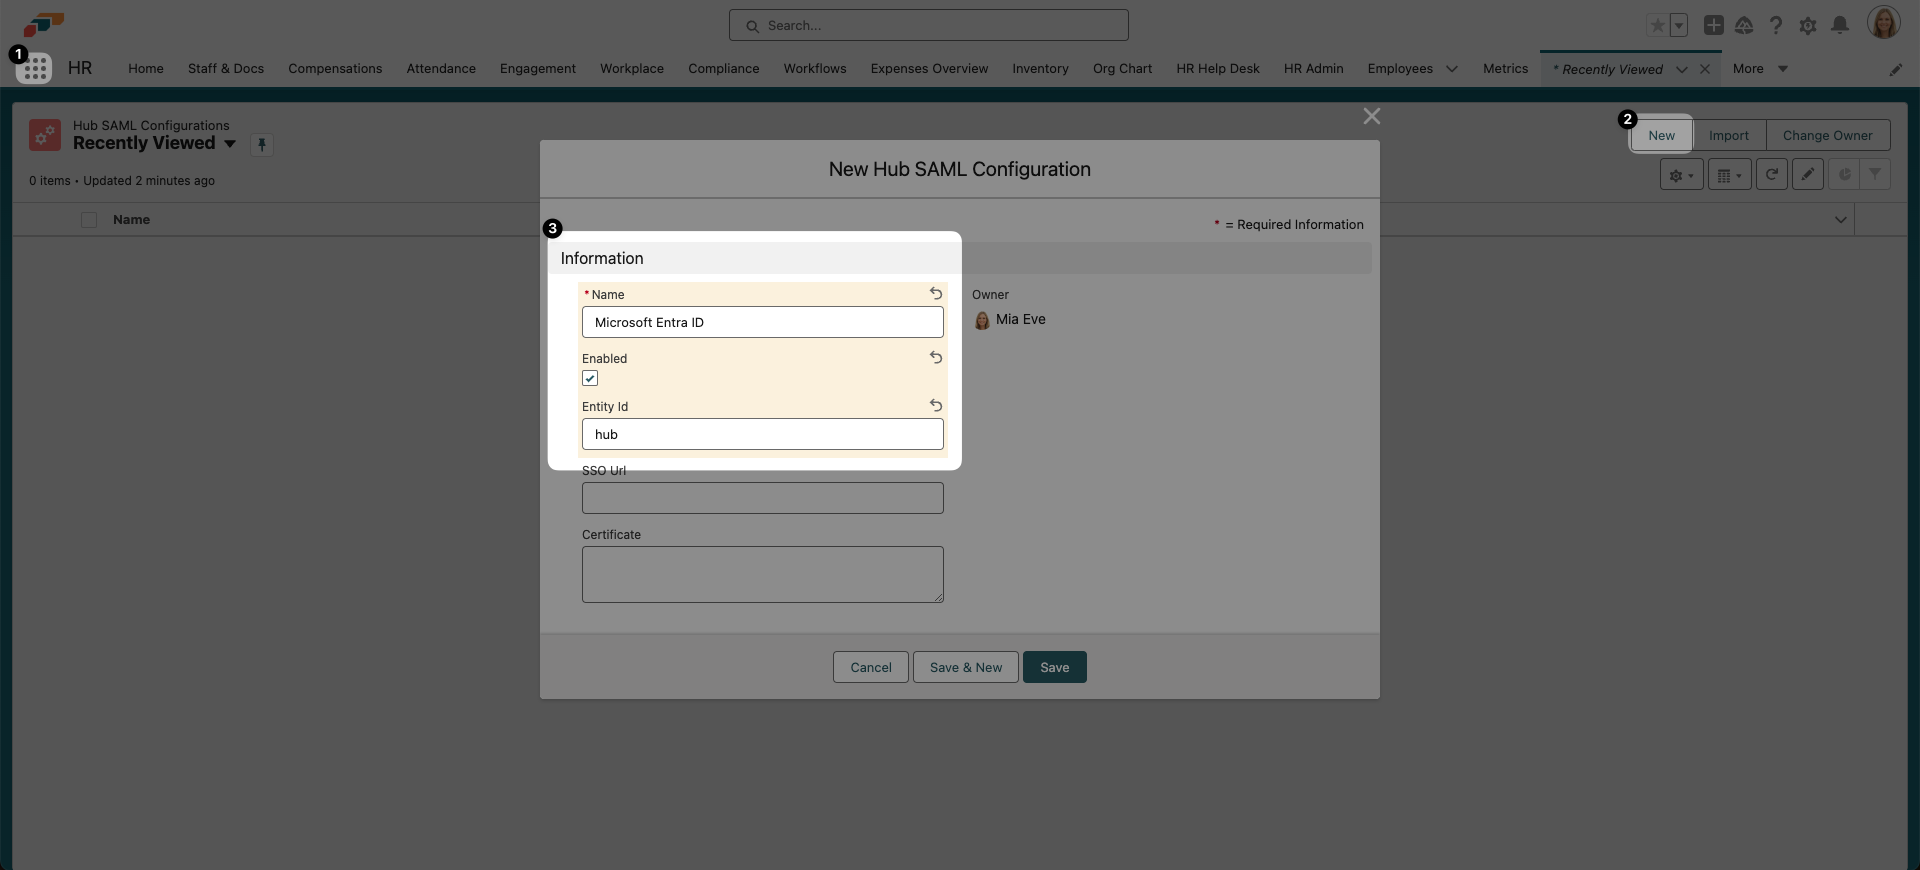
- Now go back to the flair app on Salesforce and use the App Launcher 𓃑 to find the Hub SAML Configurations page. Click New and fill in the fields.
a) Name: Choose an easily identifiable name, such as Microsoft Entra ID.
b) Enabled: Check this box to enable.
c) Entity ID:hub
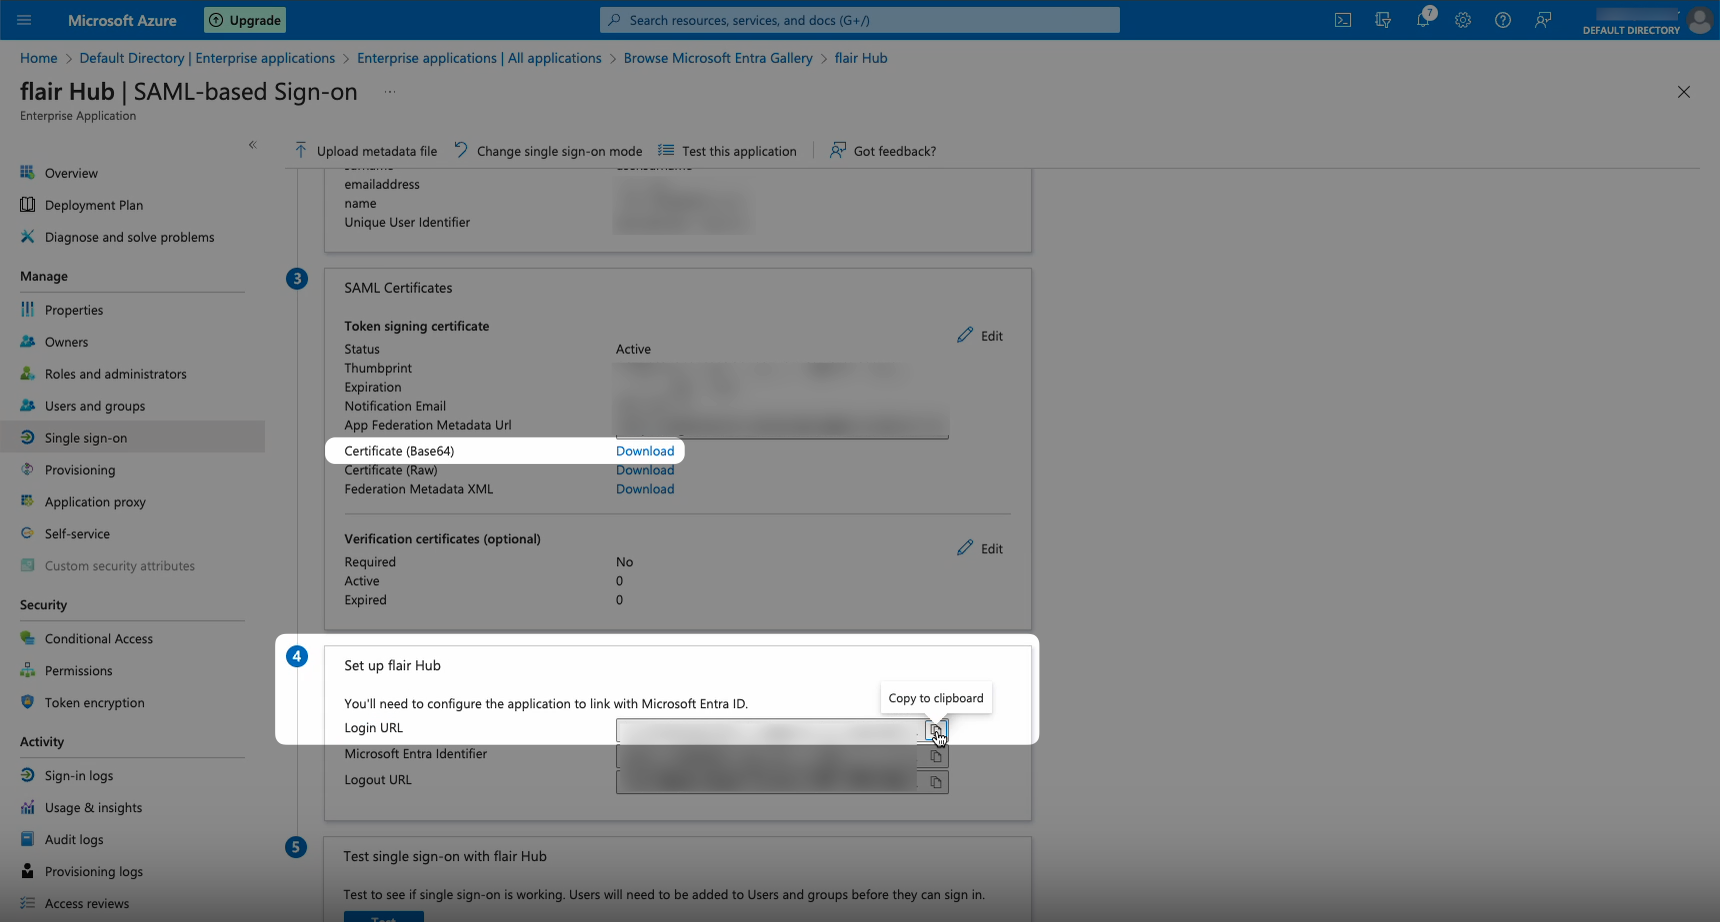
d) SSO URL: To find the SSO URL, go to back to the SAML app you created in Microsoft Azure. Scroll down to box 4 (named “Set up flair Hub”) and copy the URL in the Login URL field. Paste this URL into the SSO URL field in flair.
e) Certificate: To download the certificate, go to your SAML app in Microsoft Azure, scroll down to box 3 (named “SAML Certificates”), and click the download link labeled Certificate (Base64). Then paste the content of the downloaded certificate into the Certificate field in flair.
Once you have filled in all these fields as described, click Save.
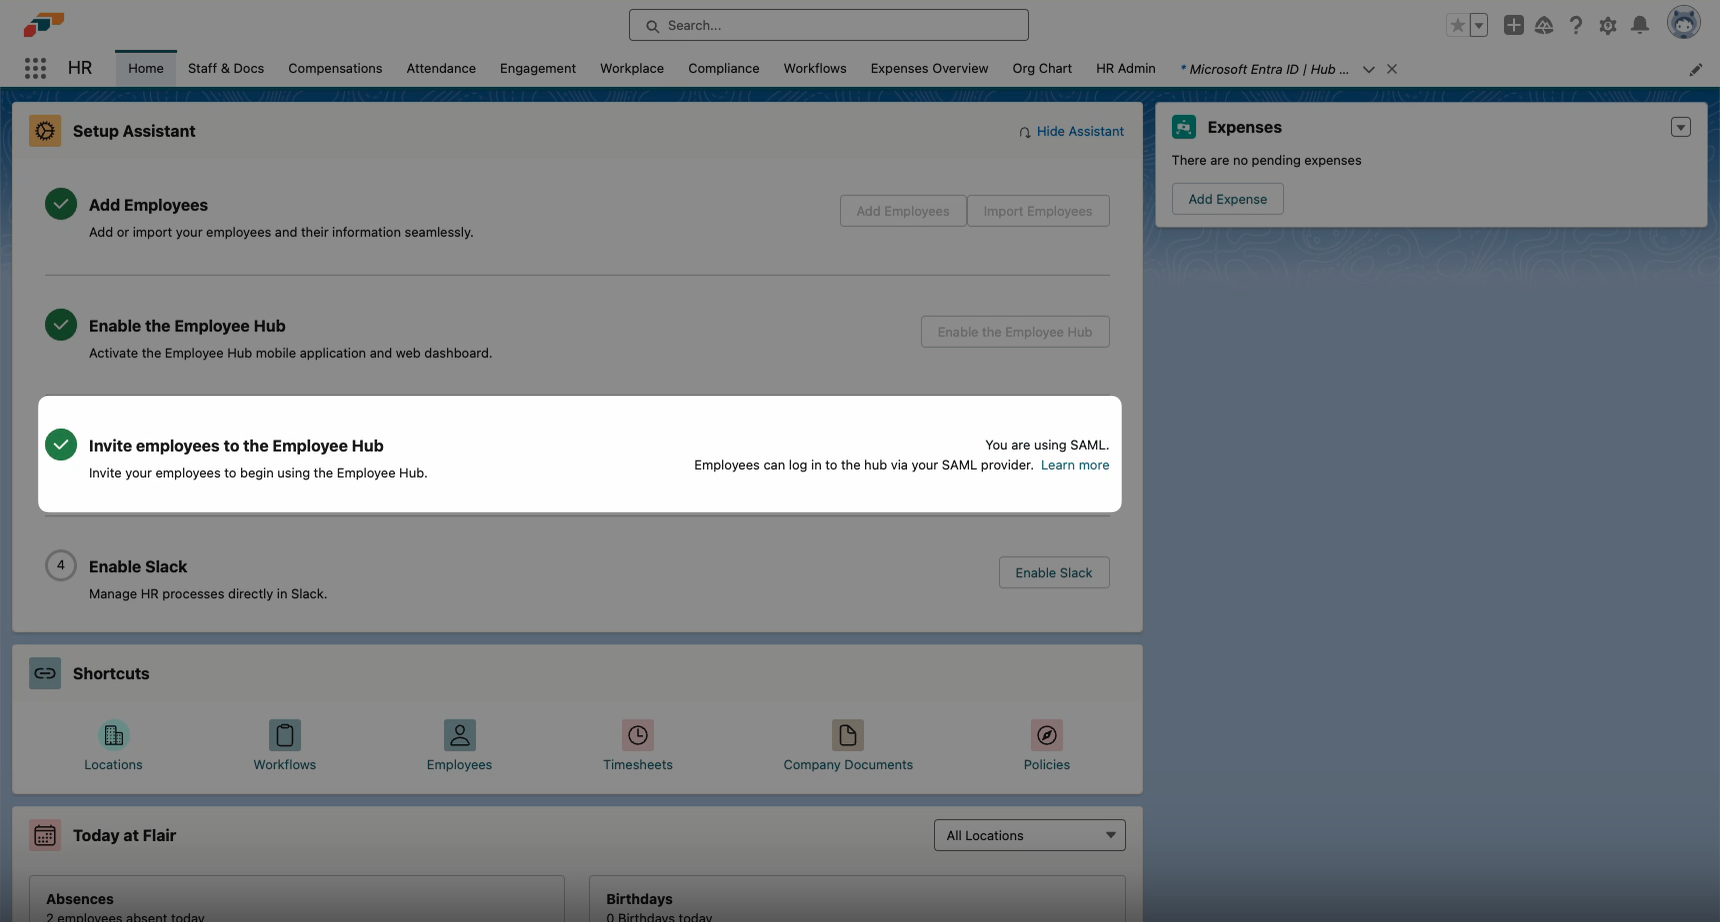
- Now, when you go to the Home page in the flair HR app, you will see a message in the Setup Assistant informing you that you are using SAML login.
Add Users and Test Single Sign-On
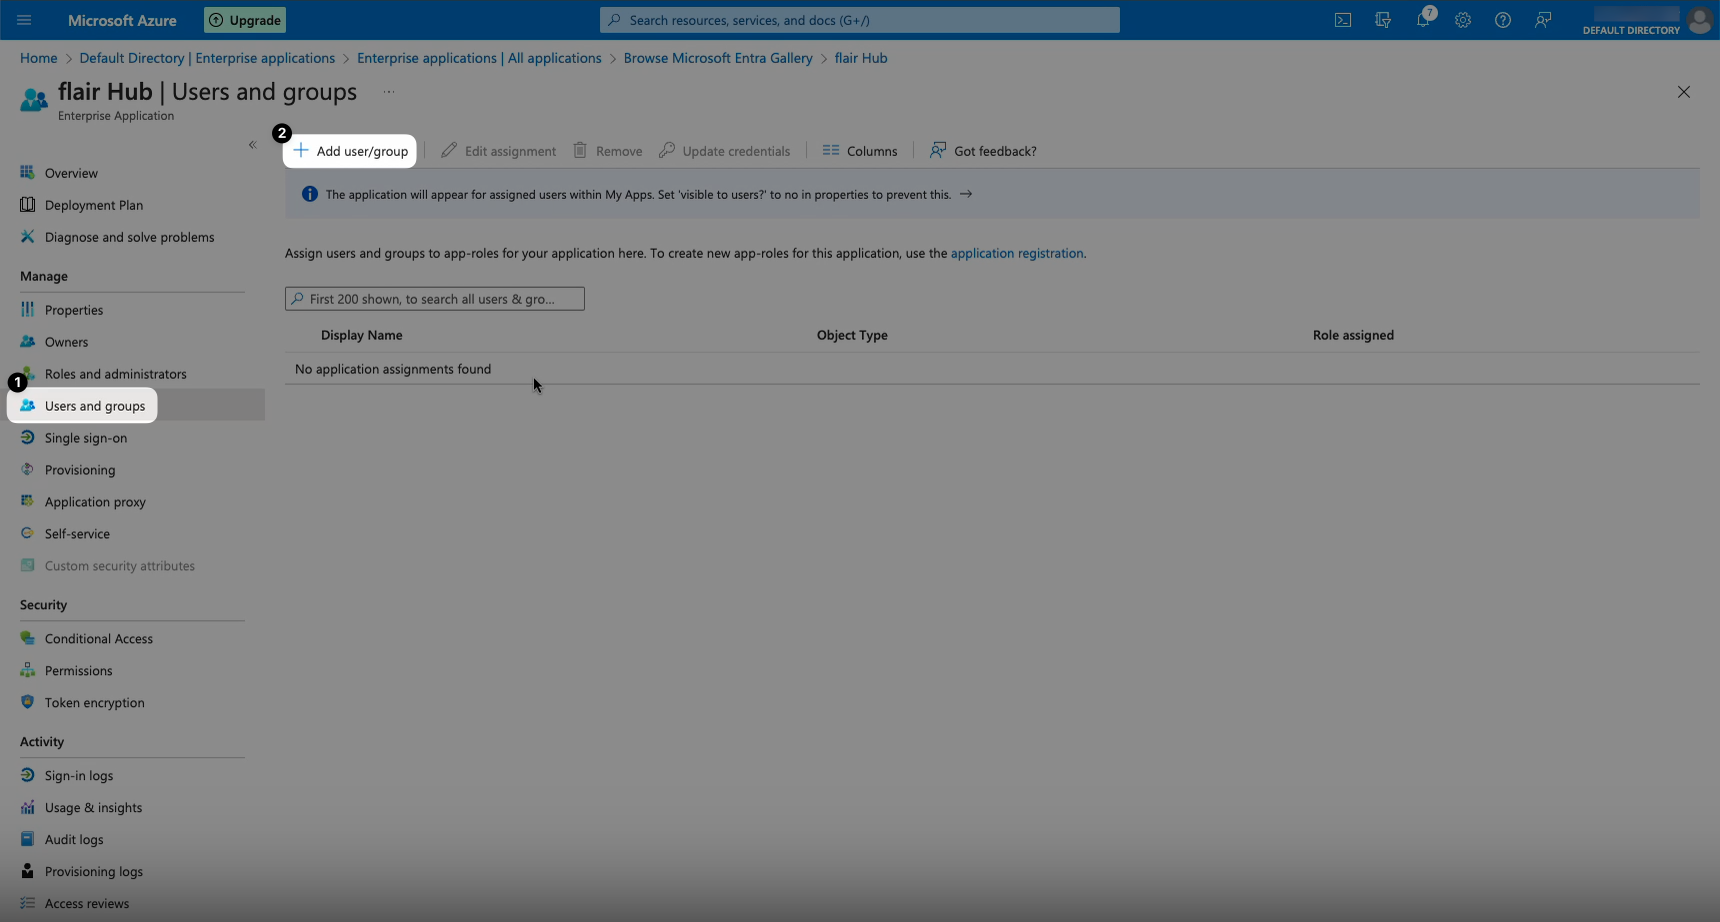
- To choose which users can sign in via Microsoft Entra ID, open Microsoft Azure and select Users and Groups from the left-side menu. Click Add User/Group.
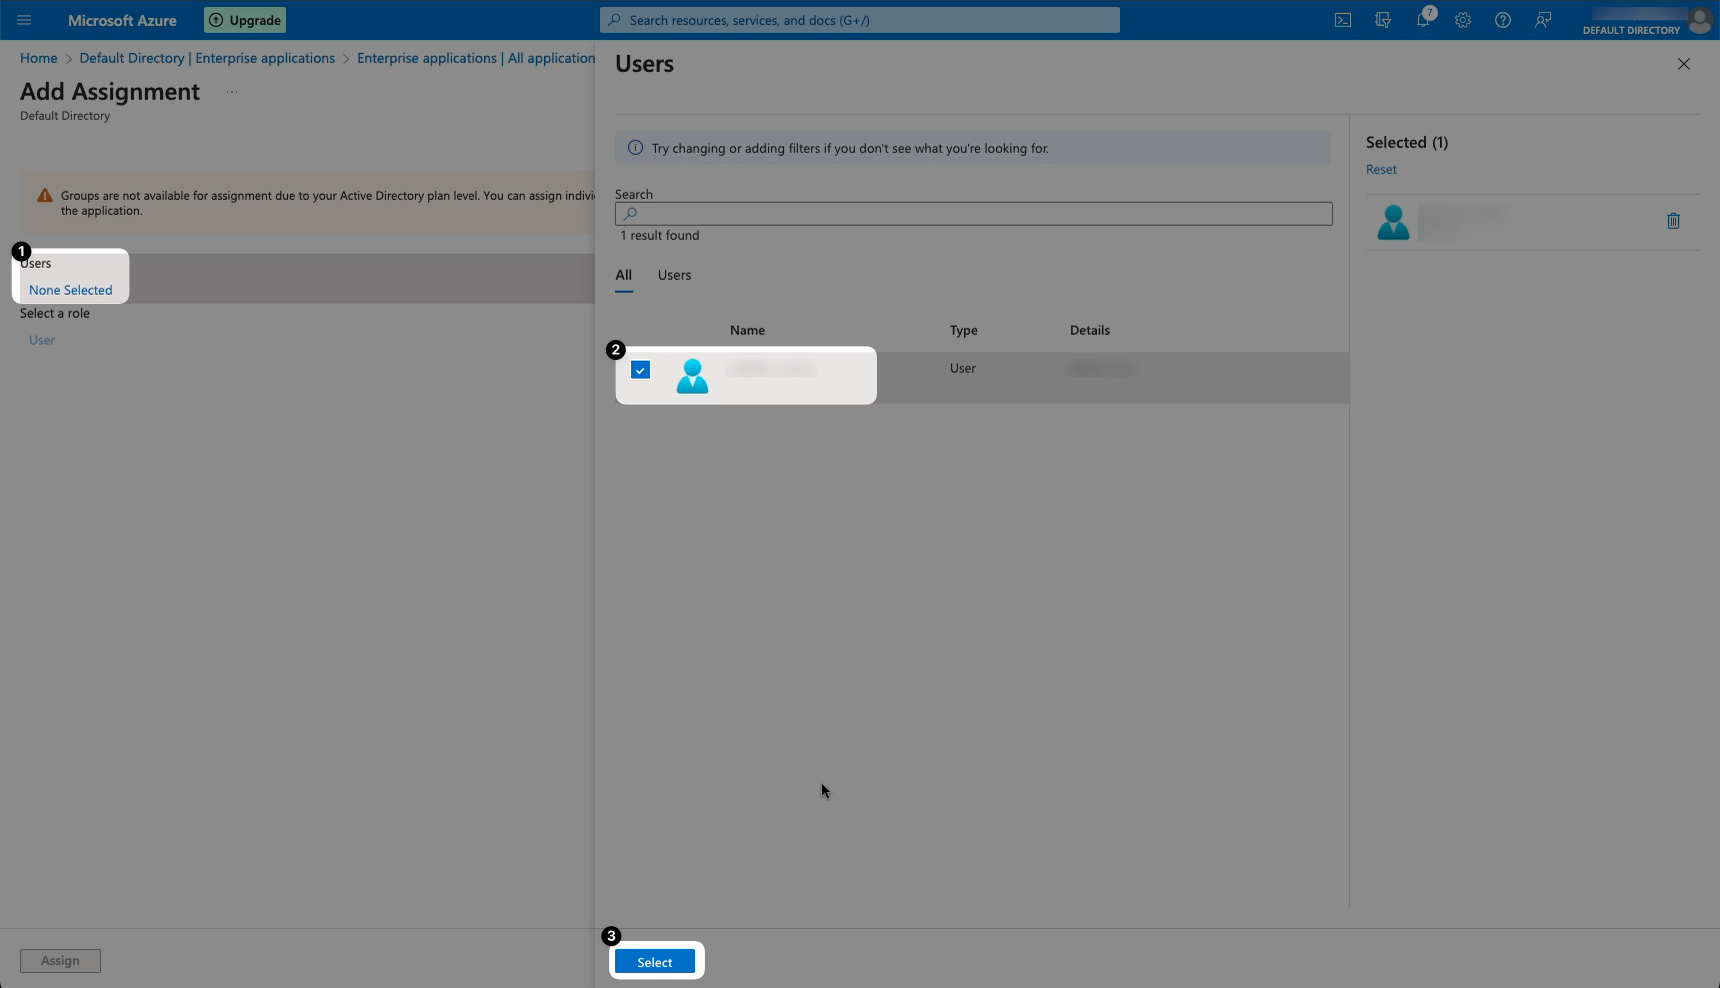
- On the next page, select Users to open a new window showing your users. Check the box next to all the users you want to enable SAML login for and then click Select.
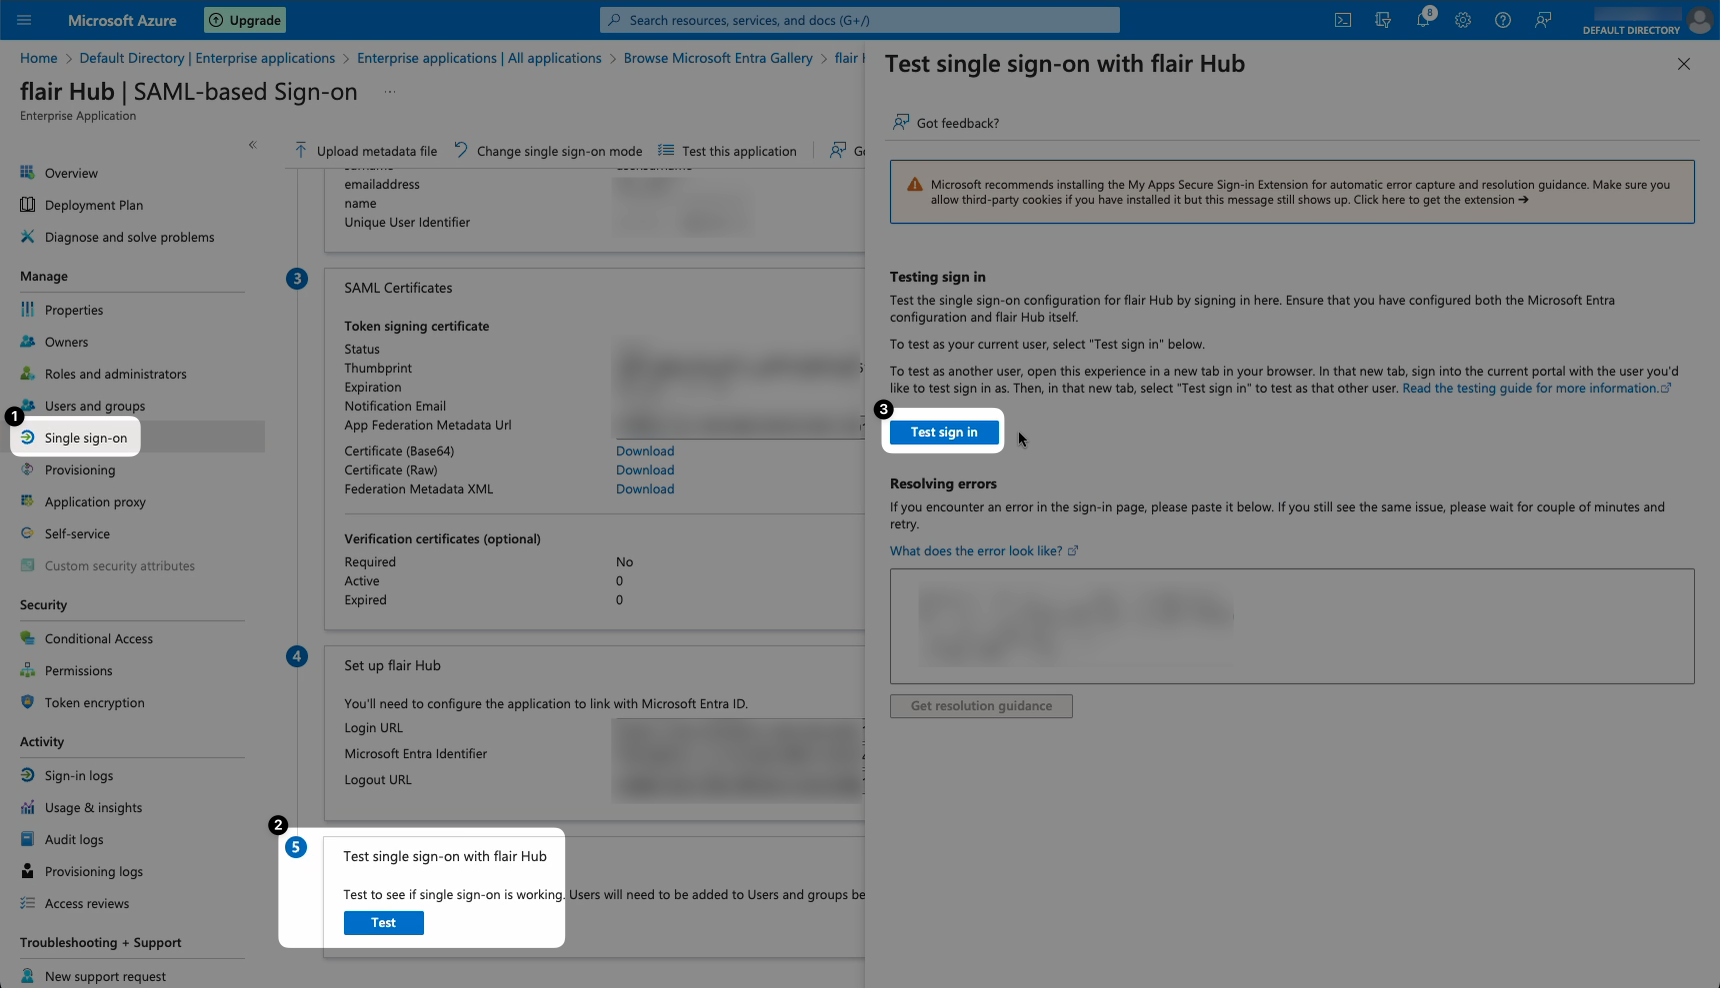
- Finally, to test your SAML login, go back to your SAML app in Microsoft Azure and open the Single Sign-On tab from the left menu. Scroll down to box 5 “Test single sign-on with flair Hub” and click Test. Then click Test Sign In.
- This will redirect you to the Employee Hub login screen. Click “Sign in with Microsoft Entra ID”. You will then be able to select the Microsoft account you want to use to log in to the Employee Hub.
