Career Portal Migration FAQ
For how long can I use my old career page?
You can continue to use your legacy career page until March 1, 2024.
Can I keep my old URL?
Yes, you can now keep your old career page URL. Just follow these simple steps:
- Set up a new career portal following the steps below under "How can I migrate my old career page to the new career portal?"
- When your career portal is ready, contact your flair Customer Success Manager or email us at [email protected] so we can activate your new career portal for you.
What's new with these career portals? Why should I migrate?
Our new career portal builder adds a variety of new customization options, allowing you to create eye-catching, branded career pages that communicate your company's unique identity. Creating and editing career pages is easier than ever thanks to our new drag-and-drop builder. It comes with a variety of components that you can add, remove, edit, and rearrange as much as you like. And you can now add images, icons, company highlights, and maps to your page.
Another new feature is the ability to create multiple career portals. This is useful if you need a separate page for other company subsidiaries, locations, or departments. Our new segmentation feature enables you to set which open positions are visible on each career page.
For more details about the new features, check out What's New in flair.
Can I still use the multiposting feature for advertising jobs?
Yes, the new career portals do support multiposting.
You can also continue to use multiposting with your old career page until March 1, 2024, when the legacy pages will no longer be supported.
How can I migrate my old career page to the new career portal?
To update your legacy career page to the new career portal, you first need to create a new career portal. Open Salesforce and search Career Portals Setup in the App Launcher. If you haven't created a career portal yet, you will see a welcome page. Click Create. If you already have a career portal, click New.
Give your new career portal a name and a URL slug. At this stage, it doesn't matter which slug you choose – we will migrate your career portal so you can continue using your current career page URL.
In the Layout & Appearance tab, you can customize the design of your new career portal, add images and text, and customize how job descriptions are displayed.
Next, go to the Details tab to add your company logo and fill in some basic company information.
Finally, to make sure that your jobs are displayed on the career portal, go to the Segmentation tab. Creating segments allows you to choose which jobs are displayed on your career portal. If you have more than one career portal, you can display the same job on more than one portal at the same time.
To show all your jobs on the career portal, click Add Segment and check that All Locations and All Departments are shown. Then click Add segment.
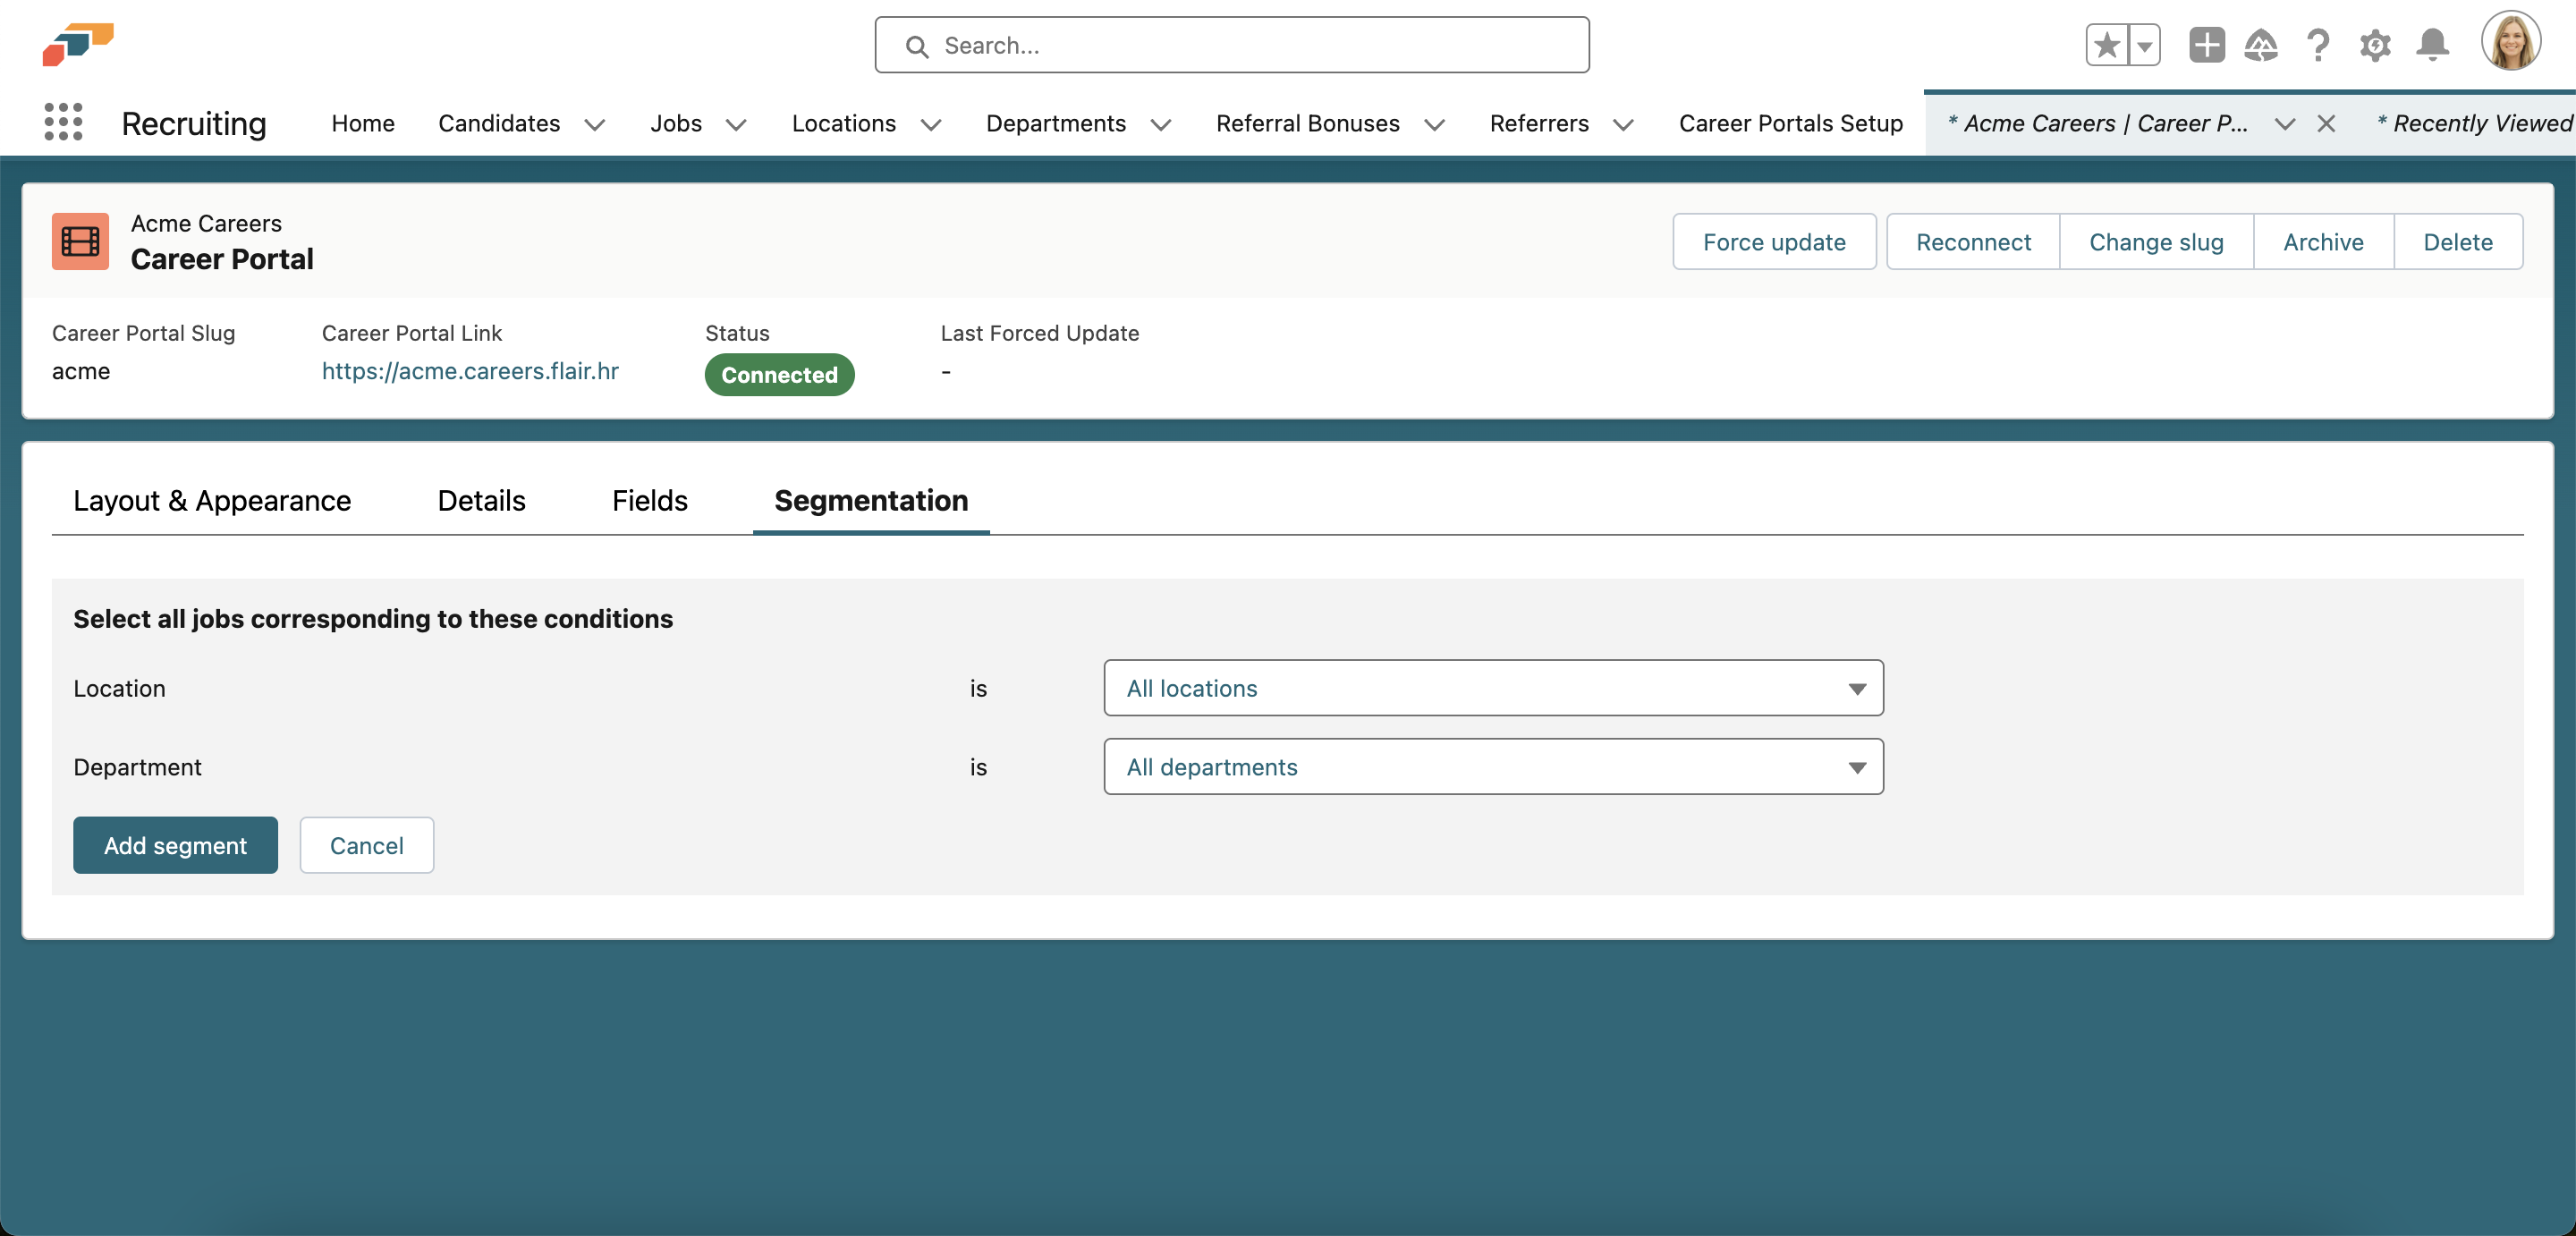
ℹ️ You need to create at least one segment to show jobs on your career portal.
Once you have completed these steps, contact us and we will migrate the career portal for you, allowing you to keep your old URL.
For more detailed steps on how to set up a career portal, visit our Help Center.
How can I connect my new career portal to my company website?
If you have connected your own website with a legacy flair career page, you will need to use the flair Recruiting API to connect your new career portal. Here's how it works:
💡 Please note, there is no need to change the API itself – only the authorization and URL.
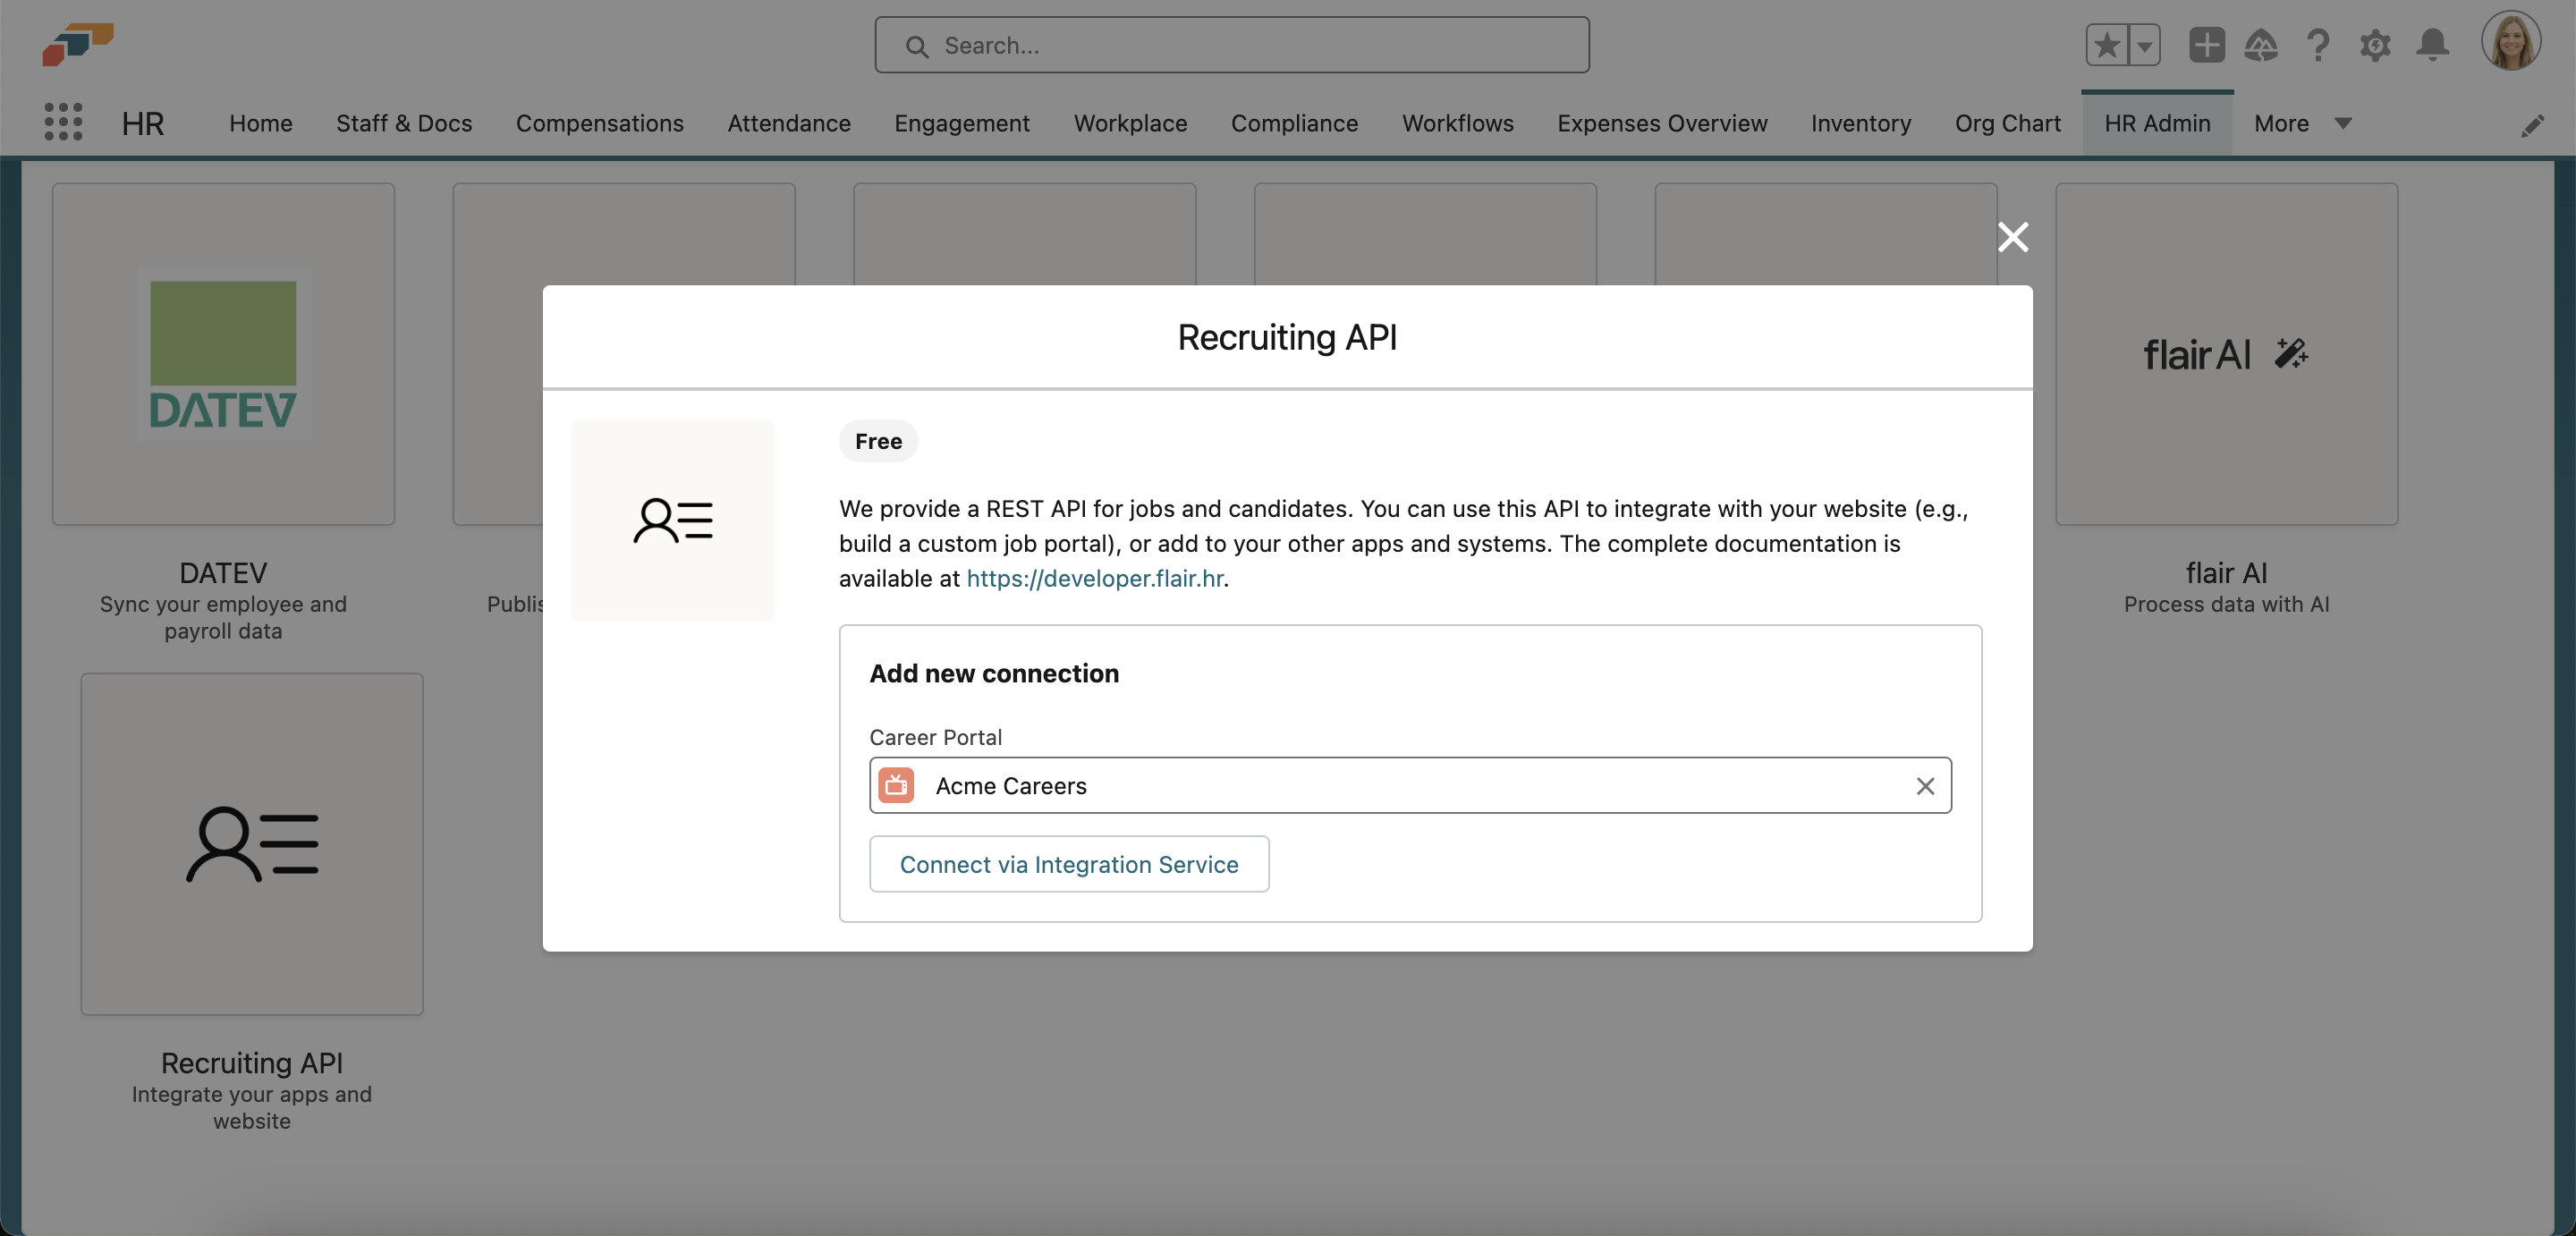
- Open the flair HR app on Salesforce and go to HR Admin. Select the Integrations tab.
- Select the Recruiting API and choose the career portal you want to connect. If you leave the career portal field empty, all jobs will be linked. Click the Connect via Integration Service button to continue.
- You will be redirected to a new Recruiting API page. Click Enable and then copy the API Token at the bottom of the page.
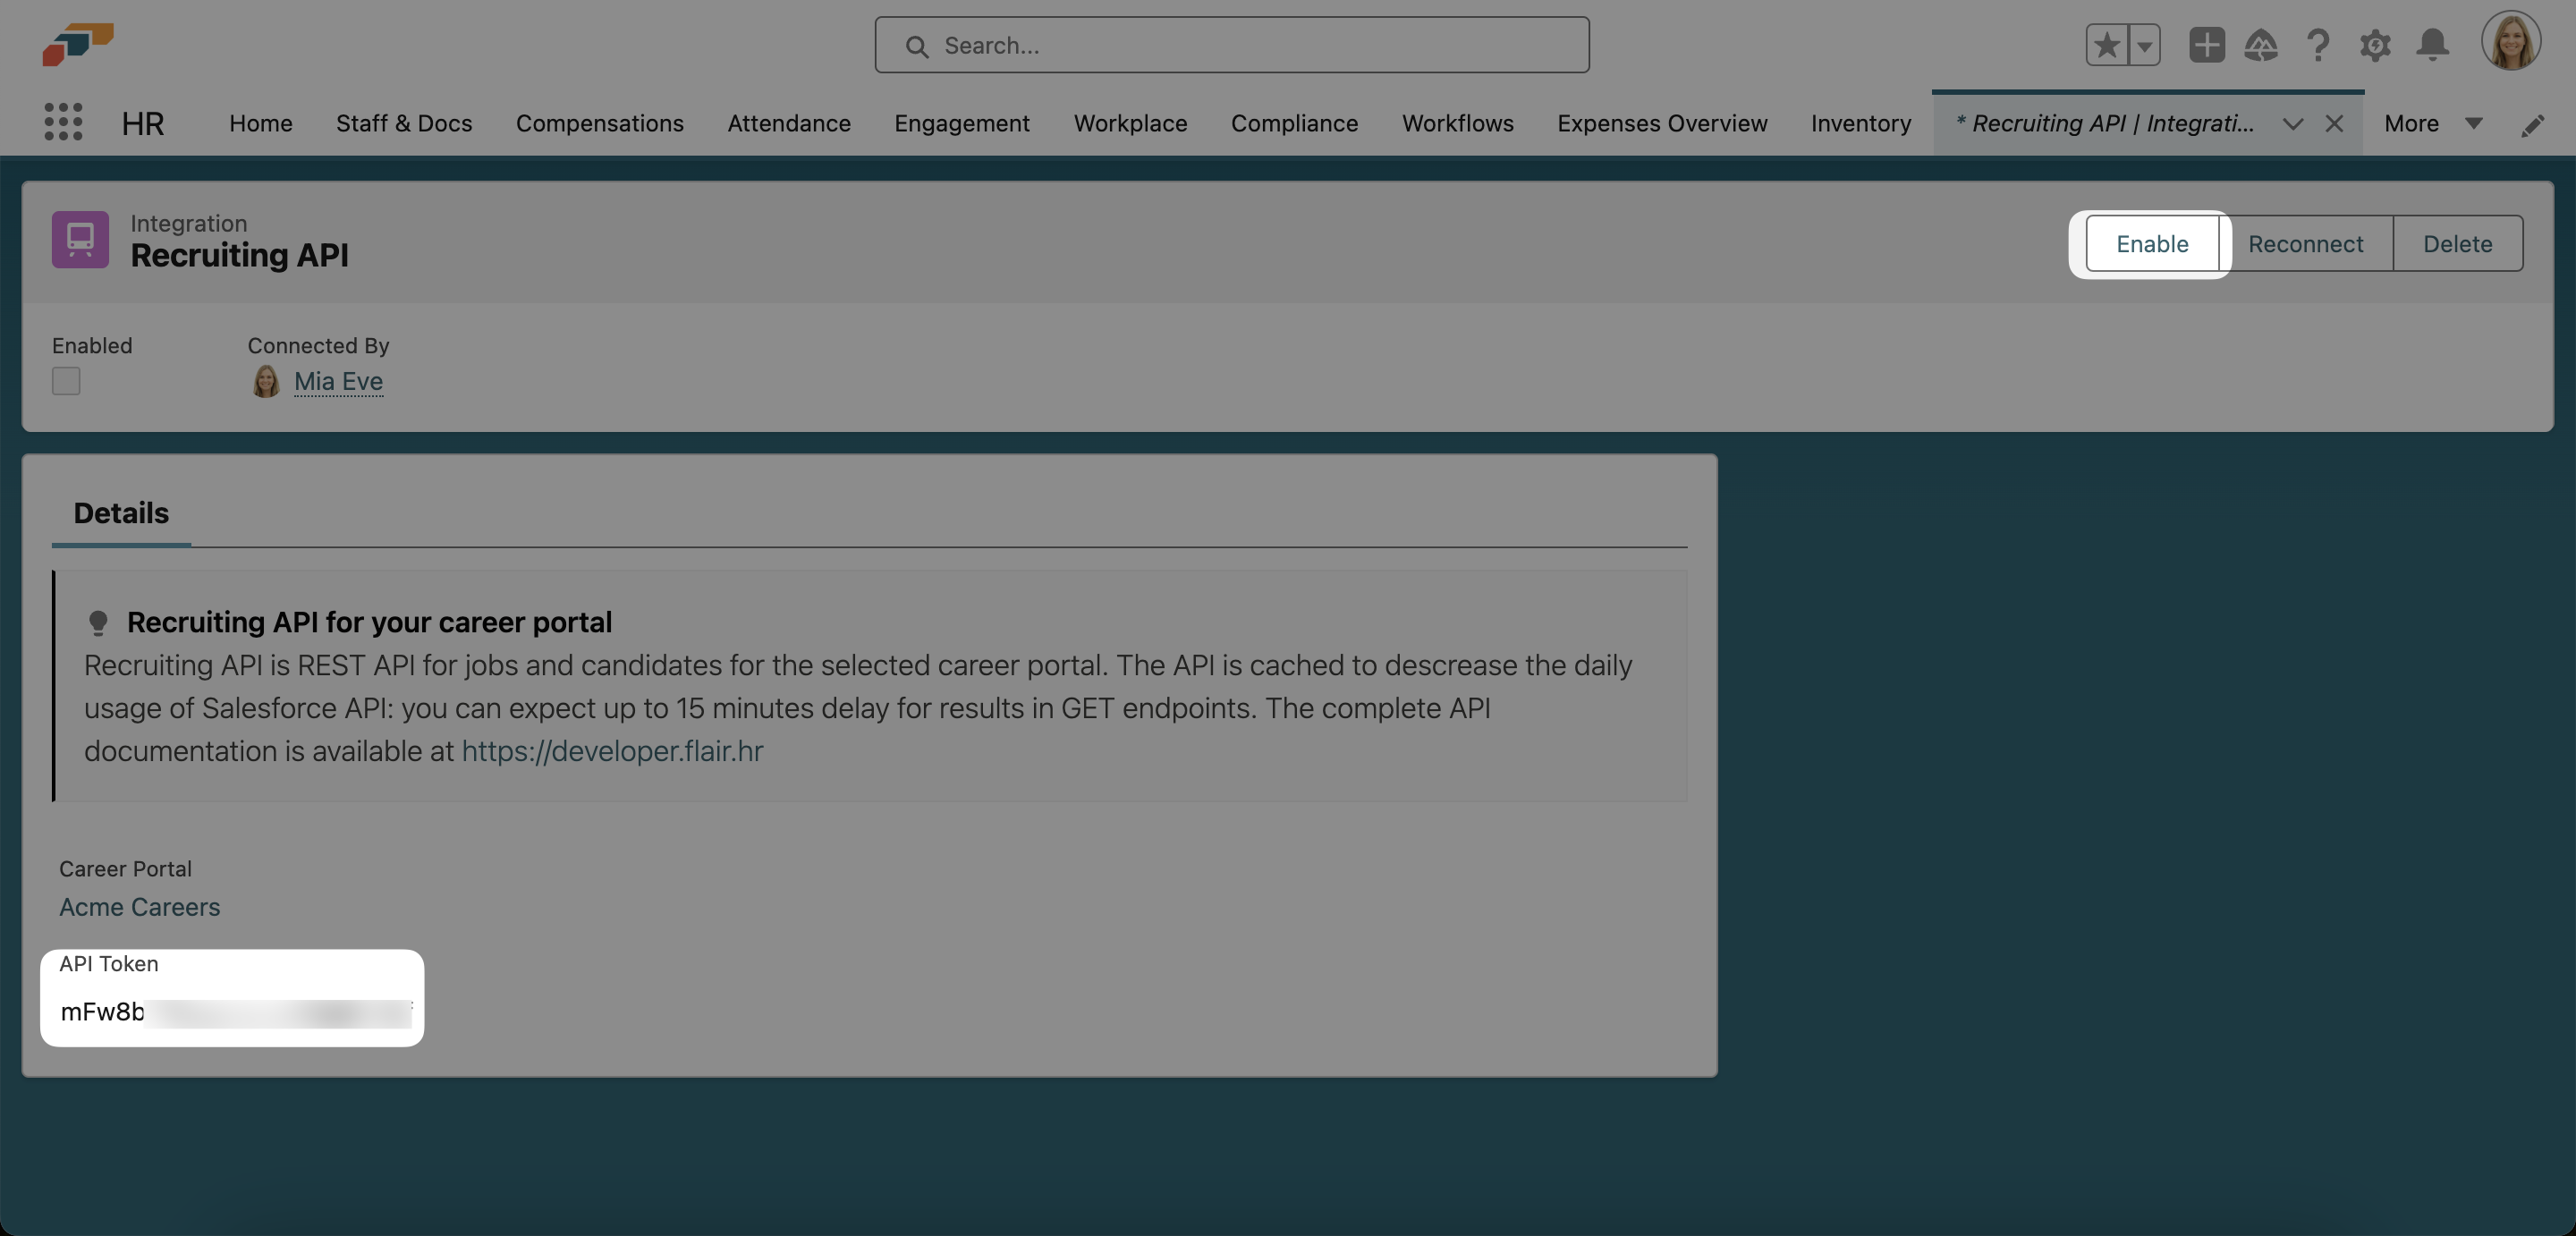
- Now in your website backend, change the API from https://jobs-api.flair.hr/v1/ to https://api.flair.hr/recruiting.
- Finally, paste in the API token you copied in step 3 for the authorization.
📘 You can access the full documentation of the flair Recruiting API here: https://developer.flair.hr/reference/get_jobs